24 сентября. Вечер.
Раккун-Сити.
Всё же, я надеюсь, что Вы начинаете играть по порядку, то есть у нас сейчас вечер 24 сентября. Начинается заставка. После неё, собственно, и начинается игра…
1. Outbreak
J’S BAR
Сразу же после того, как нам передают управление персонажем, поднимаем пистолет с барной стойки, ещё один пистолет находится в женском туалете. Что с ним делать — решайте сами. Я отдал его Синди. Напротив входа в мужской туалет лежит файл под названием PLAYING MANUAL 1. В мужском туалете можно разжиться шваброй. Далее топаем за барную стойку, здесь можно найти: Спрей, пестицидный Спрей и STAFF ROOM KEY. Ключ-то нам и нужен, чтобы открыть единственную закрытую дверь, которая ведёт на лестницу.
Примечание: Кстати, перед выходом, я бы посоветовал подпереть входную дверь бочкой — это задержит тех, кто так хочет сюда попасть. Также дверь можно вскрыть отмычками Алиссы. На Hard/Very Hard STAFF ROOM KEY находится у бармена и получить его можно только тогда, когда ворвутся зомби. Дверь также можно выбить, но это слишком продолжительное занятие.
Поднимаясь по лестнице, держитесь подальше от окна. Почему? Ну, подойдите — узнаете.
Примечание: Если Вы играете за Марка, то стоит вести с собой его друга и напарника — Боба. Доведя его до крыши, можно увидеть специальную кат-сцену.
2F STAFF ROOM
Закончив подъём по лестнице, мы попадаем на второй этаж. Имейте ввиду, что все трупы здесь вскоре встанут. И так, первым делом бежим за дверь в конце коридора (игнорируя поворот налево).
BREAK ROOM
Здесь можно разжиться железной трубой, картой здания и коробкой с патронами для пистолета. После сбора выходим обратно.
2F STAFF ROOM
Помните поворот налево, который мы пропустили? Нам туда. Первая же дверь слева — это то, что нас интересует.
LOCKER ROOM
Здесь можно найти следующие предметы: Синее растение, патроны для пистолета, антивирус, длинная труба, дневник. В закрытом шкафчике лежат два зелёных растения. Больше нам здесь делать нечего.
2F STAFF ROOM
Идём вниз по коридору (игнорируя дверь справа) и выходим в небольшую «гостиную». Здесь сразу же идём к столу, поднимаем газету. Под ней оказывается KEY WITH BLUE TAG. Меняем его на газету. Дальше подбираем гвоздомёт. Его можно использовать как оружие или по назначению, то есть построить баррикаду.
Примечание: Если Вы хотите построить баррикаду, вернитесь к дверному проёму, через который Вы заходили в этот коридор. Рядом будут лежать доски, используйте гвоздомёт на них.
При игре на Normal здесь нам больше ничего не нужно, но если в Вас живёт дух исследователя, можете проверить две оставшиеся комнаты.
В DRAWING ROOM можно найти: Зажигалку, патроны для пистолета Кевина, патроны для пистолета, газету (можно сделать коктейль Молотова). В закрытом шкафу есть ещё один пистолет.
В OWNER’S ROOM: Дробовик (требуется решение головоломки с картиной), патроны для пистолета, записка Джека, два зелёных и одно синее растения.
После всего этого возвращаемся к пропущенной ранее двери справа и открываем её. Поднимаемся наверх по лестнице в следующую локацию.
Примечание: Как и предыдущую дверь, эту можно или выбить, или открыть отмычками Алиссы.
2F LIQUOR ROOM
Выйдя в коридор, поворачиваем направо и проходим за дверь.
WINE ROOM
Справа от входа, на бочке, лежат патроны для дробовика. На столе бутылка алкоголя и FORKLIFT KEY. На полу, напротив, лежит спрей и файл. Собрав всё это, выходим обратно.
Примечание: Здесь можно сохранить свою игру. Но в отличии от старых частей серии, если Вы сохранитесь, Вам придётся выйти из игры. При загрузке сейв удаляется. Так что сценарии лучше проходить от начала и до конца, ну или же сохранятся тогда, когда Вам нужно куда-то уйти.
2F LIQUOR ROOM
Бежим вниз по коридору, поворачиваем направо и выбегаем в большой зал. Бутылки с алкоголем можно игнорировать. В дальнем углу лежит зелёное растение. Есть два способа продвинуться дальше. Если есть FORKLIFT KEY, то при помощи него заводим автопогрузчик и лезем на шкаф. Если нет, пытаемся выбить железные ставни. Но, я надеюсь, что ключ Вы взяли. Если Вы по-прежнему ведёте Боба, то после того, как перелезете по шкафам на другую комнату, жалюзи откроются и Вы сможете вернуться за ним.
3F TO ROOFTOP STAIRWAY
Поднявшись по лестнице, сразу же обыщите стол, в нём должен лежать STORAGE ROOM KEY. Больше здесь делать нечего.
4F ROOFTOP
Если Вы всё ещё ведёте Боба — это конец пути. Но имейте ввиду, здесь курсируют вороны. После кат-сцены с Бобом, можно забрать его пистолет. Чешим вниз до упора и тут у нас встаёт выбор: можно пойти в STORAGE ROOM или же просто выбить решётку слева и продолжить путь. Как только решётка упадет, запустится кат-сцена с полицейским и таймер начнёт отчёт. За это время Вам нужно спуститься на улицу. Залезаем на парапет, который «защищала» решётка, бежим вперед и перепрыгиваем на другое здание. После прыжка на крыше нового здания можно найти патроны для пистолета. Дальше проходим за дверь.
STORAGE ROOM
Если Вы решили не заходить на склад, то просто пропустите этот абзац. А если же решили навестить, то наградой Вам станет спрей первой помощи на полу и обойма для магазина на верхней полке. Больше здесь ничего нет.
TOP FLOOR OF THE APARTMENT
Поднимаем зелёную траву с пола и заходим в лифт.
FIRST FLOOR OF THE APARTMENT
Забираем траву и выходим на улицу.
IN FRONT OF J’S BAR
После того, как закончится очередная кат-сцена, Вам нужно будет выстроить баррикаду из патрульных машин. Что же, недолго думая, нужно бежать к самой дальней машине и начать толкать её до тех пор, пока она не «уткнётся» в горизонтально стоящую машину. Кстати, в этой машине имеется дробовик. Зомби эта баррикада мало остановит, поэтому нужно бежать назад и толкать вторую машину. Перед этим можно забрать и карту со второй горизонтальной машины. Находится она по левому борту, возле зеркала бокового обзора. После того, как баррикада будет выстроена, начнётся ещё одна кат-сцена и Вы попадёте на другую локацию.
BEHIND THE APARTMENT
Как только управление перейдёт к Вам, бегите вперёд. На полу здесь можно обнаружить: Спрей, патроны для пистолета, патроны для дробовика и железную трубу. У Вас есть два варианта действий, пока полицейский выбивает дверь: 1 — помочь ему, 2 — отбиваться от наступающих зомби. Как поступать — решайте сами. Я помогал ему по мере сил выбить эту чёртову дверь.
SLOPE ALONG THE CANAL
После очередной заставки бежим к копу и забираем дробовик и зажигалку (ЗАЖИГАЛКА ОБЯЗАТЕЛЬНА!). После чего, не обращая внимания на зомби, бежим к бензовозу. Открываем вентиль, чтобы из него начал течь бензин. После чего используем на бензине зажигалку, которую забрали у копа (ну, или сберегли ещё с самого Бара). Снова начнётся кат-сцена. Когда она закончится, срочно прыгаем в канал и пытаемся залезть в небольшое окошко канализации. Успели или нет — начнётся ещё одна кат-сцена.
CANAL
Бежим вниз за синей и зелёной травой, после чего бежим уже в другую сторону и до самой лестницы наверх. На пути к ней лежат ещё одна зелёная и одна красная травы. Собрав всё это, подымаемся по лестнице вверх.
IN FRONT OF APPLE INN
Бежим вперёд, к полицейскому. И примерно через 5 секунд начнётся новая кат-сцена, после которой мы попадём в другую локацию.
BEHIND THE RESIDENTIAL AREA
Теперь мы снова предоставлены сами себе. Как только получаем управление над персонажем назад, залезаем обратно в полицейский грузовик. А в нём: Дробовик, патроны для дробовика, патроны для пистолета Кевина, Патроны для пистолета и спрей первой помощи. Также здесь имеется печатная машинка для сохранения игры. Собрав весь хабар, вылезаем из грузовика и идём вперёд, на лестницу. Будьте внимательны — после второго лестничного пролёта (где находится Синее растение) в стенке по правой стороне будет лежать Револьвер. Тут он пригодится. Продолжаем подъём вверх.
FOOTBRIDGE
Дойдя где-то до середины пешеходного моста, вы запустите новую кат-сцену. После её завершения у Вас есть два варианта действий.
|
MAIN STREET Продолжаем движение по мосту и спускаемся на главную улицу, где только что происходило то, что мы видели в кат-сцене. Лавируя между толпой зомби, нам нужно собрать детонатор из двух частей: DETONATOR HANDLE и DETONATOR MAIN UNIT, после чего скомбинировать эти две части и использовать. Поздравляю! Вы только что прошли первый сценарий Resident Evil: Outbreak! |
1F BEHIND THE RESIDENTIAL AREA Возвращаемся к полицейскому, который нас привёз сюда, разговариваем с ним и… Всё. Поздравляю, первый сценарий Resident Evil: Outbreak завершён! |
ИТОГИ
После завершения сценария, будет выполнен подсчёт того, что вы совершили при игре. Учитывается:
• Время прохождения.
• Полученный урон.
• Количество выживших напарников
• Выполненные побочные действия.
Пример побочных действий — построить баррикаду на 2 этаже или же подпереть входную дверь бочкой (что я и советовал в самом начале). За отсутствие урона или не использование огнестрельного оружия можно получить специальные бонусы. Чтобы получить ранг S, нужно пройти сценарий менее, чем за 10 минут (мой личный рекорд — 9-34). Если мне не изменяет память, в среднем за ранг S можно получить где-то 1500 поинтов. Поинты тратятся в галерее для покупки новых костюмов, режимов, персонажей.
Различия Hard/Very Hard и Normal
Как я уже говорил ранее, STAFF ROOM KEY на Hard/Very Hard находится у бармена и забрать его можно только после его смерти. А она наступит только тогда, когда ворвутся зомби. Целесообразнее играть за Алиссу, ну, или же просто выбить дверь.
KEY WITH BLUE TAG также лежит в другом месте. А именно в OWNER’S ROOM, на балконе.
Самое «злобное» — это поиски FORKLIFT KEY. Чтобы получить его, нужно решить головоломку в OWNER’S ROOM. А чтобы это сделать, нужно сходить в 2F LIQUOR ROOM, взять там бутылку алкоголя и принести обратно в OWNER’S ROOM, чтобы использовать на картине. Тогда откроется ящик в столе и ключ будет там. Звучит просто, не так ли? Но поверьте, на деле это не совсем так.
И самое главное. В локациях IN FRONT OF J’S BAR, BEHIND THE APARTMENT и SLOPE ALONG THE CANAL вместо зомби будут враги под названием Scissor Worm. Очень дотошные и опасные твари. Часто любят заражать, но при этом не любят огонь. Так что коктейль молотова тут будет как нельзя кстати.
27 сентября.
Где-то под Раккун-Сити.
2. Below Freezing Point
B8F UNDERGROUND TUNNEL
А мы продолжаем. После начала игры забираем зелёную траву слева, и возле ворот в углу железную трубу. После открытия ворот, проходим далее.
PLATFORM
Сразу же поднимаемся на платформу, смотрим кат-сцену. После её завершения идём по платформе до конца, там лежит пистолет. Теперь разворачиваемся и бежим по платформе до другого её конца и поворачиваем в коридор, ведущий к лифту. Ветераны Resident Evil наверняка уже догадались что это за место. Поскольку лифт не работает, спускаемся в шахту и поднимаемся пешком наверх до тех пор, пока по левой стороне не заметим вход в вентиляционную шахту. Залезаем в неё.
Примечание: Здесь идёт небольшое разделение по персонажам. К примеру, при игре за Кевина и Синди, мы попадаем в B6F SOUTH PASSAGE, тогда как при игре за Алиссу и Джимма в B7F SOUTH PASSAGE. Подробнее об этом будет написано в конце.
B6F SOUTH PASSAGE
Поскольку я играю за Кевина, то, соответственно, попадаю сюда. Игнорируем дверь позади и бежим вперёд. Также игнорируем поворот налево, бежим дальше. На полу будет ещё один пистолет. Поворачиваем направо и бежим до конца коридора. На полу будет лежать замороженный гаечный ключ. Забираем его и бежим до развилки, и в этот раз поворачиваем направо.
B6F SECURITY CENTER
Мы попали в С-образную комнату, знакомую всем, кто играл в Resident Evil 2. Справа от входа будет зелёная трава. Продолжаем бежать вперёд, пока не доберемся до двери, ведущей из этой комнаты. По левой стороне (вдоль внешней стены) будут: карта уровня и спрей первой помощи (его приберегите, пригодится). После чего проходим за дверь.
B6F NORTH PASSAGE
Бежим по коридору вниз, пока не выйдем в небольшое помещение — что-то типа зала ожидания. Здесь имеются патроны на пистолет и ножик, на лавочке. Забрав это всё, продолжаем движение вниз по коридору и стучимся в дверь.
BREAK ROOM
Это комната отдыха для персонала. Сразу же бежим направо до упора — тут небольшая кухня и раковина с горячей водой. Используем на раковине замороженный гаечный ключ и получаем оттаявший гаечный ключ. Теперь можно осмотреться. В шкафах имеется: Антивирус и, если играете за Алиссу, дробовик. На столе спрей первой помощи и синяя трава. На лавочке железная труба. Больше здесь делать нечего.
B6F NORTH PASSAGE
Бежим ни на кого не обращая внимания до противоположной двери.
B6F SECURITY CENTER
Снова пробегаем всё помещение до противоположной двери, но не выходим. Слева от двери, на стенке, «висит» что-то типа стенного шкафчика, открываем его гаечным ключом и забираем вентиль. Возвращаемся в центр комнаты и используем вентиль, чтобы открыть ещё одну дверь. Помните, вентиль ещё пригодится, не выкидывайте его! За дверью есть патроны для пистолета, забираем их и спускаемся по лестнице вниз.
Примечание: На самом деле, здесь можно было обойтись и без гаечного ключа, для этого нужно просто выбить крышку. Занимает это от 50 до 70 ударов. Как поступать в данном случае — решать только Вам.
B7F LABORATORY
И снова мы попадаем в С-образную комнату, наподобие той, в которой мы были раньше. Здесь можно разжиться: Двумя файлами (один прямо напротив в компе, второй в дальнем конце комнаты), патронами для пистолета Кевина, ещё одним спреем, картой этого этажа и у дальней двери зелёным растением с патронами для пистолета. В эту дверь и проходим.
B7F NORTH PASSAGE
Бежим по коридору до противоположной двери и открываем.
CHEMICAL STORAGE ROOM
Если Вы играете не Йоко, то здесь Вы её и встретите. Правда, будьте осторожны с ней. Слева от входа компьютер, в нём требуется ввести код. Его можно узнать из ранее найденного файла под названием INTEROFFICE MEMO. После забираем VP-017 и вдогонку ещё один пистолет со шкафчика с химикатами. Выходим.
Нипанятна!: Коды для ПК: 0634/4509/9741 .
B7F NORTH PASSAGE
Снова через весь коридор до двери и в неё.
B7F LABORATORY
Открываем дверь справа от персонажа. Единственное место, где мы не были.
B7F SOUTH PASSAGE
Снова коридоры и снова бежим. На развилке поворачиваем направо. Перед дверью будет лежать железная труба.
CHEMICAL DISPOSAL ROOM
На бочках красная трава. Далее заходим в камеру, там лежит UMB-03. Комбинируем его с VP-017 и получаем V-JOLT. Ветераны Resident Evil 1, думаю, уже поняли зачем это нужно. Уходим отсюда.
B7F SOUTH PASSAGE
Бежим до развилки и поворачиваем вниз. Проходим за дверь.
DUCT
Если у Вас остался спрей, отдаём его раненному, и взамен получаем дробовик. После чего используем V-JOLT на растении и поднимаемся по лестнице наверх.
DUCT
Этаж B6. Я надеюсь, вентиль Вы сберегли. Если да, то вставляем его в разъём и поднимаем лестницу. Если нет, ищите, где оставили. Больше вентиль не нужен.
DUCT
Этаж B5. Поднимаемся ещё выше.
DUCT
Этаж B4. Наша остановка. Проходим за дверь.
B4F WEST AREA PASSAGE
Здесь нет ничего, кроме железной трубы в конце коридора и замороженного Хантера. Но если она Вам не нужна, тогда на развилке поворачиваем направо и открываем дверь.
B4F MAIN SHAFT
Ветераны Resident Evil 2 снова умиляются. Да, моль вернулась. Лучше с ней не возиться, себе дороже. Быстро бежим в центральный блок, здесь на полу лежат патроны на дробовик. Как и раньше, здесь коридоры обозначены цветами, мы будем ориентироваться по ним. Итак, держим путь в белый коридор (север) и открываем дверь.
B4F TURNTABLE
И снова знакомые локации. Бежим к поезду, здесь есть чем поживиться. Начнём с патронов для пистолета и зелёной травы. Оббегаем поезд слева. Поднимаем LAB CARDKEY, чуть дальше лежит и TURN TABLE KEY, но сейчас он нам не нужен и будет лишь занимать место в инвентаре, который и так не резиновый. Выходим отсюда.
B4F MAIN SHAFT
Бежим туда, откуда пришли, то есть в красный коридор (запад).
Примечание: Если Вы играете за Йоко, тогда весь остальной путь можете пропустить и сразу читать с момента возвращения в эту локацию и отправки в восточный блок. Почему? Ей, в отличии ото всех остальных, не нужно регистрировать свои отпечатки пальцев для доступа в комнату, которая закрыта на электронный замок. Ветераны Resi 2 должны помнить его. Ну, а поскольку играю я за Кевина, идём регистрироваться.
—Кроме Йоко—B4F WEST AREA PASSAGE
Продолжаем ити туда, откуда пришли.
DUCT
Этаж B4. Спускаемся по лестнице на этаж ниже.
DUCT
Этаж B5. Проходим за дверь.
B5F AREA C PASSAGE
Сразу же поднимаем зелёную траву, она как раз рядом со входом, бежим до конца коридора и поднимаем файл MONTHLY PASSCODE. Не советую им пользоваться. Подробнее об этом возможно будет в следующей версии этого гайда. Дальше, через вентиляционное отверстие залезаем в другую локацию.
B5F EMERGENCY PASSAGE
Бежим вперёд до поворота налево, здесь в углу лежит дробовик. В противоположном углу ещё один файл, под названием STAFF MEMO. Снова в вентиляционное отверстие.
B5F AREA B PASSAGE
Уже в который раз ветераны Resi 2 подпрыгивают, узнав локацию — да, это вход в лабораторию Биркина. Правда в неё саму попасть нельзя. Ну, нам и не надо. При помощи найденной карты открываем железную заслонку и бежим в единственную доступную дверь.
Примечание: В этой локации сидит человек. Если с ним попытаться заговорить — ничего не получится. Но если Вы играете за Йоко, он её узнает и даст ей Магнум. А это неплохое подспорье в битве с боссом.
COMPUTER ROOM
Здесь можно поживиться следующими предметами: Патроны для пистолета, зелёная трава, синяя трава. После чего нам нужно подойти к компьютеру, и, на манер Resi 2, зарегистрировать свои отпечатки пальцев. Теперь можно валить отсюда.
B5F AREA B PASSAGE
Снова ныряем в вентиляционную шахту.
B5F EMERGENCY PASSAGE
По коридору вниз и в вентиляционную шахту, снова.
B5F AREA C PASSAGE
Вниз по коридору и в дверь.
DUCT
Этаж B5. Поднимаемся вверх.
DUCT
Этаж B4. Проходим за дверь.
B4F WEST AREA PASSAGE
Держим путь в центральную комнату. Если кто забыл, то на развилке поворачиваем направо.
B4F MAIN SHAFT
Бежим в центр и оттуда уже в синий проход (восток).
Примечание: В этой локации вас может захватить моль. Для обеспечения такого приятного обстоятельства нужно выполнить некоторые условия, но к сожалению, мне не ведомо какие конкретно.
B4F EAST AREA PASSAGE
По левой стороне будет лежать CUSTODIAN’S DIARY. Бежим вниз до перекрёстка и поворачиваем налево. При помощи карты открываем заслонку и движемся до конца коридора. Карта, кстати, больше не нужна. Подходим к замку, и, если всё сделали правильно, дверь откроется. Заходим.
B4F CULTURE ROOM
Вот и небольшая награда за все наши труды. Здесь лежат: Бутылки с химикатами (оружие), спрей первой помощи, зелёная трава и BLOWTORCH. Также здесь имеется файл TOP-SECRET MEMO. Больше ловить нечего. Выходим.
B4F EAST AREA PASSAGE
Бежим вниз по коридору никуда не сворачивая, открываем двери с изморозью.
LOW TEMPERATURE LABORATORY
Здесь лишь несколько вещей: Сломанный дробовик, спрей и файл RESEARCHER’S WILL. Подходим к мёртвому учёному и используем на нём BLOWTORCH. После чего начнётся кат-сцена. Всё, все дела законченны. Теперь нам к поезду.
Примечание: Сломанное оружие может чинить только Девид.
B4F EAST AREA PASSAGE
Вниз по коридору и на развилке направо. Открываем дверь.
B4F MAIN SHAFT
Дальше в белый коридор.
—С Йоко—B4F TURNTABLE
Помните мы оставили TURN TABLE KEY? Теперь пришло время взять его и использовать. Не забудьте приготовиться к бою. Начнётся отсчёт времени, нужно только продержаться.
Примечание: Хантеры не достанут игрока, если залезть на парапет поезда. Находится он сзади, там где вход. Но помните, напарники тогда гарантировано погибнут.
Оптимальная позиция — с дробовиком у двери. При помощи него косите всех, кто в неё заходит. Через две минуты начнётся кат-сцена. После неё останется продержаться ещё минуту. Когда время закончится, начнётся ещё одна кат-сцена и поезд поедет на лифте вверх.
MARSHALING YARD
BOSS
Вот и первый босс в этой игре. Звать его G-Mutant. И, как нетрудно догадаться, он творение Биркина. В зависимости от сложности, на которой Вы играете, у него может быть от 4000 ХитПоинтов (easy) до 6000 (hard). На норме же он имеет всего 5000 единиц здоровья. На самом деле, не так страшен чёрт, как его малюют. Особенно при игре за Йоко (при условии, что Вы взяли таки магнум). Всё, что требуется — это не попадать под его атаки и использовать поезд для ударов. Это просто — подбегаем к девайсу, куда вставляли ключ, и снова его активируем. На норме ему хватает 2-3 удара поездом. Если же он понавыпускал много своих «детишек», постарайтесь их заманить на центр и поездом их, поездом. Запомните, поезд — Ваш лучший друг, не считая Магнума.
Различия Hard/Very Hard и Normal
Расположение ключей и ключевых предметов здесь точно такое же, как и в описании выше. Сложность начинается в количестве зомби в комнате. В некоторых комнатах их будет поболее.
Хантеры смогут вырываться из своего ледяного плена даже раньше, чем придётся использовать Hand Burner. Также в игре можно будет встретить и Ликеров.
Ну, и последнее. Битва с боссом станет на порядок сложнее. Если на hard ему потребуется уже около 5 атак поездом (это если не стрелять в него совсем), то на very hard поезд практически не причиняет ему вреда. Имейте это ввиду.
26 сентября.
Госпиталь Раккун-Сити.
3. The Hive
Персонажи попали в обречённый госпиталь Раккун-Сити, за несколько дней до появления там Карлоса Оливейра, который, если Вы помните, пришёл туда в поисках вакцины для Джилл. Госпиталь уже пал… зомби пытаются проникнуть внутрь, но здесь всё ещё есть живые люди, в том числе и наши персонажи.
ROOM 301
Все персонажи начинают свою игру здесь. Собственно, как только управление переходит к нам, подходим к кровати и нажимаем кнопку вызова медсестры. После чего можно спокойно пытаться выйти из комнаты и наткнуться на кат-сцену. После её завершения выходим в коридор.
3F PASSAGE
Выбегаем в коридор. Ниже по коридору лифт, но сейчас он не работает, так что бежим вверх по коридору. По пути не забываем забрать зелёное растение. Заходим в комнату.
ROOM 302
Здесь на кровати лежит файл MALE NURSE’S DIARY, забираем его. Далее подбираем CRUTCH и, по желанию, оставшиеся предметы. И только после этого открываем шкафчик и забираем оттуда пистолет. Начнётся небольшая кат-сцена, после неё рекомендую сразу выбегать из комнаты.
Примечание: Собственно, здесь первая встреча с врагом, известным под именем LEECH MAN. Пытаться убить его бесполезно, поэтому самый умный поступок при встрече с ним — убежать.
Примечание: Если у вас статус здоровья BLEED, самым мудрым решением будет постоять и подождать пока он исчезнет, так как при кровотечении любое движение отнимает у персонажа здоровье.
3F PASSAGE
Теперь бежим обратно к лифту, напротив него есть дверь. Заходим в неё.
3F NURSES’ CENTER
На столе возле входа лежит REPAIR WORK MEMO, на тумбе напротив — REPAIR WORK MEMO. Выходим на середину комнаты, чем запускаем очередную кат-сцену. После неё перелезаем через баррикаду и бежим в дальний угол комнаты за спреем первой помощи. Далее немного назад, в холодильнике (по идее, это же он) достаём BLOOD PACK.
Примечание: Очень полезная вещь, особенно против LEECH MAN. Если он зажал в углу или ещё что, просто используем эту кровь, и он просто забудет о вашем существовании на некоторое время. Но! Имейте ввиду, что 1 штуку лучше всегда носить с собой! Это важно.
Собрав всё, выходим обратно в коридор.
3F PASSAGE
Лифт теперь работает. Заходим в него и отправляемся на первый этаж.
Примечание: Здесь можно немного упростить себе путь. Если знаете коды для лифта, спускайтесь на B1 и введите их там, для разблокировки этажа B2. После чего можно убить LEECH MAN, и в госпитале станет спокойнее. Если так и решили сделать, то переходите сразу к B2F PASSAGE. После этого продолжайте читать ниже этого примечания. Те, кто хотят пощекотать себе нервы или не знают код, идут дальше.
2F PASSAGE
Выходим из лифта и заворачиваем в коридор, который ведёт вглубь темноты. Там же забираем спрей первой помощи. После чего возвращаемся к лифту и проходим за дверь напротив.
2F NURSES’ STATION
Здесь можно разжиться: Пистолетом, патронами к пистолету, и, собственно, то за чем мы шли, а именно — CHEMICAL CODE MESSAGE. Далее хватаем из холодильника BLOOD PACK, если нужны, и быстренько сваливаем обратно в коридор.
2F PASSAGE
Бежим вниз по коридору, и, игнорируя лестницу вниз, заворачиваем за угол. Там же забираем травку. Далее есть два варианта, сразу спуститься вниз по лестнице или же зайти в комнату. Если решили не спускаться — отматывайте сразу до 1F PASSAGE.
ROOM 202
Здесь собираем: Патроны на пистолет, зелёное растение, CRUTCH и CHOPPER. После чего выходим.
2F PASSAGE
Возвращаемся немного назад и спускаемся по лестнице на первый этаж.
1F PASSAGE
Здесь можно разжиться железной трубой. Далее перед нами встают две двери: одна закрыта решёткой. Открываем дверь слева.
NIGHT RECEPTION
Отсюда открываем решётку на дверях, и теперь они доступны для нас. Тем не менее, здесь также лежит BURST HANDGUN и SECURITY GUARD GUIDE (только для Марка). Выходим.
1F PASSAGE
Игнорируем открывшуюся дверь и бежим под лестницу, там ещё одна дверь. В неё и заходим.
1F LOCKER ROOM
Следующую дверь пока что игнорируем. Бежим до шкафчиков и начинаем по ним нещадно шарить. В первом будет красное растение. Во втором патроны для пистолета. А вот третий закрыт (чтобы открыть, нужно играть за Алиссу и использовать отмычки). Открыв его, мы найдём обойму для пистолета. Возвращаемся к пропущенной двери и проходим далее.
Примечание: Отмычки для открытия ящика: Легко:Р, Нормально:Р, Тяжело:Р, Очень Тяжело:S
1F EXAMINATION ROOM
У жмурика за столом забираем CARD KEY LEVEL 1. Прочесываем комнату и также забираем синее растение и спрей. Далее снова выбор. Если с вещами всё хорошо, выходим за дверь, которая соседствует с той, через которую вы вошли. Тем, кому охота приключений и экскурсии, заходим в дверь напротив той, через которую мы вошли.
TREATMENT ROOM
Это первый сейф-рум. Можете сохранить игру и выпить валерьянки. Хватаем предметы и продолжаем. Тут ожидаем HEMOSTAT. Уходим.
1F EXAMINATION ROOM
Выходим в дальнюю дверь…
CENTRAL WAITING ROOM
Здесь кроме зелёного растения нет больше ничего, так что хватаем его и бежим дальше.
HALL
Пресвятые тапки Джигурды… Знакомые места для ветеранов серии. Но не ждите здесь Хантеров. Собираем два красных растения и одно зелёное. Далее повторяем маршрут Карлоса и проходим через дверь.
1F OFFICE
Сплошная ностальгия, ребятки. Продолжаем пополнять свои запасы. Здесь находятся: Спрей первой помощи, две восстанавливающие таблетки (чтобы взять вторую, нужно играть за Алиссу и использовать отмычки), швабра и файл под названием PART OF MEMO. Собрали? Ок, выходим дальше.
Примечание: Отмычки для открытия ящика: Легко:W, Нормально:W, Тяжело:I, Очень Тяжело:I
1F DOCTOR STATION
И снова фанаты Resident Evil умилились. Да, это та самая комната из Resident Evil 3. Но, не будем забываться! На столе лежит антивирус. Далее в шкафчике патроны на пистолет (те, кто играл в RE3, вспомнят, что там же их брал и Карлос). Возле двери ещё имеется синее растение. Собираем всё и заходим в лифт.
Примечание: Внимательно осмотрите столы, на одном из них надпись. День Рождения дочери директора. Нашли? Запоминаем.
B1F PASSAGE
В двери напротив второй сейврум. Его можно смело игнорировать и идти дальше по прохождению, тем же, кому интересно заходят туда. Тем, кому нет, идут ниже по коридору и заходят в следующую дверь (B1F ELEVATOR CONTROL ROOM ).
REPOSING ROOM
Здесь можно прибарахлить спрей и швабру. А также сохраниться, если нервы уже ни к чёрту. Нет? Тогда продолжим.
B1F PASSAGE
Бежим вниз по коридору и заходим в следующую дверь на противоположной стороне.
B1F ELEVATOR CONTROL ROOM
Здесь нужно действовать оперативно. Отчистить консоль от личинок и ввести один из следующих кодов, которые ещё нужно разгадать. Как это сделать читайте в примечании. Сметаем синее растение, спрей и SETTING MANUAL. Затем проваливаем обратно в коридор.
Примечание: Итак, у нас есть два файла CHEMICAL CODE MESSAGE и PIECE OF MEMO. В CHEMICAL CODE MESSAGE находится следующий текст: C-4041, E-1160, T-7221 ,K-1210, I-2005. Нас интересует К. Т.е. мы имеем 1210. Далее открываем PIECE OF MEMO, в нём будет указанно, к примеру, +2345. Значит берём 1210 и прибавляем к нему 2345. Принцип сложения: 1 цифру с 1, 2 со 2 и т.д. Полученный код и будет нужным.
Нипанятна!: Коды: 3555/5315/8211
Примечание: А как же крыша? Тут всё немного сложнее. Ранее я просил внимательнее обыскать стол в DOCTOR STATION 1F. Запомнили дату? Это и есть пароль.
Нипанятна!: День Рождения — 30 Сентября. Пароль:0930
B1F PASSAGE
Вниз по коридору и проходим через дверь. Я надеюсь, что CARD KEY LEVEL 1 всё ещё с Вами.
B1F SOUTH PASSAGE
Бежим дальше вниз. По дороге забираем красное растение, и, по желанию, в ответвлении от коридора железную трубу. Ломимся в дверь.
B1F WASTE LIQUID DISPOSAL ROOM
Спускаемся по лестнице вниз и спрыгиваем в канал. Проходим вперёд и увидим, что под лестницей лежит труп с чем-то блестящим. Залезаем и забираем PADLOCK KEY. Больше здесь делать нечего. Выходим обратно.
B1F SOUTH PASSAGE
Бежим до противоположной двери. Заходим.
B1F PASSAGE
Теперь в лифт. И есть два выбора: идти дальше про прохождению (B2F PASSAGE) или сходить на крышу здания. При игре за Синди/Кевина сходить на крышу строго рекомендуется.
3F ROOFTOP
Здесь, помимо ворон, имеются: Патроны на пистолет, красное и зелёное растения и, наконец, раненный полицейский. При игре за Синди или Кевина он отдаст Вам SUB MACHINEGUN. Хорошее подспорье при битве с боссом, не так ли? Снова в лифт и теперь уже на этаж B2.
B2F PASSAGE
Выйдя из лифта, сразу же ныряем в дверь напротив.
B2F LABORATORY
Прям библиотека какая-то, а не лаборатория. Собираем файлы: INVESTIGATION REQUEST, RESEARCHER’S DIARY. Если израсходовали все BLOOD PACK, то пополните свой запас здесь. Это строго необходимо. Собираем всё и идём через следующую дверь.
B2F FIXED TEMPERATURE LABORATORY
Цепляем HEMOSTAT и забегаем в камеру. Там же используем BLOOD PACK, выбегаем обратно и подходим к пульту управления. Дальше ждём пока LEECH MAN клюнет на нашу приманку и заберётся в эту камеру, затем включаем агрегат. После очередной кат-сцены заходим в камеру и забираем CARD KEY LEVEL 2. Больше здесь делать нечего, выходим.
Примечание: Помните, что если кто-то из ваших напарников погибнет в ходе прохождения, он превратится в LEECH MAN.
Примечание: Сюда можно попасть и раньше. Просто введите код, чтобы разблокировать этот этаж, прийти и убить врага.
B2F LABORATORY
Продолжаем поход в коридор.
B2F PASSAGE
Бежим вниз по коридору и открываем дверь найденной карточкой.
B2F UNDERPASS ENTRANCE
Теперь готовимся к битве. Перезаряжаем оружие, лечимся и прочее. После чего забираем лежащие здесь спрей, патроны для пистолета и зелёное растение. Готовы? Тогда используем PADLOCK KEY на цепи, которой прикована лодка и отправляемся в…
BOSS
После кат-сцены мы остаёмся наедине с большой пиявкой. Логично, что её надо убить. На самом деле босс не очень-то и сложный, особенно если по ходу прохождения Вы сберегли много боеприпасов. Если же с патронами туго, то, постепенно отступая по каналу, нужно стрелять по вентилям. Главное — удостоверьтесь, что пиявка проползает под ней. На самый крайний случай — на месте, где была лодка, стоит канистра с бензином, при детонации она нанесёт боссу около 9000 урона. Где-то в середине канала также стоит бак, он наносит боссу приблизительно 2000 урона. Вентели по 300. Сам же босс, в зависимости от уровня сложности, имеет следующие параметры: На лёгком — 3500, на нормальном — 4000, на сложном — 4500 и на Самом Сложном — 5000. Ну, а дальше дело в шляпе.
Различия Hard/Very Hard и Normal
Самое большое отличии в том, что по госпиталю будет встречаться больше пиявок, чем обычно. Собственно, как и зомби. Также, в некоторых местах будут враги, которых не было на младших уровнях сложности.
Полицейский на крыше даст BURST HANDGUN вместо SUB MACHINEGUN.
24 сентября. Вечер.
Отель «Apple Inn», Раккун-Сити.
4. Hellfire
Улицы Раккуна стали опасны, и в попытке найти безопасное место персонажи оказываются на территории городского отеля.
APPLE INN SQUARE
Сразу же после окончания кат-сцены мы окажемся во внутреннем дворике отеля. На постаменте по центру имеется карта здания, которая совсем не повредит. Возле двери, находящейся в правом углу, лежит зелёная трава. Забираем её и бежим к двери, находящейся вверху.
BOILER ROOM
Идём осматривать труп пожарника — это активирует ещё одну кат-сцену. Возле трупа можно разжиться железной трубой и дог-тагом пожарника (он нужен только для прохождения сценария на 100%). После чего мы окажемся на развилке. Отсюда есть два пути: 1 – через третий этаж, 2 – через первый этаж. Как пойти – выбирать вам. По второму пути пойдёт один из НПЦ.
|
Путь через третий этаж BOILER ROOM Подымаемся наверх по лестнице. Здесь лежит тело ещё одного пожарника. По желанию можно забрать и его дог-таг. После чего пробегаем вперёд и проходим за дверь.APPLE INN SQUARE Бежим вниз по коридору и возле огня подбираем пистолет. После чего возвращаемся к двери, через которую попели сюда, и бежим вверх до конца. Идем через дверь.NORTHWEST PASSAGE 3 Здесь не так много альтернатив. Путь вперёд отрезан. Не забудьте подобрать синее растение с пола. Дверь ведёт в комнату, но она необязательна для прохождения — её можно пропустить и идти дальше. Кому же интересна и она, читаем ниже без пропусков.ROOM 301 Пробегаем вперёд, игнорируя дверь в ванную. Между кроватей забираем красную траву. Всё, больше здесь делать нечего. Но зато уже можно смешать три травы для лечения. Выходим обратно в коридор.NORTHWEST PASSAGE 3 Подходим к окну и вылезаем через него на балкон. Здесь лежит зелёная трава, не забудьте забрать её. Подходим к карнизу здания, начинаем быстренько двигаться по нему вперёд. Опасайтесь здесь ворон, они могут попортить немало крови. Кроме них здесь есть и разбитое окно, из которого вырывается пламя — не попадайтесь под его действие. Он может как столкнуть с карниза, так и убить. Добравшись до другого конца, игнорируем дверь и спускаемся по лестнице вниз. Валим за дверь.NORTHWEST PASSAGE 2 Дверь внизу коридора закрыта на ключ-карту, но её у нас ещё нет. Посему просто бежим вперёд. Первая дверь после поворота ведёт на склад. Её можно пропустить и бежать дальше, но там также можно разжиться различными вещами. Посему, кому это неинтересно — читаем только описание этого коридора, а комнат — пропускаем. Идём далее.STOREROOM А здесь у нас и вправду склад. Тут у нас есть: батарея, патроны для пистолета, патроны для пистолета Кевина, файл, зелёная трава (закрыта в шкафчике, открыть отмычкой S), синяя трава. Забираем это всё и двигаем отсюда.NORTHWEST PASSAGE 2 Следующая дверь ведёт в коридор второго этажа. В той стороне и лежит нужный нам предмет. Проходим за эту дверь. Примечание: На самом деле туда можно и не ходить. Обычно НПЦ открывает дверь, закрытую на ключ-карту изнутри, но бывает, что он погибает или просто… тупит. Поэтому лучше сходить за ключом самому. NORTHWEST PASSAGE 2 Примечание: Здесь вас должен поджидать один из ваших пропавших НПЦ и по идее он должен иметь в инвентаре золотой ключ. Если НПЦ нет, значит он погиб — попробуйте по карте найти его труп и осмотреть. Если ключ у него, вам повезло, если нет, то придётся добывать его самому. NORTHWEST PASSAGE 2 Нипанятна!: Возможные вариации кода к сейфу: JIA, BAE, FBH, IIB, DCH, CJF, GGF. NORTHWEST PASSAGE 1 Нипанятна!: Итак, мы имеем 4 ряда по 4 кнопки, чтобы было понятно я буду писать номер ряда (Сверху вниз) и номер кнопки (слева на право). Шаг 1: первый ряд первая кнопка. Шаг 2: первый ряд четвёртая кнопка. Шаг 3: четвёртый ряд первая кнопка. Шаг 4: четвёртый ряд четвёртая кнопка. Шаг 5: второй ряд вторая кнопка. Шаг 6: третий ряд третья кнопка. Шаг 7: третий ряд вторая кнопка. Шаг 8: второй ряд третья кнопка. NORTHWEST PASSAGE 1 Примечание: Здесь головоломка с золотым ключом. Если его нет у вас, читайте в соседней ветке как его получить. ROOM 103 |
Путь через первый этаж BOILER ROOM Возвращаемся в локацию из которой пришли.APPLE INN SQUARE Бежим к дальней двери возле которой сидит труп. После нехитрых манипуляций заходим в неё.CORRIDOR Если сходить налево от двери (от персонажа), то можно найти пистолет. Думаю, он никогда не повредит. Да? Возвращаемся к месту, с которого вошли, и бежим по коридору в другую сторону. Сейчас двери тут нас не интересуют. Помимо пистолета, тут можно найти трубу и на лестничном пролёте патроны для пистолета Кевина. На втором этаже забегаем в первую же комнату.ROOM 204 Здесь водятся GUEST MEMO 3 и дробовик (на нормале), в ванной не забудьте красную траву. Теперь самое интересное — головоломка. На стене висит карта европы. Там также имеются лампочки: некоторые горят, некоторые нет. Чтобы решить сие действо — нужно их зажечь все. Внимательно осмотрите панель и запомните номера ламп, которые не горят. Их надо включить. Вот и всё, просто, не так ли? Картины с изображением стран находятся в комнатах: 102, 103, 104, 202. Нипанятна!: 102 — Финляндия. 103 — Германия. 104 — Англия. 202 — Испания. Примечание 1: Дабы сократить простыню текста, я просто перечислю что можно найти в комнатах с выключателями. Итак: 102 — в ванной комнате лежат ACID ROUNDS. 103 — В комнате HANDGUN ROUNDS, в ванной Зелёная трава. 104 — HANDGUN ROUNDS, GUEST MEMO 2, в ванной железная труба. 202 — BUTCHER KNIFE, в ванной антивирус. Примечание 2: Двери в некоторые ванные комнаты закрыты. Их можно выломать любым персонажем или же воспользоваться отмычками Алиссы. 102 — Отмычка I, 202 — Отмычка W. После чего возвращаемся в 204 комнату и забираем золотой ключ. Если его тут нет — значит что-то Вы сделали не так. Если всё хорошо — забираем ключ и выходим в коридор. CORRIDOR Нипанятна!: Пароль указан в GUARD’S NOTEBOOK. Если и так не понятно, то вот возможные комбинации: 0721, 2287, 5128, 6354. Открываем дверь и заходим. SECURITY OFFICE Если же он тут и всё хорошо — продолжаем. Тут можно разжиться: EMERGENCY MANUAL, патронами к пистолету, дробовику, спреем первой помощи. NORTHWEST PASSAGE 2 Нипанятна!: Возможные вариации кода к сейфу: JIA, BAE, FBH, IIB, DCH, CJF, GGF. NORTHWEST PASSAGE 1 Нипанятна!: Итак, мы имеем 4 ряда по 4 кнопки, чтобы было понятно я буду писать номер ряда (Сверху вниз) и номер кнопки (слева на право). Шаг 1: первый ряд первая кнопка. Шаг 2: первый ряд четвёртая кнопка. Шаг 3: четвёртый ряд первая кнопка. Шаг 4: четвёртый ряд четвёртая кнопка. Шаг 5: второй ряд вторая кнопка. Шаг 6: третий ряд третья кнопка. Шаг 7: третий ряд вторая кнопка. Шаг 8: второй ряд третья кнопка. NORTHWEST PASSAGE 1 |
SECURITY OFFICE
И вот мы снова вернулись в офис охраны, но теперь у нас другая цель. В статую вставляем красный драгоценный камень и проходим в открывшуюся дверь.
NORTHWEST PASSAGE 2
Тут у нас две зелёные травы, патроны для пистолета и дробовика. Приготовьтесь к бою и спускайте пожарную лестницу. Спускайтесь по ней и сами.
APPLE INN FRONT LOBBY
Собираем всё, до чего дотягиваются руки (зелёные растения, патроны дробовика, спрей) и бежим к выходу. Смотрим кат-сцену и вот он…
BOSS
Это некая переходная стадия от зомби к ликеру. Но она всяко выносливее как зомби, так и ликера. Близко к ней лучше не подходить, то есть имеется у врага в арсенале атака и для ближнего боя. Идеально стоять в недосягаемости от её языка и поливать из дробовика. Также она может призывать ликеров к себе на помощь. На лёгкой сложности и норме их можно прогонять секунд на 10 включением противопожарной сирены, но в идеале лучше их тоже валить, чтобы не мешали. На сложном и очень сложном — не пытайтесь, привлечёте ещё больше ликеров. Собственно, тут нет ничего сложного, главное — держать расстояние и иметь определённое количество боеприпасов. Неплохая тактика пробежать в конец коридора, к выходу, за босса, и стрелять по нему оттуда. Так вас не достанет ни босс, ни ликеры. Но минус её таков, что боты, скорее всего, будут заниматься обычными ликерами. Хотя, если боеприпасы позволяют, почему нет?
На нормальном уровне сложности у босса всего 2200 поинтов, на тяжёлом 2700 и на очень тяжёлом 3000. После смерти босса просто идите к выходу и смотрите кат-сцены. Конец сценария.
Различия Hard/Very Hard и Normal
В отличии от обычного уровня сложности, на тяжёлом и очень тяжёлом недоступны некоторые локации. При попытке пройти дверь взрывается и наносит урон персонажу. На тяжёлом уровне сложности недоступна комната 201. На очень тяжёлом не доступны ещё и комнаты Склад (STOREROOM) и комната 301. Ну, и как я уже писал выше, нельзя отгонять ликеров противопожарной сигнализацией при битве с боссом.
И не забывайте, что наличие предметов в тех или иных локациях также меняется.
30 сентября. Вечер.
Здание Университета, Раккун-Сити.
5. Decisions, Decisions
После небольшой сюжетной завязки (в центре эвакуации Джордж находит записку от своего друга из Университета Раккун-Сити, который просит его срочно прибыть туда) начинается игра. Здание чем-то напоминает особняк из первой части. Приятные нотки ностальгии…
1F ENTRANCE HALL
Сразу же, как только управление персонажем перейдёт в наши руки, бежим вниз (левый нижний угол холла) и проходим за дверь.
1F PASSAGE ELEVATOR
Здесь первый сейфрум, а так же: железная труба, зажигалка, красная трава, карта и один закрытый шкафчик. В зависимости от сложности там можно обнаружить: Легко: Автомат. Нормал: Пистолет. Тяжело: Пистолет. Очень Тяжело: Патроны для пистолета. Открыть его сможет только Алиса. Собрав все пожитки возвращаемся в холл.
Нипанятна!: Чтобы открыть шкаф, используйте следующие отмычки: Легко: S, Нормал: S, Тяжело: S, Очень тяжело: W.
1F ENTRANCE HALL
Пришло время собрать вещички и в холле (впрочем, можно их и на потом оставить. В любом случае решать вам). Итак, чем тут можно поживиться? После первого лестничного пролёта, на столе лежит спрей и ножик. Спускаемся обратно в холл и чешим за дверь у правой стены (вторая по счёту).
1F STUDENT AFFAIRS OFFICE
На столе, напротив входа, лежит антивирус. Справа, на том же столе, лежит дневник Питера. Ещё правее, вдоль стены, можно найти пистолет и патроны к нему. У противоположной стены есть ещё один файл. Собираем всё и ломимся в следующую дверь.
1F GENERAL MANAGER’S ROOM
Справа от входа лежит красное растение. На столе находится файл, который объясняет суть головоломки с часами. На самом деле сложного тут ничего нет. В файле написано время, но написано цифрами (кто в 90х имел дело с ПК знает, что в те времена даже так картинки рисовали). Так вот, нужно лишь провести линию по одинаковым цифрам (например идут одни 9999), тогда и станет видно цифры. Решаем головоломку, забираем красный драгоценный камень у кукушки и валим отсюда.
Нипанятна!: Время для часов: Легко: 3:25, Нормал: 10:05, Тяжело: 7:40, Очень тяжело: 2:50.
1F STUDENT AFFAIRS OFFICE
Без остановки пробегам за дверь, ведущую в холл.
1F ENTRANCE HALL
От двери бежим вверх, к другой двери, но не заходим. Далее двигаемся вдоль северной стены и забегаем за лестницу (игравшие в Веронику и Ре1 поймут, о чём я). Тут на стене висит голова лося. Вставляем красный драгоценный камень в него и возвращаемся к той двери, из которой Вы вышли. От неё бежим ниже, к другой двери и заходим.
1F WAITING ROOM
По внешней стене (где окна) стоит статуя, снимаем с неё очки, бежим дальше и забираем зелёное растение возле двери. Открываем её.
1F PASSAGE A
В первой тумбочке лежит спрей. Бежим дальше по коридору, в следующей тумбочке лежат патроны для пистолета. Проходим через дверь в конце коридора.
1F PASSAGE B
Возле двери подбираем часть записки, которая содержит 3 последние цифры для лифта. Дальше вниз по коридору и после Г-образного изворота выходим на место, где лежит зелёная и синяя трава. Дальше не бежим, а открываем дверь, находящуюся рядом.
Примечание: Запомните этот коридор, а именно то место, где оборванный кабель касается воды. Впоследствии он сыграет немалую роль в удачном прохождении этого сценария.
1F ENTRANCE HALL
Мы снова в холле. Теперь поднимаемся по центральной лестнице на второй этаж. В юго-западном углу балкона лежат две травы, забираем их если нужно и идём через единственную дверь.
2F PASSAGE
В тумбе возле двери лежит железная труба, дальше по коридору ещё одна тумба, в ней лежит синее растение. Теперь пробегаем коридор до конца и натыкаемся на бюст. Одеваем на него очки. В открывшуюся в результате дверь не заходим, а возвращаемся немного назад, до развилки, и проходим за правую дверь (относительно персонажа, который идёт от бюста).
2F DRAWING ROOM
Здесь можно поживиться пистолетом, зелёным растением и антивирусом. Собрав это всё, движемся к следующей двери.
Примечание: Очки на бюсте на сложности легко находятся в этой комнате.
2F PRESIDENTS’ ROOM
Под кроватью лежит обойма для пистолета. Забираем её и двигаем к камину. Здесь дёргаем за верёвочки до тех пор, пока не откроется проход и оттуда не явится зомби. Больше делать тут нечего.
2F DRAWING ROOM
Выходим в коридор.
2F PASSAGE
В дверь напротив.
2F ART GALLERY
Забираем у статуи синий драгоценный камень. При тщательном осмотре можно найти и патроны для пистолета. Забираем всё и выходим обратно в коридор.
Примечание: При игре за Синди можно сыграть на рояле довольно таки знакомую мелодию…
2F PASSAGE
По коридору возвращаемся в холл.
1F ENTRANCE HALL
Спускаемся по лестнице на первый этаж и бежим к голове лося. Вставляем ему недостающий глаз (синий драг. камень) и откроется потайная дверь. Заходим и спускаемся по лестнице.
STUDY ROOM
После небольшой кат-сцены мы, наконец-то, можем осмотреться. Комнатка тут небольшая, но вещей хватит. На столах лежат два больших антивируса, одна восстанавливающая таблетка. На столе Питера лежат три файла. Один из них нужен для продвижения дальше (первая цифра кода лифта). Больше делать тут нечего, посему по лестнице идём обратно.
1F ENTRANCE HALL
Возвращаемся в комнату с лифтом. Если кто забыл, это левый нижний угол холла.
1F PASSAGE ELEVATOR
Теперь у нас есть весь код для лифта. Вводим его и отправляемся на 3 этаж.
Нипанятна!: Если уж совсем всё плохо, то коды следующие: Легко — 4032, Нормал — 4161, Тяжело — 4927, Очень тяжело — 4284.
3F PASSAGE ELEVATOR
Выходим из лифта и, игнорируя дверь, бежим в конец коридора, там забираем патроны для пистолета. Теперь возвращаемся назад и выходим за дверь.
3F EXPERIMENT PREPARATION ROOM
Тут у нас лежат: большой антивирус, красное растение и большая восстанавливающая таблетка. Теперь возвращаемся обратно в коридор.
3F PASSAGE ELEVATOR
Заходим в лифт. И выбираем этаж исходя из того, по какому маршруту Вы желаете пойти. Соответственно, маршрута два: первый — через этаж B2 и второй — через этаж B4.
|
Маршрут через этаж B4. B4F CORRIDOR Сразу перед лифтом лежит антидот. Идём до развилки и поворачиваем вверх по коридору, игнорируя дверь. Там ещё два синих растения и карта. Собрав всё (или не всё) возвращаемся назад и ломимся в дверь.B4F ACCESS WATER WAY Спускаемся вниз, перед спуском в канал забираем железную трубу. По каналу вперёд до упора — ножик. Запрыгиваем на парапет, там: патроны для пистолета Кевина. Спускаемся ещё ниже и… B4F OLD SUBWAY TRACK Ну ничего себе, у них и метро тут есть! Прямо такой маленький городок… Ладно. Возле выхода лежит погнутая железная труба, дальше идём в поезд и находим… да, штурмовую винтовку! Хе-хе. Возле поезда также лежит синяя и зелёные травы. Теперь по путям идём вперёд, переходим через провал по рельсам.B4F OLD SUBWAY TUNNEL Рядом со входом лежит труба, забираем её, если нужна. После чего заходим в вагон метро.SOUTH CAR Здесь у нас спрей первой помощи и ещё один автомат. Прям праздник какой-то! Забираем и идём в следующий вагон.NORTH CAR Тут у нас обойма для автомата, патроны для пистолета и красная трава. Теперь выходим обратно в туннель.B4F OLD SUBWAY TUNNEL Быстренько чешем к противоположной от состава стене и проходим через дверь.B4F T-SHAPED PASSAGE У входа лежит спрей первой помощи, забираем его и стучимся в ближайшую дверь.UNDERGROUND MANAGEMENT ROOM Здесь у нас карта, большой антивирус, патроны для пистолета и неработающий лифт. Забираем вещи и выходим обратно в коридор.B4F T-SHAPED PASSAGE Бежим вниз по коридору до самого конца, игнорируя поворот. Там будет вентиляционная шахта. Залезаем в неё.B4F EMISSION TOWER INSIDE WALL Забираем зелёное растение и по-над стеночкой крадёмся на другую сторону. На той стороне забираем синюю траву (если надо) и залезаем в вентиляционное отверстие.B4F STOREROOM Сразу же, как вылезаем, бежим вниз до конца, к двери. Но она закрыта. Что же делать? Отодвигаем шкаф справа от двери и залезаем в ещё одно вентиляционное отверстие… Примечание: Двери можно открыть отмычкой при игре за Алиссу. B4F SPARE POWER SUPPLY ROOM Нипанятна!: И снова мы имеем 4 ряда по 4 кнопки. Я буду писать номер ряда (Сверху вниз) и номер кнопки (слева на право). Здесь две разновидности, опишу обе. Если не подходит первый, значит второй. Вид 1: Шаг 1: второй ряд вторая кнопка. Шаг 2: второй ряд третья кнопка. Шаг 3: третий ряд третья кнопка. Шаг 4: второй ряд первая кнопка. Шаг 5: четвёртый ряд первая кнопка. Шаг 6: третий ряд третья кнопка. Шаг 7: третий ряд вторая кнопка. Шаг 8: второй ряд третья кнопка.
B4F STOREROOM
Нипанятна!: Легкий: Р, Нормал: Р, Тяжёлый: Р, Очень Тяжёлый: S. B4F T-SHAPED PASSAGE |
Маршрут через этаж B2 B2 PASSAGE ELEVATOR Тут у нас имеется пестицидный спрей и спрей первой помощи. так же, если Джордж не среди Ваших НПЦ, то он будет здесь. После своей смерти он оставит восстанавливающее лекарство и антивирус. Забираем их, поминаем Джорджа и спускаемся по лестнице вниз.WEST WATERWAY Здесь можно найти FOLDING KNIFE и если пройти дальше, а на развилке повернуть на запад, то там можно найти трубу. Собрав всё, возвращаемся на перекрёсток и идём на восток и заходим в единственную дверь.EAST WATERWAY Поднимаемся по лестнице, бежим вперёд, забираем зелёную траву и заходим в дверь.PASSAGE A На перекрёстке ожидает красная трава и небольшой подкол от разработчиков. Забрав траву — отправляемся на север и заходим в дверь. Хмм… где загрузка? Ладно… заходим в первую попавшуюся нам дверь.SHED Тут настоящий праздник для игрока: WATER PURIFYING FACILITY MAP, FIRST AID SPRAY и наконец-то GRENADE LAUNCHER. Ура! Выходим обратно.PASSAGE A Продолжаем идти вперёд. И что тут у нас? ВАААААААУ! Да это же… это же… ДЖИГУРДА! Простите… это зомби из первого Resident Evil… Безжалостно валим его и заходим в дверь.WATER WORKS MANAGEMENT OFFICE Сразу же возле входа лежит пистолет, забираем. Далее: CABLE REPAIR REQUEST. Также в этой комнате находится P-BASE. Всё? Нашли нужный реагент и можно убегать? Нет, на самом деле он не запечатан, потому нам и не подойдёт. Дверь здесь закрыта на ключ, потому, как это не печально, выходим обратно.PASSAGE A Теперь по коридору до развилки и не сворачивая пробегаем прямо.PASSAGE B В повороте по середине коридора патроны для пистолета. Далее продолжаем путь и заходим в противоположную дверь.UNDERGROUND TUNNEL Просто пробегаем и заходим в другую дверь.WATER PURIFYING FACILITY Заходим в ближайшую дверь.RESTROOM Туалет… странные туалеты в Раккун-Сити, Вас тут ожидает ещё один гранатомёт. Кроме него синяя трава и спрей первой помощи, больше тут ловить нечего.WATER PURIFYING FACILITY От двери бежим вверх, подбираем патроны для пистолета Кевина, смотрим кат-сцену и знакомимся со свиперами. Бежим дальше и забираем KEY WITH RED TAG. После чего выходим через дверь, при помощи которой сюда и попали.UNDERGROUND TUNNEL Бежим дальше… PASSAGE B …и дальше… PASSAGE A Пусть бегут неуклюже пешеходы по лужам… WATER WORKS MANAGEMENT OFFICE Помните закрытую дверь? Открываем её и заходим.WATER TANK Бежим вниз и по направлению противоположной стороны. Запрыгнув на вторую платформу, можно перевести дыхание. При помощи компьютера откройте замок резервуара. После чего можно забрать разрывные гранаты для гранатомёта. Если нужна и синяя трава — она возле двери, через которую вошли. Собрав и сделав всё что нужно, возвращаемся обратно.WATER WORKS MANAGEMENT OFFICE Выходим.PASSAGE A Как же я устал… PASSAGE B Крысиные бега прям… UNDERGROUND TUNNEL Ещё немного… WATER PURIFYING FACILITY Сейчас рекомендую перебить всех хантеров в этой локации. Впрочем, если вы достаточно отчаянный, как, например, я — то просто ныряем в резервуар и плывём до платформы по центру. Тут можно нарыть боеприпасы для гранатомёта. После чего продолжаем плавание, но в этот раз наверх (в сторону, где нашли ключ ранее). Игнорируем лестницу вверх, поднимаемся на платформу и заходим в дверь.QUALITY ASSURANCE TESTING ROOM Здесь лежит большой антивирус. Хватаем его и заходим в дверь.UNDERGROUND TUNNEL Тут, помимо врагов, можно разжиться красным и зелёным травами. Продолжаем путь.WATER TANK Знакомое место, не так ли? Ага… Проходим дальше, поднимаемся по сломанной лестнице, открываем дверь и берём… SEALED REAGENT CASE. Наконец-то! А теперь нам бежать весь путь обратно… или же, по выходу из комнатки просто спрыгнуть в воду. Так я и поступил  Спрыгиваем и в дверь.WATER WORKS MANAGEMENT OFFICE Спрыгиваем и в дверь.WATER WORKS MANAGEMENT OFFICEТеперь подходим к аппарату по производству химмиката и используем на нём SEALED REAGENT CASE. В замен получаем P-BASE (SEALED). Всё, время убираться отсюда.PASSAGE A Валим… PASSAGE B Бежим… UNDERGROUND TUNNEL Недолго осталось… WATER PURIFYING FACILITY Переплываем так же, как и раньше (когда шли за SEALED REAGENT CASE). Только в этот раз не игнорируем лестницу и поднимаемся по ней вверх.1F BACK SQUARE После довольно эффектной кат-сцены управление снова возвращается к нам. Собираем вещички, которые достались нам задаром, после чего, подняв ключ, открываем дверь в университет.1F PASSAGE B Готовимся морально и физически, лечимся и прочее. После чего бежим вниз по коридору и за дверь.1F ENTRANCE HALL Итак, знакомьтесь: Танатос. Последнее творение генной инженерии, бла, бла… бла, бла. В общем, чего это я? Бегите от него. Он бессмертен! Да ,совсем. Нет, его никак не убить. Игнорируя его, несёмся к двери, находящейся в правом нижнем углу. 1F WAITING ROOM Не останавливаемся ни на минуту. Быстро в противоположную дверь.1F PASSAGE A Тактика та же. Быстро проносимся по коридору и влетаем в дверь.1F PASSAGE B А теперь помните, я говорил, что этот коридор сыграет важную роль? Так вот, его время пришло. Быстро подбегаем в выключателю, который находится возле висящего провода. Теперь дело времени и реакции. Заманиваем Танатоса на лужу и дёргаем выключатель. Разряд тока вырубает его. Но помните, что только на время. Подбегаем к нему, снимаем с него образец Т-Крови и снова выбегаем в холл.1F ENTRANCE HALL Теперь в левый нижний угол. К лифту. 1F PASSAGE ELEVATOR Направляемся в лифт и отправляемся на этаж B4.B4F CORRIDOR Здесь вас должен встретить НПЦ с недостающим ингредиентом. Если НПЦ тут, то забираем его и отправляемся на 3 этаж. Если же его нет — читайте соседнюю ветку и ищите его сами. |
3F PASSAGE ELEVATOR
Это место уже знакомо нам, потому не тратя ни минуты, движемся дальше и заходим в дверь.
3F EXPERIMENT PREPARATION ROOM
Здесь мы всё обчистили, потому просто идём далее.
3F LABORATORY
Здесь стоит интересующий нас инкубатор. Вставляем в него все три ингредиента и запускаем. Смотрим кат-сцену… что? Открылась дверь… нам туда.
3F MACHINE STORAGE ROOM
А здесь у нас настоящий праздник. Тут можно разжиться: Штурмовой винтовкой, гранатомётом, патронами для пистолета Кевина, двумя спреями, железной трубой. Подобрав всё, что нужно, продолжаем движение.
3F SECOND HALL
После порции кат-сцен начнётся отсчёт времени до уничтожения университета. Не переживаем. Подходим к столу. За ним два компьютера: первый перезапускает инкубатор, второй открывает все замки. Теперь быстренько возвращаемся обратно к инкубатору.
3F MACHINE STORAGE ROOM
Быстро пробегаем дальше.
3F LABORATORY
Теперь мы можем наготовить сыворотки от Т-Вируса сколько угодно, вот только мы ограничены во времени. Одна порция готовится 30 секунд. Теперь посчитаем, сколько нам нужно:
1. Для себя.
2. Для НПЦ.
3. Для НПЦ.
По сути, НПЦ можно и не лечить. Для хорошей концовки нужно вылечить своего персонажа и иметь 1 сыворотку на руках. Но нам ещё пригодится одна лишняя для битвы. Итого:
1. Для себя.
2. Для НПЦ.
3. Для НПЦ.
4. Для концовки.
5. Для Танатоса.
Вы готовы сбежать из здания за 4 минуты? Если нет, можете не кормить напарников или же не держать лишнюю сыворотку. В общем, чтобы вы не решили, пришло время бежать обратно.
3F MACHINE STORAGE ROOM
Снова бежим дальше.
3F SECOND HALL
Здесь открылся секретный ход, несёмся в него.
TESTING PASSAGE B
Если со здоровьем плохо, тут имеется зелёная трава. Если же нет, не обращаем на неё внимания и бежим к лестнице. Спускаемся вниз. От лестницы бежим назад и открываем дверь. Кстати, не удивляйтесь, если тут вас будет ждать Танатос.
2F PRESIDENTS’ ROOM
Знакомое место, не правда ли? Но не время для ностальгии, надо бежать к двери.
2F DRAWING ROOM
Не отвлекаясь ни на что, вылетаем в коридор.
2F PASSAGE
Помните тут мы открывали проход? Так вот, быстро в него. БЫСТРО.
TESTING PASSAGE A
Система та же: бежим вперёд к лестнице, спускаемся, бежим назад и открываем дверь. Заходим. И где же мы?
1F PASSAGE B
Опять знакомое место, не так ли? Бежим в дверь, через которую мы недавно заходили в здание. Если кто забыл, она в конце этого коридора. Выходим.
1F BACK SQUARE
Фух, мы успели… Успели же? Теперь осталось подождать конца отсчёта таймера и посмотреть ещё одну кат-сцену. Но это ещё не конец. Перезаряжаем оружие, лечимся и идём через открывшуюся дверь, которая ведёт в…
1F UNLOADING PASSAGE
Здесь аккуратненько собираем всё то, что нужно нам в данный момент и движемся вперёд. И уже у самой двери нас поджидает босс.
BOSS
Вещей тут много, но босс легче от этого не становится. Стреляйте в него из всего, что есть. Но не забывайте уворачиваться от его прыжков. Также тут имеется и ракетная установка. Спрятана она надёжно. От двери, в которую мы пытались войти, нужно по-над стеной пройти вправо до упора. Там будет закрытый красный шкаф. Вот его надо открыть, стрелять ли в него или просто бить — решайте сами. Но базука там. Главное не промахнитесь потом. Одного точного попадания из базуки ему вполне хватает. Жизней у него: Лёгкий — 300, Нормал — 3500, Тяжёлый — 4500, Очень Тяжёлый — 4800
BOSS 2
Думали это всё? А вот он так не думал. Вторая битва будет простой, если по моему совету вы прибарахлили себе одну сыворотку. Хватаем пистолет с капота машины, вставляем туда ампулу и стреляем в гада. Всё, готов. Ну, а если ничего нет, то стреляйте в него из всего, что есть. Благо тут и травки есть и многое другое. Удачи!
Различия Hard/Very Hard и Normal
На очень сложном уровне сложности все НПЦ находятся всегда с игроком. Потому придётся проходить по всем маршрутам за ингредиентами самому.
Также отличается место нахождения очков для бюста. На очень сложном они находятся в закрытом шкафчике в CONTROL ROOM, который открыть может только Алисса. Ну, и как подарочек: времени до взрыва гораздо меньше.
Не забывайте, что наличие предметов в тех или иных локациях также меняется.
Автор текста: ЛёняСК
Оформление: Dillinger
Стилистика текста сохранена
Специально для ResidentEvilLive.Ru

Resident Evil Outbreak, BIOHAZARD OUTBREAK — однопользовательская видеоигра с возможностями сетевой игры, выпущенная для игровой консоли PlayStation 2 первоначально в 2003 году. Данная игра стала первой в серии Resident Evil, поддерживающая режим мультиплеера (только для японской и североамериканской версий). Outbreak представляет собой серию не связанных между собой эпизодов из жизни обитателей Раккун-Сити, происходящих в одно и то же время, что и события в играх Resident Evil 2 и Resident Evil 3: Nemesis. В качестве сиквела для Outbreak было выпущено продолжение под названием Resident Evil Outbreak File 2.
Игровой процесс
Игроку предлагается выбрать сценарий, уровень сложности и персонажа. Уровень сложности определяет количество врагов и встречающихся боеприпасов. В каждом сценарии присутствуют дополнительные задания, выполнив которые, игрок достигнет отметки прохождения в 100 %. Пройдя все пять сценариев с такой отметкой, откроется бесконечный режим, когда всё оружие в игре будет иметь бесконечный запас амуниции.
Кроме того, в каждом сценарии есть особые (англ. «SP» Items) предметы, которые разбросаны по всему уровню. Всего в каждом сценарии по 20 таких предметов, ещё по 20 предметов существуют для каждого из восьми персонажей. Сложность в их обнаружении заключается в том, что эти предметы невидимы и никак не подсвечены. В случае обнаружения таких предметов, для персонажей будут открываться новые костюмы и новые монологи.
Игроки могут соединяться посредством сети Интернет через сетевой адаптер, использующий широкополосный доступ. Для такого режима игры требуется регистрация на игровом сервере. После соединения с сервером игрокам предлагаются два режима игры: свободный режим и режим сценария. В свободном режиме игроки собираются в вестибюле и могут сам задавать такие параметры игры, как выбор сценария и сложность игры. В режиме сценария сервер автоматически выбирает сценарий и назначает персонажей. Игрок может в любой момент сохранить свои достижения и прервать игру. В случае успешного завершения сценария, игрок зарабатывает именную звезду.
31 декабря 2007 года Capcom завершила поддержку серверов для сетевой игры в США, а 30 июня 2011 года — в Японии.
Сюжет
Действия игры Outbreak начинаются через пару дней после того, как Т-вирус впервые вырвался из лабораторий корпорации Umbrella на улицы города Раккун-Сити, незадолго до того, как возникший кризис перерос в полный хаос. Восемь персонажей игры находятся в баре «У Джека» (англ. J’s Bar), кто-то из них здесь работает, большинство — отдыхает. Но никто из них даже не подозревает, в каком кошмаре наяву они окажутся в самое ближайшее время. Покой нарушается, когда в бар забредает очень странный клиент, который внезапно набрасывается на официанта Уилла и кусает его. Взглянув в окно, люди в баре столбенеют от ужаса: улица наводнена живыми мертвецами. Теперь всем ясно, что оставаться в городе больше нельзя, и разделившись на группы, персонажи отправляются искать пути спасения. В ходе прохождения, персонажи побывают в разных уголках заражённого города, на обретение спасения у каждого из них уйдет по нескольку дней. Окончание игры совпадает по времени и действию с событиями, отражёнными в Resident Evil 3: Nemesis: правительство США наносит ядерный удар по городу, у которого больше нет будущего.
Всего в игре имеется 5 различных сценариев:
- Outbreak (Выброс)
- Below Freezing Point (Ниже Температуры Замерзания)
- The Hive (Улей)
- Hellfire (Адский Огонь)
- Decisions Decisions (Решения, Решения)
Персонажи
- Кевин Райман — работает в полицейском департаменте города Раккун-сити. Имеет отличную атлетическую подготовку и достаточно метко стреляет. Хороший человек и закоренелый оптимист, который «не заморачивается по мелочам». Дважды проваливал вступительный экзамен в S.T.A.R.S. Любимое место отдыха — J’s Bar, куда он заходит практически каждый вечер.
- Марк Уиллкинз — ветеран вьетнамской войны, но даже разменяв пятый десяток, он всё ещё полон сил и энергии. Работает в охранной компании Раккун-сити. Он прочувствовал вкус войны и сейчас, как никогда, хочет жить в мире и спокойствии.
- Дэвид Кинг — молчаливый сантехник. Дэвид не любит говорить о своём прошлом. И не потому что он не дружелюбный, нет, он просто немногословный человек. Всегда начеку, ходит со своим ножом и подтверждает свои слова кровью.
- Джордж Гамильтон — доктор, работающий в госпитале Раккун-сити. Первоклассный хирург. Не любит быть лидером и брать все «шишки» на себя, но легко входит в доверие к людям.
- Джим Чапман — работает в метрополитене города Раккун-сити. Трусоват, умеет притворяться мёртвым, дабы зомби его не трогали. Всегда носит при себе монету, которую подкидывает, чтобы принять решение. Мастер по разгадыванию головоломок и открытию сложных механизмов.
- Ёко Судзуки — обладает отличным знанием компьютеров. Тихая, осторожная личность. Её пытливый ум удивительно тверд. Очень сложно отвлечь, когда на чем-то сосредоточена.
- Алисса Эшкрофт — журналист местной газеты. Обладает способностью выискивать ценную информацию. Сильная духом, что делает её напористой личностью, но в то же время и большой неудачницей, которая постоянно конфликтует с людьми. Несмотря на свой характер, Алисса — заботливый человек. При необходимости помогает другим.
- Синди Ленокс — самая популярная официантка в J’s Bar из-за её лучезарной улыбки. Она полезна, ориентированный на помощь человек, который всегда думает о других в первую очередь. Даже в экстремальных ситуациях она не теряет своей выдержки и готова прийти на помощь.
Разработка
Resident Evil Outbreak изначально носила название Biohazard Online. В 2002 году Capcom выпустила несколько мультимедийных продуктов с таким названием. Это были картинки, изображающие восьмерых персонажей на фоне Арклейских гор, а также фильм-трейлер, демонстрирующий систему вербального взаимодействия персонажей.
Позднее название заменили на Network Biohazard и появилась информация о том, что в игре запланировано более 20 различных сценариев. Окончательным названием стало Biohazard Outbreak (Resident Evil Outbreak за пределами Японии), с числом сценариев, уменьшенным до пяти.
Ещё пять сценариев, не вошедших в игру, но продемонстрированных в трейлере, вошли в основу продолжения игры — Resident Evil Outbreak File 2.
Оценки
Игра получила средние оценки критиков. Общее количество проданных копий составило приблизительно 1,5 миллиона. Игра заняла 32-е место в списке самых продаваемых игр Capcom.
By Doug Radcliffe
Design by Marty Smith
Capcom continues their mastery of the survivor horror genre with Resident Evil Outbreak. Players choose from one of eight playable characters; each character offers a unique personal item and special ability. Resident Evil Outbreak is also the first Resident Evil game to feature online play. Complete tasks, solve puzzles, and battle zombies individually or as a group.
This GameSpot game guide for Resident Evil Outbreak includes:
- General Strategies: Check this section for general strategies and online tips.
- Characters: This section features vital information on the eight playable characters.
- Weapons and Items: Look here for weapon and item descriptions.
- Scenario Walk-throughs: This section provides complete solutions for all five Resident Evil Outbreak scenarios.
- Event Checklists: Look here for complete event checklists for each scenario.
- Collection: This section compiles all collection items, description, and cost.
Chapter 1 — General Strategies
This chapter offers general strategies and online tips for Resident Evil Outbreak.
- Fighting isn’t always the answer. In fact, most of the time it’s not the answer! Conserving ammunition is extremely vital to long term survival. Ammunition is scarce, particularly for the better weapons (such as the shotgun or grenade launcher). Don’t shoot every zombie you encounter. Zombies aren’t quick and it’s often easy to avoid them. Utilize your character’s special abilities to aid in avoiding combat. Knock a zombie back with Kevin’s kick or elude a zombie with Yoko’s escape maneuver. Save ammunition as a last resort.
- Non-player characters join you in the single-player game. These non-player characters can stick with you or even go around alone and perform their own tasks. They will even solve puzzles and gather important scenario items on their own. This can become an issue should the NPC perish at the hand of a zombie or other enemy. Instead of joining you at a location to hand over the important item (or to use it), the NPC’s rotting corpse may be slumped in a corner and hold the only means of continuing on. If you can’t find an NPC or an important item that NPC might hold, check the map for the red «X» that denotes the location of a dead party member. Go there and search the corpse’s inventory for the item.
- In online mode, party members can work together by trading valuable items (giving an injured teammate a health item or handing over an extra weapon to a defenseless friend). Know your character’s strengths and use them to aid your online partners. Yoko’s extra inventory slots can hold extra weapons or ammunition to aid in combat situations or more health items to help the wounded; Kevin and Mark can share weaponry early because both come equipped with their own handgun; Cindy starts with and can hold extra health items; and David can create his own weapons and share them with others by using his toolbox.
- Online party members can split up and solve scenarios faster by performing different tasks at the same time—such as getting the silver and gold keys on Hellfire or the P-base and V-Poison ingredients on Decisions, Decisions. Splitting up is riskier. Fewer players means combat situations could be tougher. Plus you won’t have a friend nearby for aid with the presentation of a health item. If you have split up and perish, return as a zombie and scare the jeebies out of your fellow online players!
- You can help your online teammates with various actions. For instance, pulling a teammate up from a ledge or carrying a wounded friend through a hall. Completing scenarios successfully and quickly is about teamwork. Work together to defeat enemy creatures and share your ammo and health items to benefit the team.
Chapter 2 — Characters
This chapter provides vital information on the eight playable characters in Resident Evil Outbreak.
Kevin Ryman
| Occupation | Police Officer | |
| Age | 31 | |
| Height | 6’0″ | |
| Weight | 197 lbs. | |
| Description | He has a high-quality handgun at game start. | |
| Personal Item | Special .45 Automatic | |
| Special Actions | Kick (Circle + R1), Take Pot Shots (Hold R1, X) |
Kevin is an excellent all-around character. He starts with a sturdy handgun (with special ammunition scattered around the scenarios) and possesses a robust kick that can push back zombies so he can make a quick escape instead of using valuable ammunition. The «Pot Shots» move enhances Kevin’s aim and damage when using his .45 handgun.
Mark Wilkins
| Occupation | Security Guard | |
| Age | 52 | |
| Height | 6’2″ | |
| Weight | 222 lbs. | |
| Description | He is strong with melee weapons. | |
| Personal Item | Handgun | |
| Special Actions | Guard (Hold R1, press Circle repeatedly), Full Swing (Hold R1, X) |
Mark Wilkins is a burly security guard and, like Kevin, begins with his own handgun, which frees up other weapons for your NPC partners. Utilize Mark’s guard move to protect yourself against most enemy damage (though not virus infection). The full swing maneuver is used with melee weapons. Though he starts with a handgun, Mark is strong with melee weapons with his full swing maneuver.
Jim Chapman
| Occupation | Subway Staff | |
| Age | 24 | |
| Height | 5’9″ | |
| Weight | 55 lbs. | |
| Description | He will rarely be attacked by enemies. | |
| Personal Item | Coin | |
| Special Actions | Play Dead (Hold R1, press and hold Circle), Item Search |
Jim lacks the weapon skill of Kevin the cop and Mark the security guard but he’s effective at playing dead! Jim Chapman’s special move is playing dead. He drops down onto the ground and nearby enemies ignore his presence. Note that it does increase your virus meter. Use it to skip past tougher enemies and avoid combat.
George Hamilton
| Occupation | Doctor | |
| Age | 39 | |
| Height | 5’10″ | |
| Weight | 175 lbs. | |
| Description | He can create many types of medicines. | |
| Personal Item | Medical Set | |
| Special Actions | Tackle (Circle + R1) |
George comes equipped with a medical set, which converts herbs into various medicines and anti-viruses. If George is an NPC or part of your group online, hand over herbs to him to create antidotes, recovery medicines, and anti-viruses. Utilize the tackle move to push back enemies and avoid further combat.
David King
| Occupation | Plumber | |
| Age | Unknown | |
| Height | 6’0″ | |
| Weight | 203 lbs. | |
| Description | He can create new weapons using tools. | |
| Personal Item | Toolbox | |
| Special Actions | Lug Wrench Throw (Circle + R1), Continuous Knife Attack (Hold R1, repeatedly press X) |
A plumber by trade, David King carries a toolbox to fix and create new weaponry. For instance, David can combine a lighter and the pesticide to create a flame weapon. You may also find broken weapons in some scenarios (like the broken shotgun in Below Freezing Point) and David can fix them. David’s special actions include the lug wrench throw (which tosses one of the lug wrenches from his toolbox) and the close-range knife attack.
Alyssa Ashcroft
| Occupation | Reporter | |
| Age | 28 | |
| Height | 5’9″ | |
| Weight | 139 lbs. | |
| Description | She is a master of unlocking things. | |
| Personal Item | Lock Picks | |
| Special Actions | Back Step (Circle + R1), Take Pot Shots (Hold R1, X) |
Alyssa is the master of unlocking things. You’ll find locked cabinets, lockers, and doors within each scenario. Utilize Alyssa’s lock pick set to open the locked areas and recover the items inside. The back step helps Alyssa dodge nearby enemies and make an escape to conserve ammunition. She also features the pot shot ability, much like Kevin.
Yoko Suzuki
| Occupation | Student | |
| Age | 20 | |
| Height | 5’3″ | |
| Weight | 127 lbs. | |
| Description | She can hold more items at one time. | |
| Personal Item | Knapsack | |
| Special Actions | Escape (Hold R1, press and hold Circle) |
Yoko’s claim to fame is her large knapsack: it holds four more items in addition to her normal four inventory slots. Thus she’s a great partner in online games. Your group can hoard more health items, more ammunition, and more vital items for the scenario. Perform Yoko’s escape maneuver to avoid enemies.
Cindy Lennox
| Occupation | Waitress | |
| Age | 24 | |
| Height | 5’9″ | |
| Weight | 142 lbs. | |
| Description | She can heal her friends. | |
| Personal Item | Herb Case | |
| Special Actions | Duck (Circle + R1) |
Cindy, the waitress at J’s bar, carries an herb case that contains and can hold additional herbs. Like Yoko, Cindy is a great support party member. She can use her herbs on other party members. Use Cindy’s duck move to elude an attack and make a quick escape without wasting ammo or risking damage.
Chapter 3 — Weapons and Items
This section offers tips on using various types of weaponry in Resident Evil Outbreak. You’ll also find a list of vital items throughout the scenarios.
Melee Weapons
The benefit of melee weapons is you don’t need ammunition to use them. But the downside is you have to move very close to the enemy in order to inflict damage. The closer you are to the enemy, the greater the risk of suffering damage and increased virus infection.
Some melee weapons also suffer damage and become less potent over time. For instance, bash zombies repeatedly with the iron pipe and it begins to bend. The bent version is less effective than its straight counterpart. Melee weapons found throughout the scenarios include the iron pipe, a crutch, a butcher knife, a stick, a scrub brush, and David’s creations.
If you must kill an enemy, use melee weapons in hit and run fashion. Inflict damage then back off and avoid the counter attack. Repeat as necessary. Don’t neglect your character’s own melee attacks, particularly the special abilities of Kevin and George. These can repel an attacker and allow you to escape or counter with another weapon.
Projectile Weapons
The benefit of projectile weapons is their longer range. You can remain at a relatively safe distance and use the projectile weapon to inflict damage on the enemy. This can keep you out of the enemy’s attack range and prevent harmful damage or viral infection. But the downside is that the projectile weapons require ammunition, which is extremely scarce throughout the scenarios.
Projectile weapons include Kevin and Mark’s handguns, the handgun SG, the burst handgun (found in night reception in The Hive), the magnum revolver (found in the open window in Outbreak), the sub machinegun (found on the roof in The Hive), the assault rifle (found in the subway car in Decisions, Decisions), the shotgun, the grenade launcher, and the rocket launcher (found in the front square at the end of Decisions, Decisions).
Conserve ammunition whenever possible by simply avoiding combat. Since ammunition is so scarce, it’s much more valuable in tougher situations, such as boss battles or against faster, tougher foes. Zombies are easier to avoid. Utilize your character’s special abilities to avoid contact or being surrounded by zombies. Be accurate with your shots and don’t use the shotgun at longer range. It’s a close-range, powerful weapon. It has the ability to down multiple enemies in a single blast. For instance, wait until several zombies approach your position and pulverize them all with a close-range shotgun blast.
Health Items
The following is a list of health items and their function in Resident Evil Outbreak.
- Green Herbs: Restore health.
- Blue Herbs: Cure poison.
- Red Herbs: Mix to enhance herb.
- Green Herb and Blue Herb Mix: Restore health and cure poison.
- First Aid Spray: Stops bleeding and restore health.
- Antidote: Cure poison.
- Anti-Virus: Temporarily stops viral infection.
- Recovery Medicine: Restores health.
- Hemostat: Stops bleeding.
Vital Items
The following chart reveals the location and use of vital items found in each scenario. This chart assumes normal difficulty level. Locations may change depending on other difficulty levels.
| SCENARIO | ITEM | LOCATION | USE |
| Outbreak | Staff Room Key | J’s Bar | Opens staff room door. |
| Outbreak | Key with Blue Tag | Staff Room | Opens door into staircase leading to liquor room. |
| Outbreak | Forklift Key | Wine Room | Activates the forklift in the liquor room. |
| Outbreak | Lighter | Drawing Room or next to officer’s corpse. | Ignites the gas from the tanker truck. |
| Outbreak | Detonator Handle and Detonator Main Unit | Amongst the corpses at the end of Outbreak | Combines to form the detonator. |
| Below Freezing Point | Frozen Wrench | B6F south passage | Once thawed, used to open the panel in the B6F security center. |
| Below Freezing Point | Valve Handle | B6F security center. | Use to open the door in the security center and raise the ladder in the Duct. |
| Below Freezing Point | VP-017 | B7F chemical storage | Combine with the UMB No. 3 to create the V-Jolt. |
| Below Freezing Point | UMB No. 3 | B7F chemical disposal room | Combine with the VP-017 to create the V-Jolt. |
| Below Freezing Point | V-Jolt | Inventory combination of VP-017 and UMB No. 3 | Use on the infected plant in the Duct. |
| Below Freezing Point | Blowtorch | 4F culture room | Used to thaw the frozen corpse in the B4F low temperature laboratory. |
| Below Freezing Point | Turn Table Key | B4F turn table | Activates the train. |
| Below Freezing Point | Lab Card Key | B4F turn table | Can be used to unlock the compute room and east area passage instead of using the passcodes. |
| The Hive | Blood Packs | Several rooms including the nurses’ center and laboratory. | Used to distract the leeches and Leech Man, particularly in the fixed temperature laboratory. |
| The Hive | Card Key Level 1 | Examination Room | Opens door into B1F south passage. |
| The Hive | Card Key Level 2 | Fixed Temperature Laboratory from Leech Man corpse. | Unlocks the door to the underpass entrance. |
| The Hive | Padlock Key | B1F south passage. | Unlock the boat. |
| Hellfire | Security Room Key Card | Boiler Room | Unlocks the security office. |
| Hellfire | Silver Key | In room 101’s safe. | Used to unlock doors with the silver locks. |
| Hellfire | Gold Key | In the horse statue in room 204. Opened after solving the Europe map puzzle. | Used to open the door into the power supply room. |
| Hellfire | Red Jewel | Plant in room 306. | Inserted into bust in security office to open hidden passage. |
| Decisions, Decisions | Red Jewel | Inside the clock in the General Manager’s Office. | Inserted into the moose head in the entrance hall. |
| Decisions, Decisions | Brass Spectacles | aiting Room | Placed on the bust in the 2F passage to open the testing passage A route. |
| Decisions, Decisions | Blue Jewel | Art Gallery (pull cord in Presidents’ Room first) | Inserted into the moose head in the Entrance Hall. |
| Decisions, Decisions | Card Key | Back Square | Opens double door back into 1F passage B. |
| Decisions, Decisions | Key with Red Tag | Water Purifying Facility | Opens locked door in the water works management office into the water tank. |
| Decisions, Decisions | Sealed Reagent Case | Water Tank | Holds the P-base. |
| Decisions, Decisions | P-base | Water Works Management Office | Held in the sealed reagent case and inserted into the reagent incubator in the 3F laboratory. |
| Decisions, Decisions | V-Poison | Emission Tower B1 | Inserted into the reagent incubator in the 3F laboratory. |
| Decisions, Decisions | T-Blood | IF Passage B | Recovered from injured Thanatos R.v |
| Decisions, Decisions | Daylight | Laboratory (from Reagent Incubator after all three items inserted and incubator reactivated) | Used to cure self and the world of the virus. Can also be shot at Thanatos R in the second battle using the shooter. |
Chapter 4 — Walk-through
This section provides complete scenario walk-throughs for Resident Evil Outbreak. The walk-throughs reveal each required path through a level even though some paths may be completed by NPC characters that have joined you in the scenario. For instance, in the Hellfire scenario, while you hunt for the silver key, an NPC may complete the tasks required to gather the gold key. If you follow the walk-throughs in this section and can’t locate an important item, check the NPCs’ inventory. If you can’t find your NPC, check the map for a red «X» denoting the death and location of an NPC. Move to their body and search them for the item. Note that these scenario walk-throughs are for the normal difficulty mode. Items and puzzles can variety depending on difficulty level.
Outbreak
Briefing: It was a typical night at J’s bar. Some uninvited guests crashed the party. Our race for survival was just beginning.
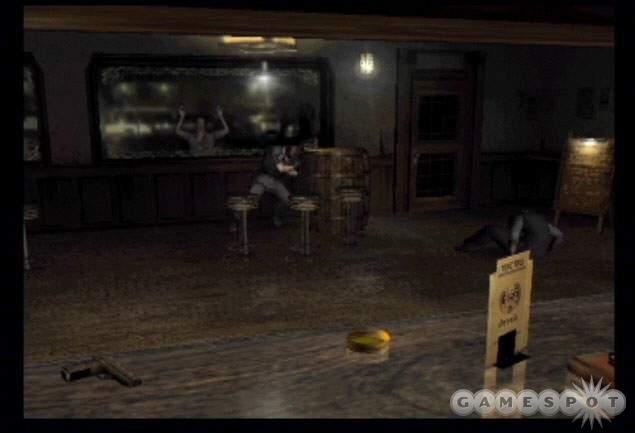
You begin inside J’s bar just before the zombies attack. All characters but Yoko begin at the bar (Yoko starts in the women’s bathroom). Grab the handgun off of the bar. If your character starts with a handgun, give it to one of the NPCs. Move toward the door and push the two barrels toward the right side in front of the door. This somewhat delays the zombies’ entrance into the bar.
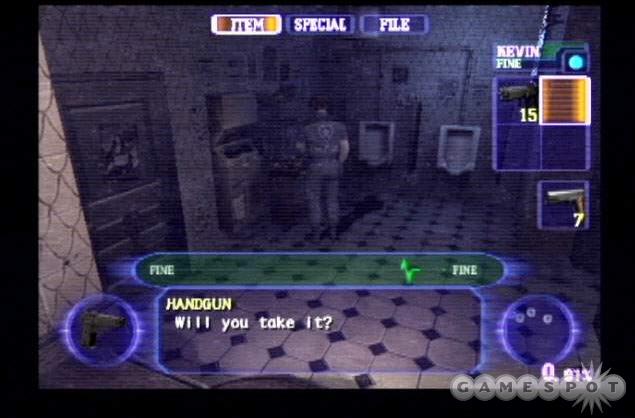
The most important item in the bar is found just to the right of most characters’ start position—it’s the staff room key. Pick up the key. Before moving onward, take a moment to explore the men’s and women’s bathrooms for additional items, including a handgun and green herb in the men’s bathroom. Once you’ve finished exploring, open the staff room door to the left of the bathrooms and enter the stairs between 1F and 2F. Don’t forget to help Bob, the security guard, if you want to meet several requirements on the event checklist. You’ll have to escort him around these rooms to keep him safe.
Ascend the staircase (grabbing the green herb after the first flight, if it’s still there) and enter the staff room at the top. Cross the staff room around toward the right side and open the door ahead into the break room (ignore the hall on the left for the moment).
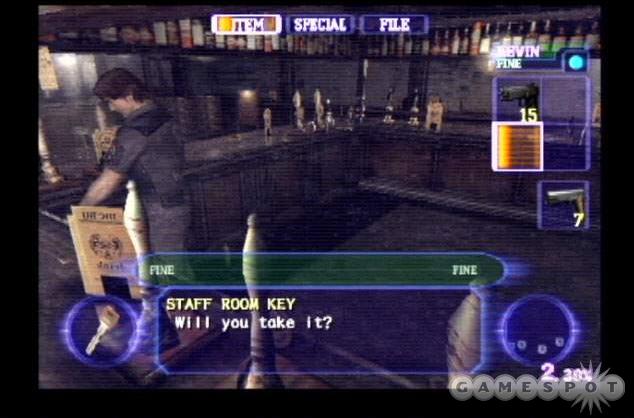
Inside the break room, check the garbage can for a blueprint of J’s bar and find handgun ammunition on the table. Return to the staff room. Turn down the hall on the right and enter the first door on your left into the locker room. Search the lockers for a variety of weaponry, ammunition, herbs, and a file. One locker can only be opened if you’re playing as Cindy. Exit the locker room and continue into the staff room area.
Face the desk on the left and pick up the nail gun. Return to the hallway entrance and spot the boards along the right wall. Move against the boards and use the nail gun to automatically barricade the hallway entrance. Return to the staff room and search the coffee table for a newspaper and the key with blue tag.
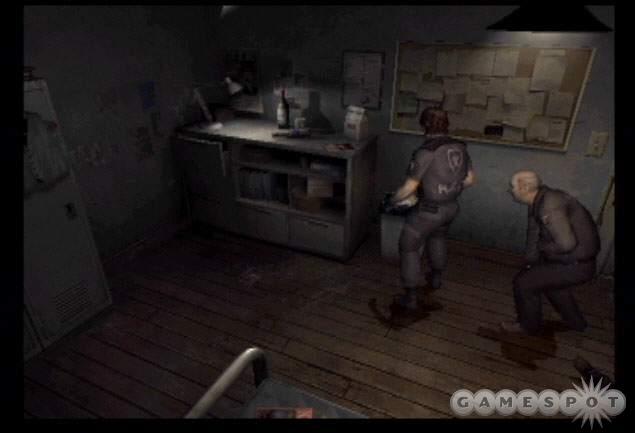
Return to the hallway and face the locked door on the left. Use the key with blue tag. Ascend the staircase and enter the liquor room at the top. Move around the left corner and search the wall of bottles for the alcohol bottle. Place it in your inventory and return down the stairs into the staff room.
Cross the staff room to the back corner and enter the owner’s room. Search the balcony for several herbs then approach the desk on the left side of the room. Face the painting—with the bottle-shaped hole—on the far wall. Use the alcohol bottle on the painting. This unlocks the desk to your left. Open and search the desk for a shotgun as well as a file.

Return into the staff room. You can search down the hall on the left and enter the drawing room. Beware of the crow that might enter the room. You can find a lighter on the table (for reading the graffiti as part of the event checklist and later for igniting the gas, though you’ll find another lighter later) and some ammunition. Alyssa can unlock the armoire on the other side of the room.
Move back up the stairs into the liquor room. Open the door on the right into the wine room. Cross the room and find the forklift key on the table. You can also save your position and find shotgun rounds on the left barrel. Exit and return into the liquor room.
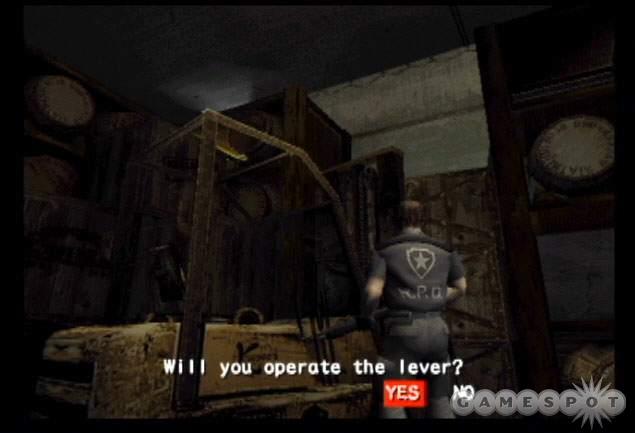
Cross to the back end of the room and find the forklift. You just recovered the forklift key so it’s time to put it to good use. Operating the forklift raises the crates between the two shelves. With the crates raised, you can now cross the top of the shelves to find the room’s ventilation shaft exit. Note that if you are helping Bob, leave him here (kill off any zombies first) while you move through the ventilation shaft. You’ll be back for him in a moment. Climb the ladder onto the first shelf and cross the crates and the second shelf to the exit shaft. You’ll enter the 3F to rooftop stairway.
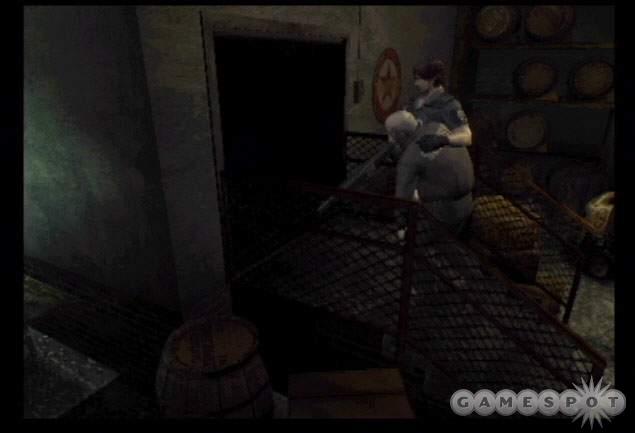
If you’re helping Bob, descend the staircase and open the door back into the liquor room. Help Bob through and up the stairs. At the top, search the desk for the storage room key. Exit through the door and onto the rooftop.
Avoid the crows and run to the opposite side of the rooftop. Use the storage room key on the door to the left and enter the storage room. It’s not mandatory but does contain some ammunition on the top shelf (use the crates). Return to the rooftop. Note that if you successfully led Bob, his journey ends on the rooftop.
Bust the section of fence across from the storage room. Use a weapon or a melee attack. Climb onto the pathway and move to the left. You’ll eventually reach a gap. Jump to the adjacent rooftop. Quickly pull yourself onto the adjacent roof (the crows can knock you off so move fast or kill the crows beforehand). Go left and enter the top floor of the apartment. Cross the room to the elevator on the right and use it. Board the elevator and enter 1F of the apartment.
Grab the herb then reach the intersection. Beware of the zombies on either side. Scamper away to the left and exit the door. You’ll reach in front of J’s bar. Descend the staircase to automatically speak with the officer.
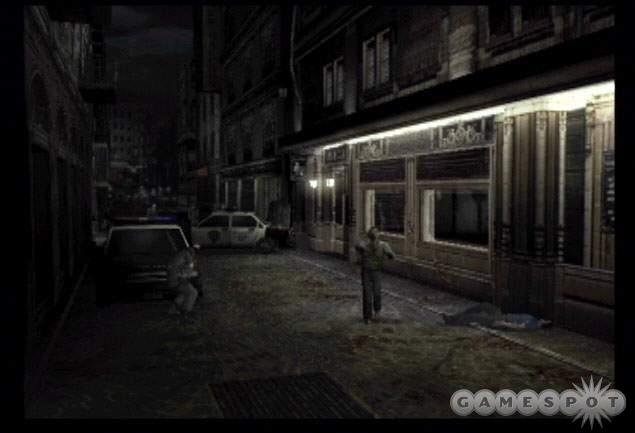
Move to the opposite side of the nearby police car and find the vicinity map. Proceed down the street away from the officer and find the police car on the left curb. Push it forward until it stops. Return to the officer and find a second police car along the street. Push it forward until it stops. Appear in the next area automatically.
Find some first aid spray on the left side. Quickly move to the double doors on the opposite side of the area and assist the officer in breaking the doorway with weaponry or other attacks. The police officer meets an untimely fate and drops some key items. Grab the lighter (which you may already have) and his shotgun if you need another weapon. With lighter in hand, move to the right toward the tanker truck.
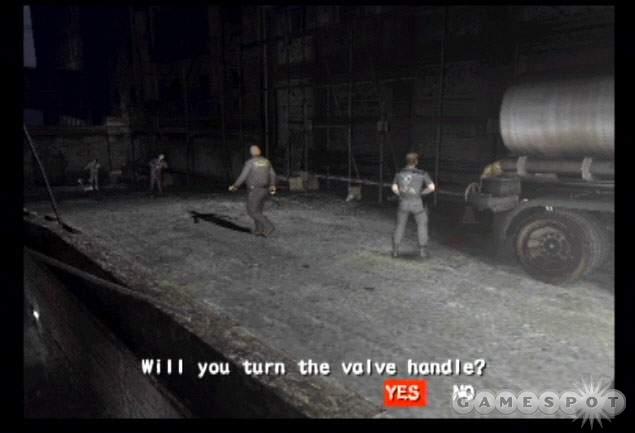
Lure the nearby zombie away so you can safely turn the valve, which releases the gas. Once it’s covering the ground, move to the edge of the flammable liquid and use the lighter (ensure your allies aren’t standing in the gas). The explosion sends you to the slope along the canal.
Move left to the edge and drop down. Cross the canal and enter the tunnel on the left side. Drop out and move toward the top of the screen. Continue to the right (grabbing the herb along the way) and ascend the ladder at the end to reach in front of the Apple Inn.
Exit the sewer and head to the right and find the police officer. When the officer stops moving, speak with him and become automatically transported to the next area. Once there, enter the police van and save your game if you wish. Collect the shotgun, ammo, and health items. Search the exterior for another herb. Move up the staircase across from the officer.

Find an herb in an alcove on the right side and search the open window for the magnum revolver. Ascend the staircase to the footbridge. Cross the bridge and descend the staircase on the right side and reach Main Street. Walk forward and speak with the officer. At this point you can complete the level by detonating the explosives or returning to the previous officer. You must do both methods to meet event checklist requirements.
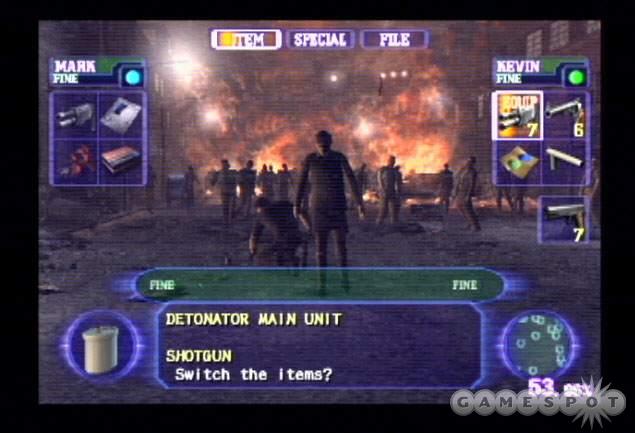
To set off the explosives, continue across from the officer to find a group of zombies around the policemen corpses and detonator pieces. Move to the right side of the street and find the detonator handle. Cross to the left side of the street and find the detonator main unit. Combine the detonator handle and the detonator main unit to form the detonator. Move to the policeman corpse in the street’s center and use the detonator.
Below Freezing Point
Briefing: We escaped the zombies and found our way into a frozen underground facility. What truths lie beyond the cries of pain in the distance?
You begin in the tunnel. Find an herb in an alcove on the left side of the screen. Wait until the cutscene then pick up an iron pipe on the left side. Move through the open door onto the platform. Go up the ledge on the bottom portion of the screen. Walk forward until the gunshot triggers the cut scene.
Follow the narrow corridor around the left corner to the elevator. Ascend the staircase until you reach the ventilation shaft on the left side of the screen. Grab hold and pull yourself inside. Crawl through and into the next section.
At this point the level splits depending on which character you picked. Kevin and Cindy enter at B6F south passage; George and David enter at B6F east passage; Alyssa and Jim enter at B7F south passage; and Mark and Yoko enter at B7F east passage. Both B6F entrances lead essentially to the same location and goals as do the B7F entrances just in different order.
Since characters can start on entirely different floors, the order of tasks below will differ between the characters that start on B6F (Kevin, Cindy, George, and David) and B7F (Alyssa, Jim, Mark, and Yoko). Characters starting on B6F will obtain the valve handle first and use it to get to B7F to collect the chemicals. Characters starting on B7F will obtain the chemicals first, use the chemicals to kill the infected plant so they can reach B6F and obtain the valve handle.
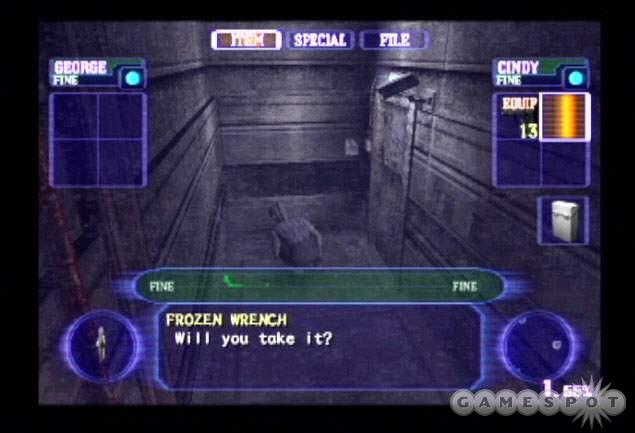
This first section describes in order how to complete the level using Kevin, Cindy, George, and David. Skip down to the BF7 laboratory to begin the walk-through as Alyssa, Jim, Mark, or Yoko.
Enter the B6F south or east passage. Kevin or Cindy should be able to find a handgun and the frozen wrench just ahead and to the right of their start position. Beware of the zombie then turn down the left hall and open the door at the end. Enter the B6F security center. Check the room for an herb and first aid. Check the map on the left side. Exit through the opposite door into the B6F east passage. Search the lobby for handgun rounds and a knife. Move through the opposite door into the B6F break room.
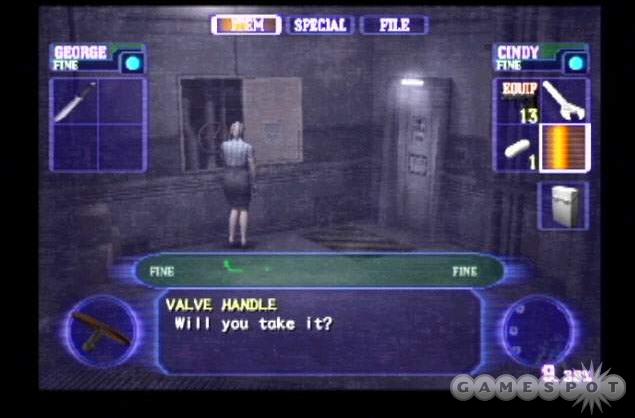
George and David begin in the east passage. Search the lobby for handgun rounds and a knife. Move through the hall into the security center. Grab the items and check the map inside then continue into the B6F south passage to recover the handgun and frozen wrench. Return to the east passage and into the B6F break room.
Search the break room for first aid (carry it to the duct later if possible), an herb, and an iron pipe and check the lockers for anti-virus. Alyssa can unlock the far right locker with a lockpick. Move into the alcove on the right side of the room to find a sink filled with hot water. Move against the sink and use the frozen wrench. The warm water melts the ice and turns the frozen wrench into just the wrench.
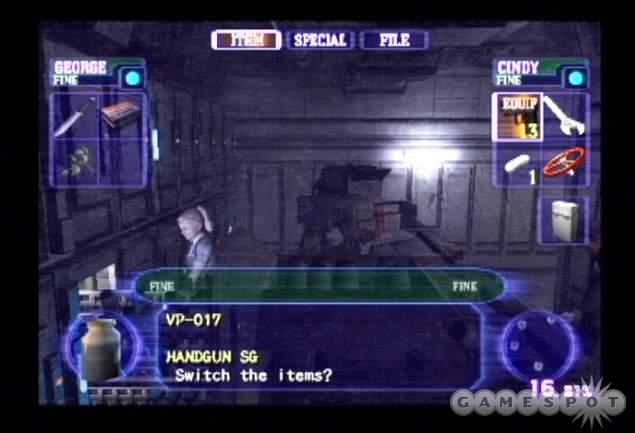
Return through the east passage and into the B6F security center. Watch out for any zombies along the way. Cross the room to the maintenance panel on the left side. Use the wrench to loosen the bolts on the panel and pick up the valve handle inside. Move in front of the door in the security room’s center. Use the valve handle on the small hole to the door’s right. Turn the handle to open the door. Search the room for ammo then descend the ladder into the B7F laboratory.
This is the floor Alyssa, Jim, Mark, and Yoko begin on. Make your way through the B7F hallway into the B7F laboratory to begin your walk-through at this point. Once you have completed these tasks and killed the infected plant, enter the B6F level and complete the walk-through at the beginning of this section to obtain the valve handle.
Search the lab for a variety of items: a file on the cabinet ahead of you, some rounds for Kevin’s weapon, a file near the computer (note the passcode), an herb, and a chemical bottle, which can be used as a thrown weapon. Move left from this room’s entrance to find the exit door in the corner. Move into the B7F east passage. Follow the passage to the door at the end and enter the B7F chemical storage.
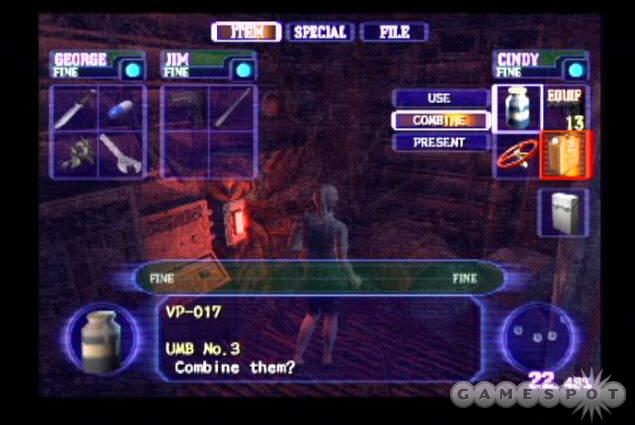
Beware of the zombies hanging out in here. Search the room for some items (handgun, chemical bottle, herb) then move to the computer in the back right corner. Use the computer and enter the passcode retrieved from the file in the laboratory. The code possibilities are 0634, 4509, and 9741. This moves the storage units on the other side of the room. Walk against the moved storage unit and pick up the VP-017.
Return into the B7F east passage and return to the B7F laboratory. Move through the first door on your left (watch out for a possible zombie intruder) and into the B7F south passage. Follow the hallway to the intersection and take the turn. Open the door and enter the B7F chemical disposal room.
Cross the chemical disposal room and approach the door to the left of the large window. Note the zombie inside: he comes alive when you enter the room. Inside the room, grab the UMB No. 3 and mix it with the VP-017 to create the V-Jolt, used to eradicate infected plants. Return to the B7F south passage and turn left at the intersection. Open the door into the Duct.
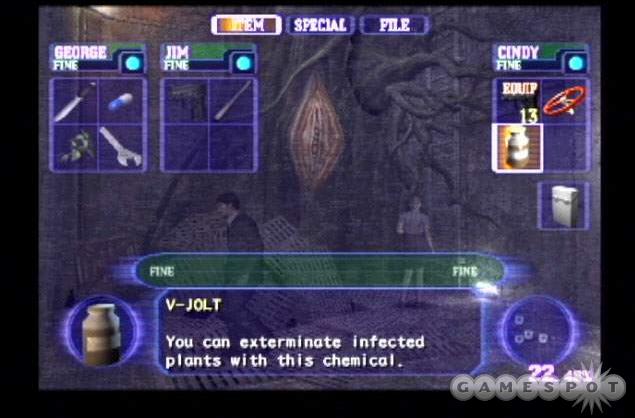
Examine the wounded man in the corner. Use first aid spray on him and be rewarded with a shotgun. Cross the area and reach the infected plant. Stand against the plant and use the V-Jolt to eradicate the obstruction. Climb the ladder to the first catwalk. This catwalk includes a typewriter for saving your game.
Use the valve handle on the hole to the right of the ladder. This raises the ladder to the upper catwalks. The two paths that were split at the scenario’s start (Kevin, Cindy, George and David on B6F and Alyssa, Jim, Mark, and Yoko on B7F) meet at this point.
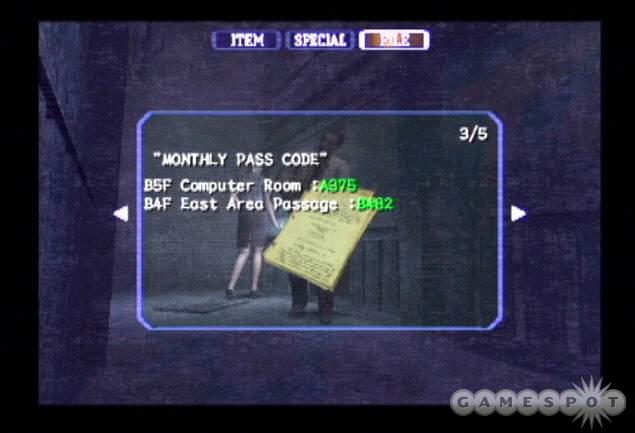
Enter the door on this second level catwalk and find yourself in the B5F area C passage. Round the corner and beware of the crawling zombie. Pick up the file next to the zombie to recover two passcodes: one for the B5F computer room and another for the B4F east area passage.
Return to the duct and descend the ladder to the first level catwalk. Open the door and enter the B6F south passage. Follow the hall back into the B6F security center. Approach the center of the security console and enter the two passcodes revealed on the memo. The code combination possibilities are C582 and A194, A375 and B482, and J126 and D580.
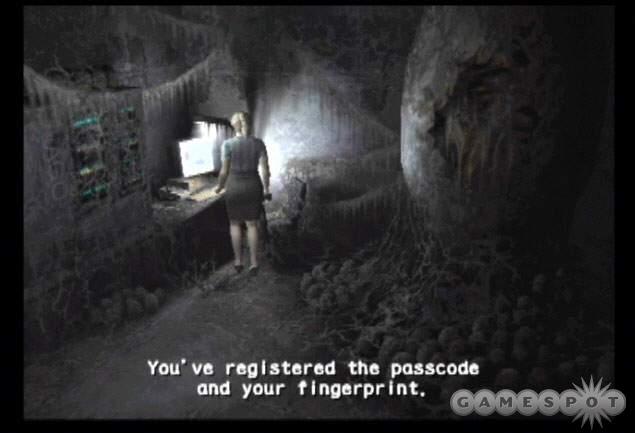
Return to the B6F south passage and the Duct. Ascend the ladder to the second catwalk. Open the door into the B5F area C passage. Enter the small crawlspace into the B5F emergency passage. Traverse the path; grab the memo inside the emergency passage to learn guest access on the computer terminal. Exit the emergency passage through the other side and into the B5F area B passage.
Search the room for an herb (if you’re Yoko, talk with the man). Cross the room to the big bay door and use the console to its right. Avoid the larvae in the next room. Open the next door into the B5F computer room (which you unlocked from the security room). Investigate the compute room for some ammo and health items. Check out the computer in the corner. Use it to log on with guest access and imprint your fingerprint into the system. If the computer doesn’t work, return to the B5F emergency passage and read the memo there.
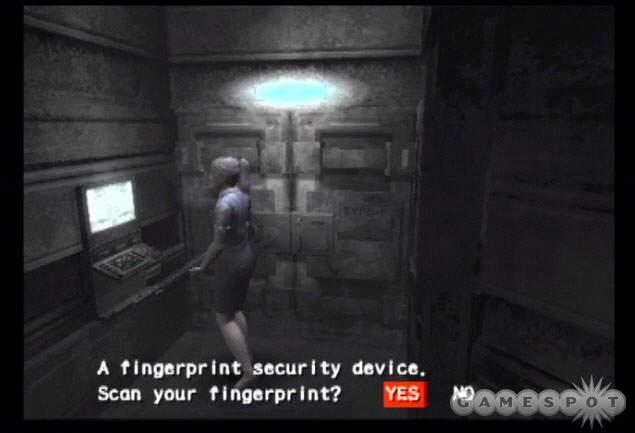
Return through area B, the emergency passage, area C, and back into the Duct. Climb the ladder to the third catwalk. Open the door into the B4F west area passage. Enter the door at the intersection into the main shaft. At this point, a gigantic mutant insect snatches your character and places you inside a cocoon back in the B5F computer room.
Wiggle your way out of the cocoon and retrace your steps back to the third catwalk and the main shaft. Avoid the giant moth and enter the center intersection. The doorways are color-coded. You arrived from the red one. Enter the blue one; this passage was previously unlocked so enter the B4F east area passage.
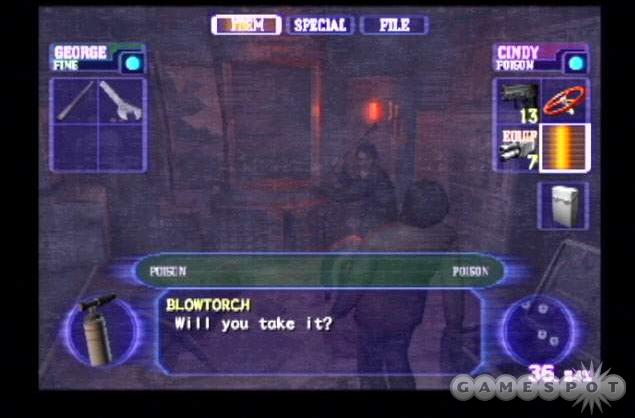
Turn right at the intersection and move past the frozen enemy. Use the console on the left. It requires a fingerprint, which you have previously entered into the system. Enter the open door into the B4F culture room. Search the room for first aid, ammo, chemical bottles, and a file.
The most important item is the blowtorch resting on the ground near the zombie. With blowtorch in hand, exit to the B4F east area passage. Follow the hall past the intersection into the B4F low temperature laboratory.
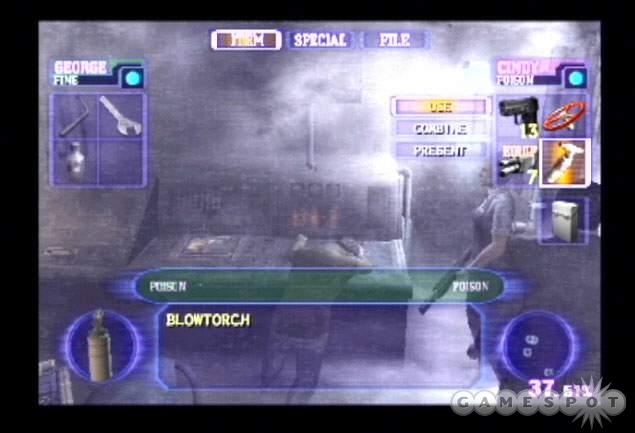
Search the misty ground for first aid, a file, and a broken shotgun (which if you’re David, you can fix). There’s also a typewriter for saving your position. Approach the corpse on the console. You can’t operate the lever with the corpse frozen to the console. Use the blowtorch to melt the frozen corpse. He automatically pulls the lever.
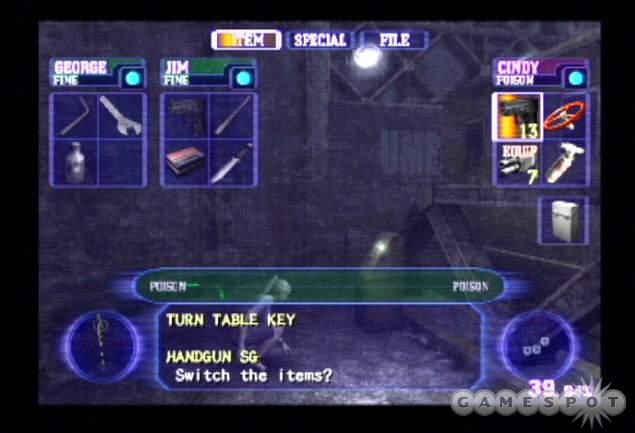
Return to the main shaft. Beware of the now-unfrozen enemies. Follow the catwalk marked with the white light and enter the B4F turn table. Avoid the zombies and approach the vehicle. Go to its left side and pick up the turn table key near the console. Use the key on the console. A countdown begins. All party members should reach the train. Hop on the back of the train to avoid the enemies in the area.
Ride the vehicle to the marshaling yard. Move forward to trigger the cut scene. Now you must battle the Mutated G. Lure the creature onto the tracks. Move around to the opposite side of the train and use the console when the Mutated G is standing on the tracks. Perform this action twice to slay the beast. You can also utilize your current weapon and ammunition to inflict damage on the creature.
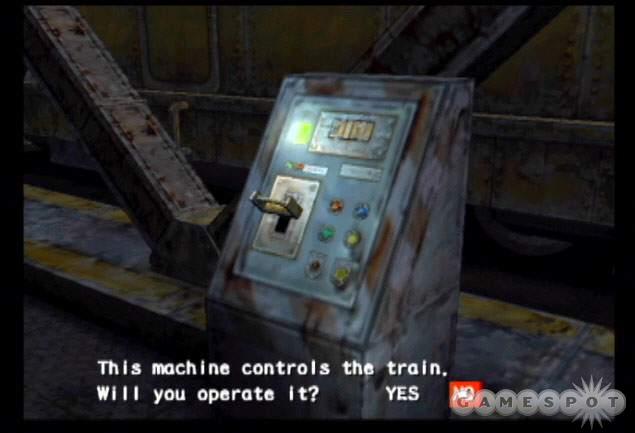
Level Note: It’s possible to unlock the B5F computer room and B4F east area passage using a key card instead of the passcodes entered into the security room terminal. If you want to use the key card (which is also on the event checklist) instead of the passcode, move through the main shaft on the upper catwalk. Enter the B4F turn table and find the lab card key on the left side of the train. This card key opens the computer room and east area passage.
The Hive
Briefing: A hospital transformed into some kind of hive full of squirming «things.» We pushed on and pushed the repulsive image from our mines.
You begin in a hospital room. Explore the room (push the call button if you wish) then move toward the exit to trigger the cut scene. Exit the room into the 3F passage. Follow the hallway around to the left into the far hallway. Open the door on the left into room 302. Search the room for a couple melee weapons (stick and crutch) as well as a file on the bed. Next open the locker to find a handgun. This triggers the arrival of the Leech Man.
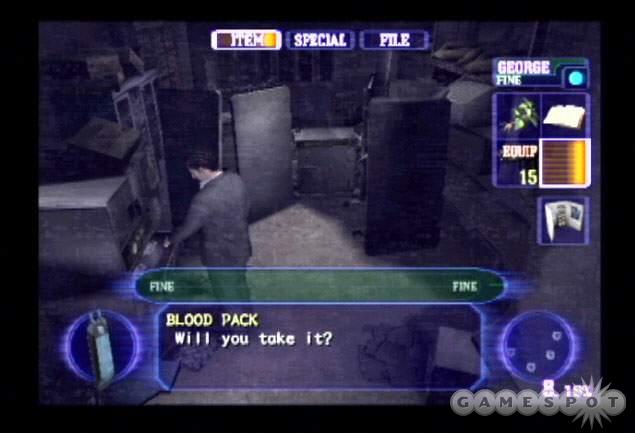
The Leech Man will follow you around the hospital. If you take too long in a certain area, the Leech Man drops from a vent shaft to cause problems. Don’t bother wasting ammunition on the Leech Man. You can’t kill him until later in the scenario. You can temporarily distract the Leech Man (and the smaller leeches) with blood packs. You’ll find them throughout the hospital. Place the blood pack on the ground to occupy the leeches and their Leech Man master while you explore the room or make an escape.
After the Leech Man drops into the room, escape back to the 3F passage. Return to the opposite end of the hall and enter the nurses’ center on the left. Find a map on the left side and a file on the right side of the room. Approach the back end of the room to trigger a cut scene. If a cut scene isn’t shown here then you didn’t get the handgun from room 302 to trigger the Leech Man’s arrival.
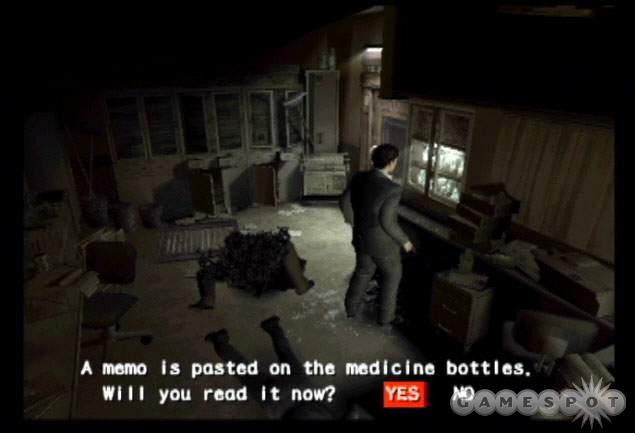
Climb over the obstruction and search the alcove for first aid and blood packs in the cooler on the right side. Fill your inventory with as many packs as possible. Avoid the zombie as you leave the room. Call the elevator opposite of the nurses’ center and proceed to floor 2F. Exit the lift into the 2F passage.
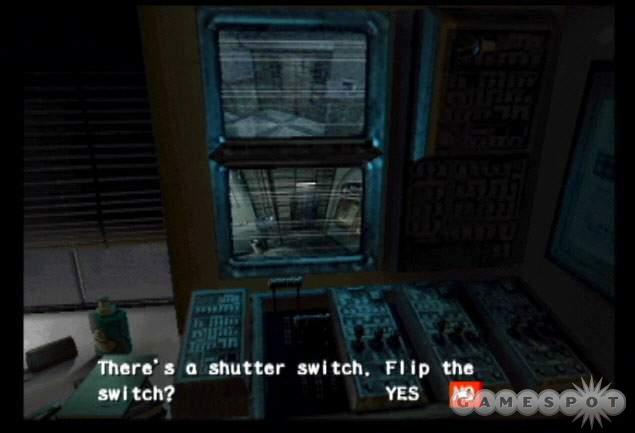
Search the lobby for items then cross to the opposite side of the hall to find the door leading into room 202. Comb the room for a variety of items including an herb, file, ammunition, and melee weapons. You can even press that nurse’s call button again if you wish! Return to the 2F passage and enter the nurses’ station opposite the elevator.
Examine the medicine cabinet on the right side of the room. When you do, a couple leeches pop out. Eliminate the leeches with a weapon or place a blood pack on the ground to distract them. Examine the medicine cabinet again to read the memo. Find the cooler in the room and open it to find more blood packs. Exit to the 2F passage and find the staircase. Descend to the 1F passage.
The large shutter ahead of you is closed and can be opened. Open the door to the shutter’s left into night reception. Search the back of the room for the burst handgun then move to the control panel and use it to open the shutter. Return to the 1F passage. Use the panel next to the shutter to open the passage. Enter the hall.
Search the hall for an herb. Cross to the opposite side and use the switch to open another shutter. Enter the door on the left to move into the office. Check the table for a memo containing a code number. Check the cabinets for medicine and beware of the leech hopping around the room. Move through the opposite door into the doctors’ station. Search the room for an herb, anti-virus, and ammunition as well as files containing important code numbers. Note the birthday of September 30th is actually an optional code.
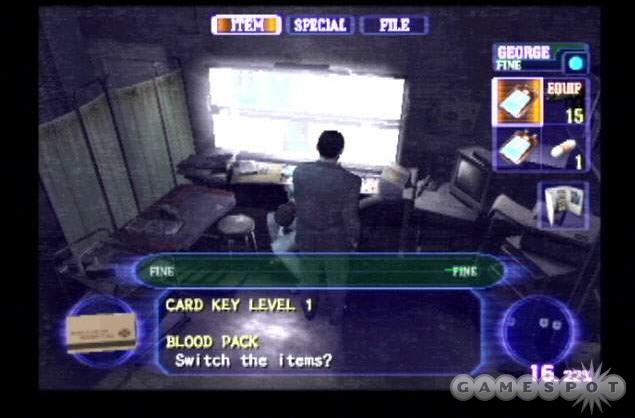
Return to the hall and move through the other door into the central waiting room. From here enter the door into the examination room. Inside the examination room and search the slumped over corpse at the desk to find the card key level 1. A thorough search also reveals some health items. Move through the opposite door into the treatment room. Gather the health items and save your game at the typewriter if necessary.
Return to the examination room and enter the other door into the locker room. Search the lockers for items but beware of zombies. The far left locker is locked and can be opened if you’re playing as Alyssa. Return to the 1F passage. Use the elevator and descend to floor B1F.
Exit the elevator, snag the herb nearby, and enter the opposite door into the reposing room. Search the room for some items and a typewriter to save your game. Return to the B1F passage. Move down the hall and enter the first door on the left: it’s the elevator control room. Comb the room for files and items. Approach the console: it’s covered with leeches! Shoot the leeches or use a blood pack to distract them.
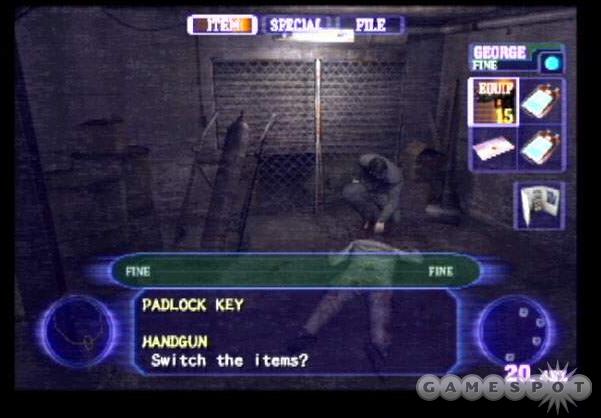
You need to enter a passcode into the console to unlock a new floor for the elevator. Check your files to find the code. One file, the chemical code message, reveals the following: C-4041, E-1160, T-7221, K-1210, I-2005. A second file, reveals a number with a plus sign. To get the code, add the number with the plus sign to the C, E, T, K, and I numbers. The possible codes are 8211, 5315, and 3555. Also, enter the code 0930 (the birthday date from the doctors’ station) to gain access to the rooftop.
Exit the control room and go left. Approach the door at the end of the hall (avoid the nearby zombie) and use the card key level 1 on the card reader. Open the door into the B1F south passage. Cross the hallway (snagging the herb near the entrance and the iron pipe at the intersection) and beware of the zombie at the intersection. Follow the hall into the waste liquid disposal room.
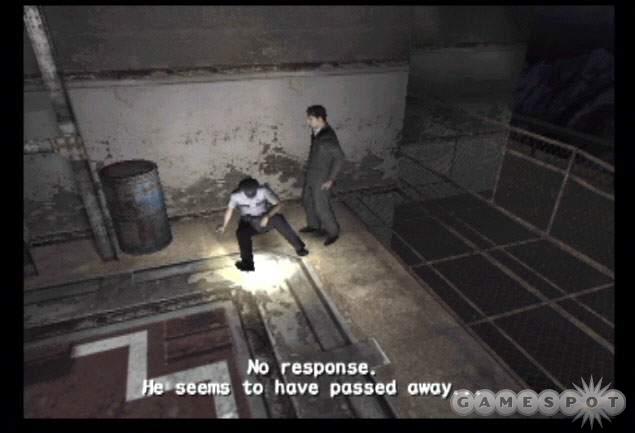
Search the left side for an herb but beware of the curious leech. Descend the stairs and avoid another leech lurking in the shallow water. Cross to the water to the far alcove and grab the padlock key near the corpse. Watch out; it’s a zombie! Exit the room and return to the elevator in the B1F passage.
If you unlocked the elevator’s ability to reach the rooftop, make the side trip now. The rooftop contains ammunition, some pesky crows, and a wounded police officer. Speak with the officer. You may be able to recover the sub machinegun from him. Return to the elevator and descend to B2F and into the B2F passage.
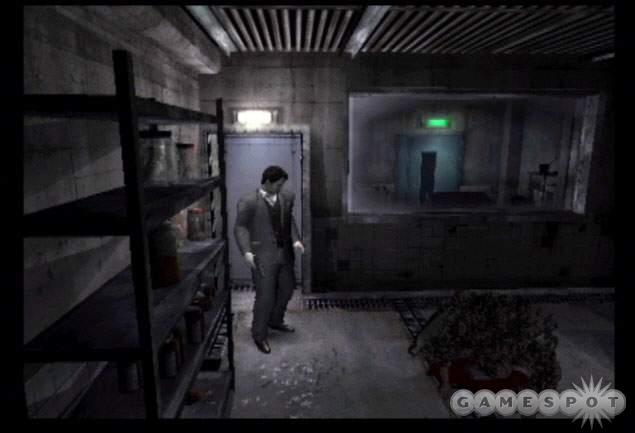
Open the door on the right into the laboratory. Search the lab for more blood packs (you’ll need one soon so save it) and a couple files. Exit through the opposite door into the fixed temperature laboratory. Ignore the console and enter the door into the small room. Place a blood pack in the middle of the room. Wait until the Leech Man enters the lab then lure him toward the blood pack.
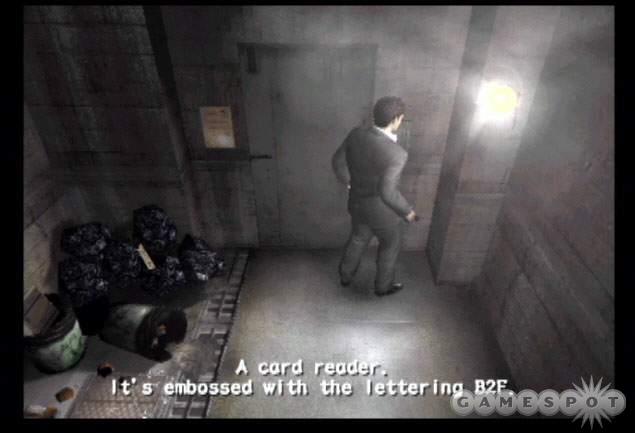
While the blood pack occupies the Leech Man, return to the console and switch the temperature to «High». After the cut scene, switch the temperature to «Stop» and check around the console for some health items. Reenter the room containing the former Leech Man. Search around the corpse for the card key level 2.
Exit the labs and return to the B2F passage. Move down the hallway and use the card key level 2 on the card reader at the end of the hall. Open the door into the underpass entrance. Check this storage area for ammo and health items. Approach the padlock next to the boat. Use the padlock key on the padlock to free the boat. Use the boat.
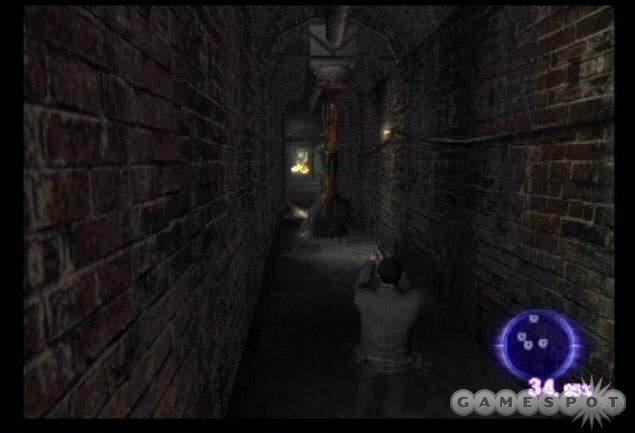
You must now battle the gigantic leech. Utilize any weaponry in your inventory while keeping your distance. The leech can submerge its front end and attack your character’s torso from long-range. You can also lure the leech down the canal back toward the boat. Shoot the valve wheels on the ceiling with the gigantic leech moves underneath to inflict damage. You can also use black tank on the bridge section and even the gas tank near the boat’s original position to defeat the creature. Don’t stand close to the explosions. Once he falls to your attacks, run down the canal past the leech’s start position to complete the level.
Hellfire
Briefing: While avoiding blasts of flame, we proceeded through the smoke-encased hotel. We now knew the true meaning of «Hell.»

Walk forward and check out the map engraving. Turn around and enter the door to move inside the boiler room. Check near the fireman’s body to examine the radio. You’ll also find the fireman’s id tags here. A second fireman lies at the top of the ladder with similar id tags. Finish the mission with both id tags to meet an event checklist requirement. Climb the ladder and move past the second fireman. Open the door into the area marked Apple Inn square.

Avoid the zombies in this hallway. Search the right side for a handgun then move around to the left side and enter the door. You’re now in the northwest passage 3. Turn left and approach the open window. Check room 301 on the left for an herb. Exit through the open window.
You must traverse the narrow ledge going to the left. Pestering crows hover around the area and can knock you off the ledge. Pull up quickly before a crow attacks again. Avoid getting blasted by the fire out of the windows around the other side (the blast can kill a crow if you’re fortunate). Upon reaching the fire escape, descend the ladder and enter the door into the northwest passage 2.
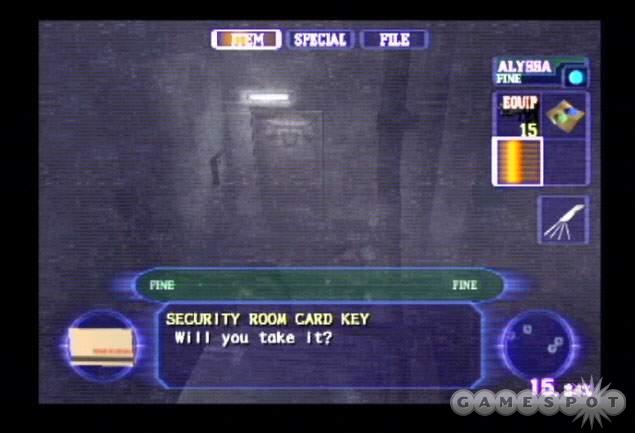
Turn right and open the first door on the left into the store room, which contains various items such as ammo, files, and health items. Return to the passage and enter the next door on the left into the corridor. Follow the corridor to the boiler management office. Continue into the next room, the boiler room, and find the security room card key on the ground. Return to the northwest passage 2.
Move to the end of the hall and enter room 201. Avoid the zombie inside and search the area for anti-virus and an herb. Return to the passage and make your way back to the first door to the left of the entrance. Use the security room card key to unlock the door. Enter the security room. Search it for files and health items. There’s also a typewriter to save your game.
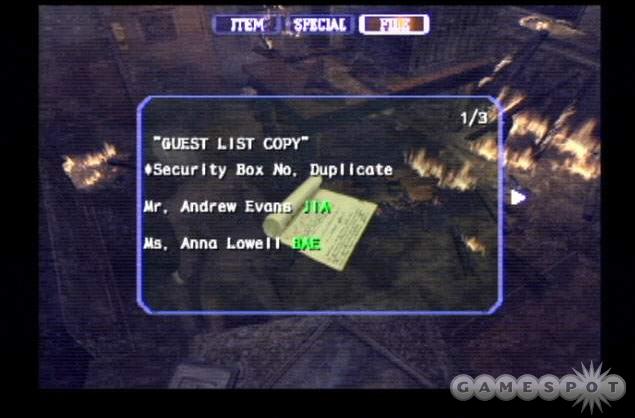
Return to the northwest passage 2 and follow the hall to the end door on the right. It’s the owner’s room. There’s a typewriter here if you need it. Push the wooden crate through the hole in the floor. Once it falls, drop down into the room below. Search the room for an important file, the guest registry. Note the guest names and the corresponding three digit code. Exit the door into northwest passage 1.
Search the bench for a shotgun but beware of the monster on the ceiling above you. He’s hard to see just don’t linger in the hall for very long. Open the door to its right into room 101. Search the room for health items then grab the file on the bed. It reveals who is staying in this room. Match the name with the guest registry file in your inventory. Approach the safe on the back wall and enter the corresponding code. Open the safe and collect the silver key.
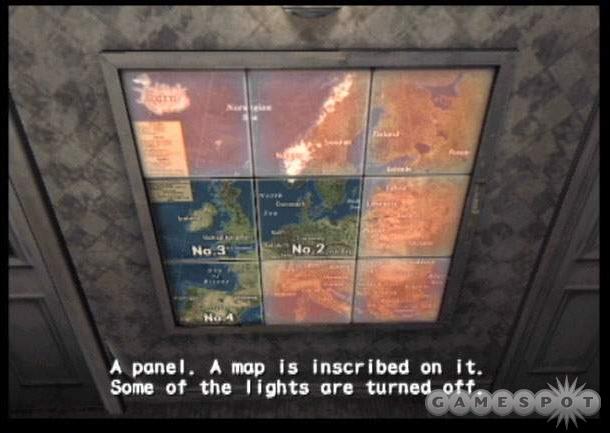
Exit room 101 into the northwest passage 1 and find the first door on your right. It’s locked and requires the silver key. Use the silver key to unlock the door and enter the corridor. Search the right alcove for a handgun then move through the fiery hall to the left side. Enter the second door on the left into room 102. Search the room for a file and check out the painting of Finland. This painting, and others like it in rooms 103, 104, and 202 are part of the Europe map puzzle. Leave the painting alone until you enter room 204.
Search the remaining rooms in the hall (103 and 104) for various items, ammo, files, etc. Break down locked doors or, if you’re Alyssa, use a lockpick. Move down the corridor to its end to find the stairs leading to the second story. Open the first door on the right into room 204.
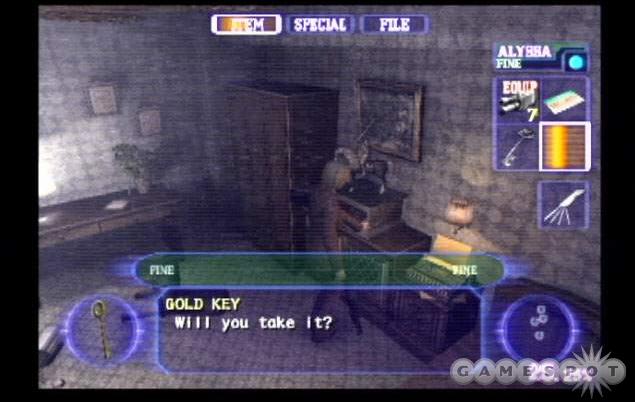
Check out the four panels on the wall. These are part of the Europe map puzzle. Your goal is to light all four panels. If any panels are not lit, you must return to room 102, 103, 104, or 202 (down the hall from your current location) and use the switch on the painting. Each panel corresponds to a particular painting. Panel 1 corresponds to room 102; panel 2 corresponds to room 103; panel 3 is matched with room 104; and panel 4 is matched with room 202.
With all panels lit, move to the opposite side of the room and use the horse statue to open and recover the gold key. Search the rest of the room for a file, health items, and ammo.
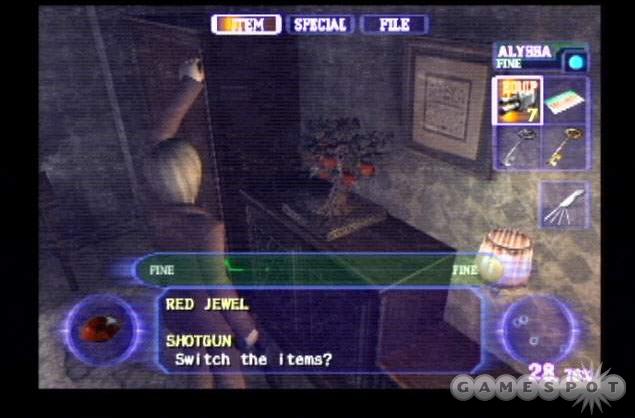
Return to the lounge stairs and take the stairs to the third floor. Open the door into the area marked Apple Inn square. Beware of the zombies and enter the door on the left into the room marked 30X. Search the room for ammo then find the hole on the right wall. Crawl through the hole into the adjacent room. Find the grenade launcher inside. Exit the room into the Apple Inn square.
Enter the door on the right into room 306. Grab the red jewel from the plant on the cabinet. Exit room 306 and descend the staircases. Return through northwest passage 2 and into the owner’s room. Drop down the hole in the owner’s room and enter northwest passage 1. Find the locked door requiring the gold key. Use the gold key to enter the power supply room.
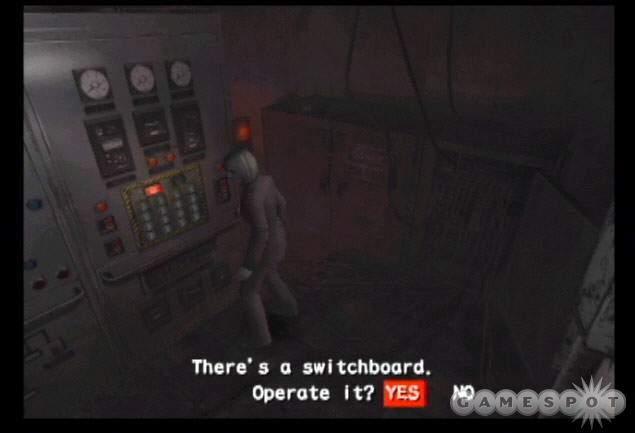
Use the control panel inside the power supply room. The goal is to turn all of the console lights on. Hitting a button causes all buttons that surround the one you touched to light up. With all buttons lit, the power is restored. Exit the power supply room back into the northwest passage 1.
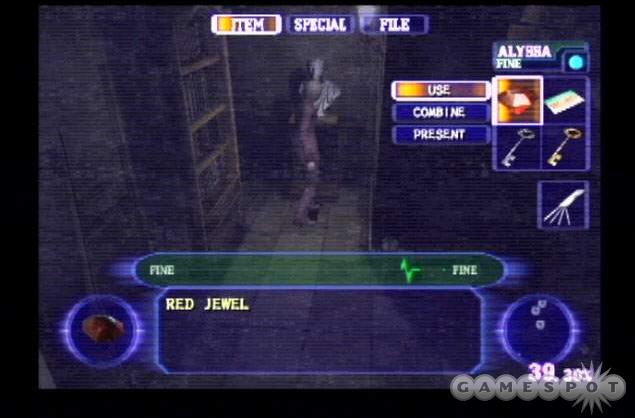
Enter the owner’s room and climb the table and pull yourself up to the upper section. Exit into the northwest passage 2. Head left and follow the hall to the security office on the right side. Move left around the far side of the table. Push the bookcase toward the statue to reveal the hidden passage. Use the red jewel on the statue to open the passage. Enter the Apple Inn front lobby.
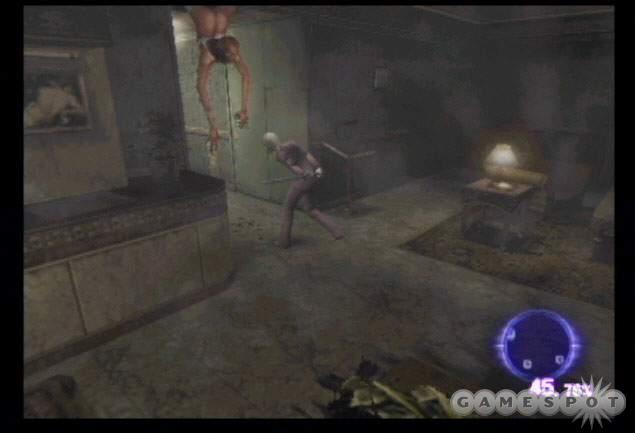
Search the upper catwalks for items then use the box to the left of the ladder. Lower the ladder and descend into the room. Search the lower section for items before attempting to exit through the left hall. This triggers the scenario’s boss encounter with the Regis Licker. Additional lickers enter the lobby and attack from ground level. To get rid of the ground lickers, ring the bell on the front desk. You could also shoot them but it’s better to use your ammunition on the boss creature.
When battling the Regis Licker, attempt to remain out of range of its tongue attack. Watch the Regis Licker and when it begins to shake, retreat quickly and out of range to avoid taking damage from the attack. Defeat the creature and leave the inn to complete the mission.
Decisions, Decisions
Briefing: Destruction. Darkness. We quickly raced forward knowing all too well that each decision we made held newfound hope or endless despair.
You begin in the entrance hall. Head left into the bottom left corner to find the 1F passage elevator. You’ll use this eventually to visit other floors. Check the area for several items, including map, herb, typewriter for saving the game, iron pipe, and a lighter. Return to the entrance hall and cross to the other side. Enter the center door into the student affairs office.
Beware of the zombie in the room and grab a file off of the desk. Search the back left side of the room for a book containing information on the moose in the entrance hall. Exit through the rear door into the general manager’s room. Find a memo on the left desk with unusual number patterns. It’s actually part of a puzzle in the same room. The number patterns form four larger numbers. For instance, in normal mode notice how the first page has the number four down the center. It basically forms the number «1» in the pattern. Check the other pages for similar patterns.
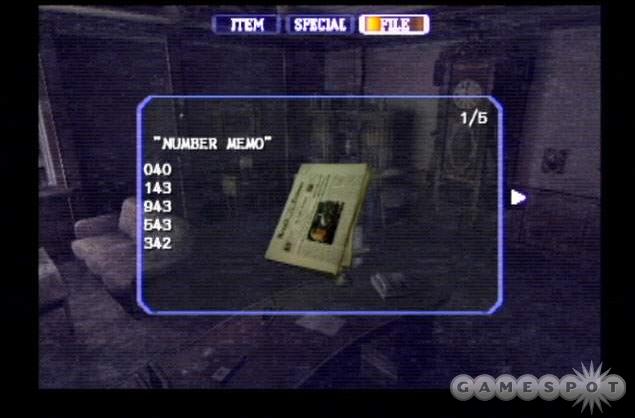
Find the painting in the front left corner of the room. Use the painting to reveal a switch. Push the switch to activate the clock on the back wall of the room. Grab the nearby herb then approach the clock. You must set the clock to the four digit time revealed in the «number memo» in your inventory. The time setting differs for each difficulty level. On easy, set the clock to 3:25; on normal, set the clock to 10:05; on hard, set the clock to 7:40; and on very hard, set the clock to 2:50. Grab the red jewel from the clock.
Return through the student affairs office to the entrance hall. Move along the right side of the entrance hall to find the moose head on the wall. Use the red jewel on the moose head to place the jewel in the moose’s eye. Return to the other side of the entrance hall (where the student affairs entrance is) and enter the door in the right corner. You’ll enter the waiting room.
Move through the hall and avoid the zombie. Search the bust on the right side to grab the brass spectacles. Enter the far door into 1F passage A. Continue through this hallway. Note that you can push the dressers along the side walls and reveal hidden items (such as ammo or health items). Traverse the hall around a couple corners to the back door. Enter 1F passage B.
Check the debris on the left side near the door to find a part of a torn menu with a three digit number. Continue through the hall and take note of the switch on the right wall. You don’t need to use it now but it comes into play later in the scenario. Grab the blue herbs or leave them there for later. Enter the door on the right back into the entrance hall.
Climb the staircase inside the entrance hall and search the upper floor for items. Enter the door into the 2F passage. Once again you can push the dressers to reveal items. Avoid the zombie presence here and move to the very back of this passage to find another bust. Place the brass spectacles on the bust to reveal a hidden door to the bust’s left side.
Return down the hall to the two doors on either side. Enter the door on the right into the drawing room. Search the room for herbs, a weapon, and anti-virus. Find the next door and enter the Presidents’ room. Search the room for ammo (if your character fits under the couch) and other items before moving to the fireplace. Pull one of the cords within the fireplace. Hopefully a random zombie appears, which completes the «pulled string, zombies came out» segment of the event checklist.
Return to the 2F passage and enter the door across the hall into the art gallery. Cross the room to the statue and grab the blue jewel. Comb the room; if you’ve selected Cindy as your character, play the piano as part of the event checklist. Return to the 2F passage. Enter the secret door opened by the brass spectacles. It’s testing passage A, a shortcut downstairs. Cross the catwalk and descend the ladder. Search the bottom route for some ammo before exiting through the left door into the 1F passage B. Move through this passage back to the entrance hall.
Go to the far side of the entrance hall to the moose head on the wall. Insert the blue jewel into the moose’s eye to open a secret passage behind your position. Enter the passage into the study room. Descend the staircase until the cut scene interrupts the action.
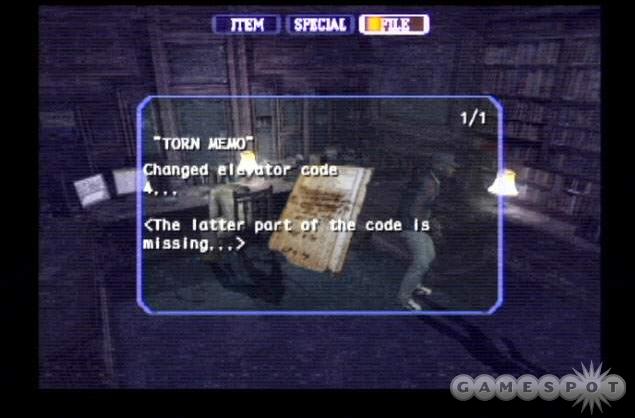
Search the right side of the desk for the second piece of the torn memo. Look at the left side of the desk for a couple notes pertaining to ingredients. Search the rest of the room for anti-virus and other health items before ascend the stairs back into the entrance hall.
Return to the 1F passage elevator and operate the console. The code to activate the elevator is on the two pieces of the torn memo. Possible code variants include 4161, 4284, 4032, and 4927. Enter the appropriate activation code into the console then cross the room to the elevator. Proceed to floor B2F and reach the B2F passage elevator.

Search this storage area for various items, such as the first aid spray on the top of the shelf (use the crates to reach it). You’ll even find poor George slumped against the wall—unless you’re playing as George. Find the door and exit to the pier. Cross the pier going left quickly to avoid becoming shark food. Grab the first aid spray if you wish but be quick. Ascend the stairs on the far side. Find a couple herbs near the next door that leads into the back square.
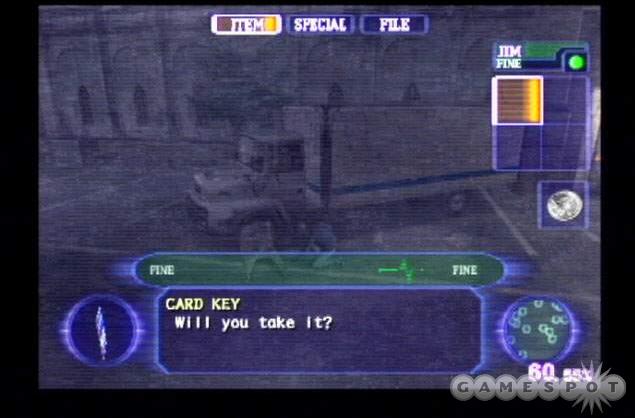
Watch the cut scene then move forward and find the blue herb. Move along the right side of the area to find the corpse near the truck. Grab the card key off of the corpse. It unlocks the double door to the right of the truck, which you can do so now but don’t move inside yet. Continue across the courtyard and pick up the memo next to the other corpse. Go to the back wall on the right side and check out the map. Now move to the left side and descend the ladder through the man hole.
You’ll enter the water purifying facility. Walk onto the crates and jump up to grab the overhead bar. Shimmy to the right until you’re over the platform. Drop down. Check the platform for ammunition before moving to the left side and finding another overhead bar. Jump straight up and grab hold. Shimmy to the left and drop down on the adjacent walkway. Search the top of the crate for some ammo for Kevin’s weapon and down the catwalk to the far left to find standard handgun rounds.
Move along the catwalk to the far right until the cut scene interrupts the action. Now you have a new beast to deal with. Search the ground to the right of the container to find the key with a red tag. Return to the left and avoid or kill the beast. Check the restroom (the left door) to find a grenade launcher. Exit and open the door on the right into the underground tunnel. Cross the catwalk and open the door into passage B.
Walk through the passage and search the alcove on the right for handgun rounds. Continue to the far door into passage A. Avoid the zombie and grab the herb. Enter the door on the left to search the shed for the grenade launcher, which uses the burst rounds. Exit and continue past the shelving and into the next door. Open the door at the end of the passage on the right. It leads to the water works management office.
There’s a reagent case on the table. If you’ve been reading files you’d know this could be important. Unfortunately it’s not sealed so it’s worthless. Discard it. Check the table for ammo and a file. There’s also a typewriter in the room to save your game and an herb in the corner. The container holding the «P-base» is here but you’ll need to find a sealed reagent case to obtain the item.
Cross the room to the locked door. Use the key with a red tag to unlock the door. Enter the water tank. Grab the nearby herb then cross toward the bottom of the screen. Avoid or kill the beasts and go up toward the console. Use the console to release the water tank lock. Pick up some ammo on the right side.
Retrace your steps through passage A and B into the water purifying facility. Return over the overhead bars to the room’s start location. After the second bar, go left through the opening in the fence. Open the door on the right into the quality assurance testing room. Search the room for an herb and anti-virus then enter the far door into the underground tunnel. Avoid the beast and enter the water tank across the catwalk.
Move along the narrow ledge and climb the short ladder. Enter the door. Search the small room for the sealed reagent case. Exit the water tank. Instead of returning to the purifying facility, go to the left. Drop down and you’re back to where you unlocked the water tank. Climb out of the water to avoid the beasts. Return to the water works management office.

Use the sealed reagent case on the P-base to obtain the item. Retrace your steps through passage A and take the intersection to the right into the east waterway. Avoid the zombie and descend the ladder into the shallow water. Avoid another creature and proceed through the gate into the west waterway. Follow it to a ladder. Climb up to the B2F passage elevator. Go left to the lift and hit the 3F button. Enter the 3F passage elevator.
Search the desks to the far left for ammo. Enter the door on the right into the experiment preparation room. Check the front desk near the computer for anti-virus and the desk in the back of the room for medicine. Exit through the door into the laboratory. Move to the back of the room and use the sealed P-base on the reagent incubator. Return to the lift and descend to the B4F. Enter the B4F corridor.
Move right to the intersection. Grab the antidote off of the ground. Move forward and find additional items as well as check the map on the wall before entering the door on the left into the access waterway. Move toward the stairs and encounter the first of several giant spiders. Blow it apart with the grenade launcher or just avoid the creature. Go down the hall and drop down into the sewer.
Avoid the next spider as you move forward. Beware of another in an alcove on the left. Climb up and move into the next area marked the old subway tracks. Check the platform on the left for a blue herb (which cures poison from the spiders if necessary). Run down the tracks to the right until you enter the old subway tunnel.
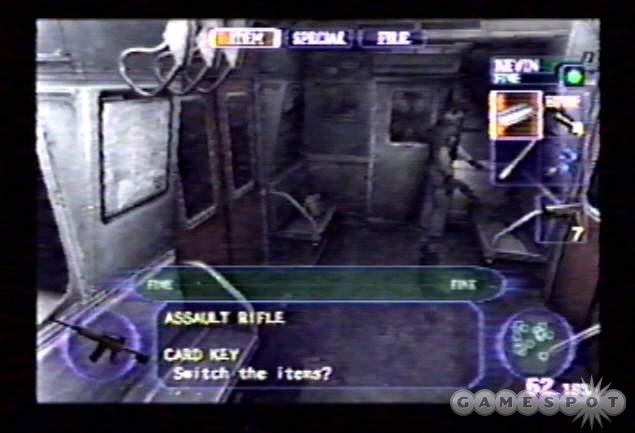
Enter the subway car on the left. You’ll enter the south car. Search the car (while avoiding the zombie inside) for first aid and the assault rifle on the seat in the upper left corner. Enter the door into the north car. Avoid the zombies while picking up the assault rifle ammo on the seat to the right. Exit the car into the old subway tunnel.
Avoid the wasps overhead and run to the blue door on the right side of the screen. Enter the T-shaped passage. Grab the first aid out of the container on the right. Check the underground management office. Grab the anti-virus and check out the map to the right of the typewriter (which can be used to save your game). You’ll also find some ammo on the table. Exit and check the control room across the hall for additional items. Exit and cross the hallway to the end. Crawl through the hole at the bottom of the wall into the emission tower inside wall.
Grab the herb. Wasps fly overhead and will knock you off the ledge. Take time to shoot them if you have the ammo. Just face a particular direction and wait for the wasp to attack above you. Shoot until it dies. Move across the ledge toward the right side. Reach the next platform and pick up the blue herb. Crawl through the hole into the storeroom.
Avoid the zombie inside. Cross the room and push the cabinet (to the door’s right) to the right to expose a hole. Crawl through the hole into the spare power supply room. Use the console. It’s another light switch puzzle. When you hit a button, that button and the adjacent diagonal button will be lit up. Solve the puzzle to restore power to the emission tower.
Exit the door into the T-shaped passage. Turn left at the intersection and climb the ladder into the emission tower access passage. Go left at the intersection and find some pesticide spray in the container (handy if you’re David). Proceed to the right and find a handgun in the back corner. Open the door on the left wall into the emission tower lower part.
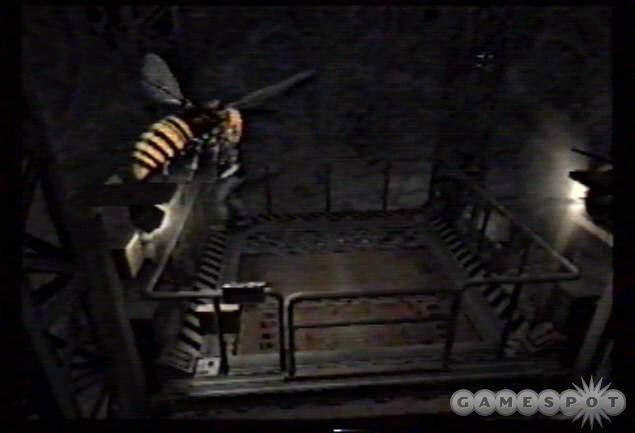
Beware of the wasps and run onto the lift. Use the lift to enter the emission tower elevator. More wasps buzz overhead. Get into the back left or right corner of the lift and aim upward. When a wasp moves overhead to attack, shoot it. Try to conserve ammunition with accurate shots. Reach the top of the lift into the emission tower B1.
Move around the catwalk and find the V-Poison on the back wall (within the wasp construction). Return to the staircase and ascend. Search the upper catwalk for a blue herb then enter the door into the emission tower station. Grab the anti-virus off of the table. Check the room for first aid and antidote. Exit through the back door into the back square. Enter the double door on the left side of the screen (unlocked with the card key earlier) and return to the 1F passage B.
Maneuver through the passage and open the first door on the right. You’re back in the entrance hall—and so is Thanatos R, the creature from earlier. Avoid him and return inside the 1F passage elevator. Use the lift to 3F into the 3F passage elevator. Move through the experimental preparation room and into the laboratory. Use the V-Poison on the reagent incubator. Two items down, one item to go.
Retrace your steps back into the entrance hall. You must retrieve the last item from Thanatos R. Lure him into 1F passage B. Remember the switch that activated the electricity-filled wires? You must lure Thanatos R under those wires. Move through the waiting room then 1F passage A and into 1F passage B. Remain near the switch until Thanatos R arrives. Shock him when he’s underneath the wires by pressing the button. Pick up the T-Blood.
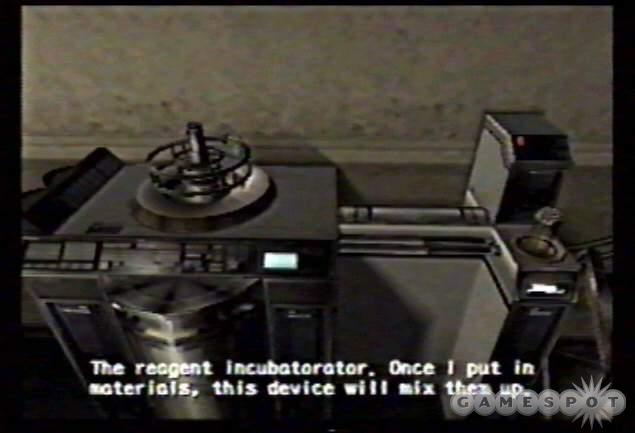
Return to the entrance hall and the 1F elevator passage. Use the elevator to 3F and the 3F elevator passage. Move through the experimental preparation room and the laboratory. Use the T-Blood on the reagent incubator.
Exit through the opposite door into the machine storage room. Search the first lab room for various items, including first aid and a grenade launcher. Move through the plastic drapery into the second hall. At this point you have a few decisions to make. You can save the world and yourself by operating the computer console and use it to reactivate the reagent incubator. It makes «Daylight» which counteracts the virus. Use the left computer to reactivate the reagent incubator. You can also pick up a handgun near the doctor’s body.
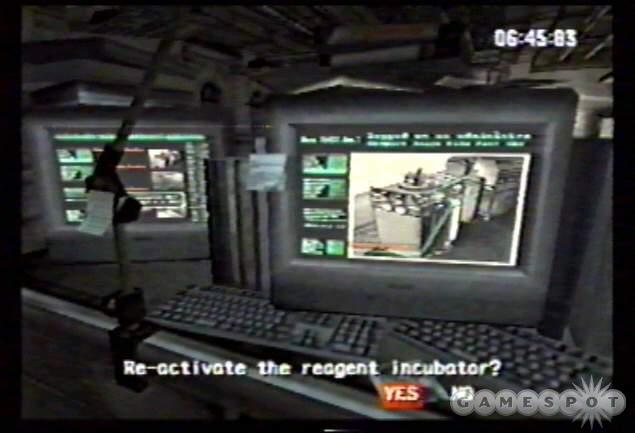
Use the computer on the right to release all locks on the University premises. Even if you don’t want to use the reagent incubator to save the world, you still need to use the lock release. If you want to use the reagent incubator, return through the machine storage room and into the laboratory. Move to the incubator and wait for it to eject vials of «Daylight» and grab one to use on yourself and at least one other to end the game with (to save the world!). You can also grab a third if you want to use a vial on Thanatos R to make the end battle a bit easier. The incubator takes time to create each vial but you should have plenty of time on the countdown.
Return to the second hall and enter the door on the left side of the room. It’s testing passage B. Cross the catwalk and descend the ladder. Go through the door into the Presidents’ room. Continue through the drawing room and into the 2F passage. Use testing passage A, which you opened earlier. Avoid Thanatos R and go left into the testing passage. Descend the ladder and exit into 1F passage B.
Avoid Thanatos R and move down the hall to the double doors in the back corner. Exit into the back square. Proceed toward the exit door. It’s in the back right corner near the map. Wait for the countdown to conclude. After the cut scene, avoid the wasps and proceed again to that exit door. Open it into the unloading passage.
Proceed through the passage. Check the scaffolding on the left (and subsequently the top of the truck) for first aid and ammo. Descend to ground level and climb across the truck. Check the hole for more first aid. Continue forward until the cut scene interrupts the action. It’s time to battle Thanatos R.
Stay away from Thanatos R; don’t get close or you’ll suffer at the hands of his melee superiority. Instead, use weapon fire to break the red cabinet on the right wall (near the scaffolding). It contains the rocket launcher. Keep away from Thanatos R and wait for him to jump. Watch the ground for Thanatos’ shadow and move away. He’s vulnerable after landing. Blast him with a rocket. You automatically move to the canal and then the front square upon defeating Thanatos R the first time.
That’s right…the first time. He’s back. You have a couple options here, particularly if you brought an extra vial of «Daylight» with you. Approach the tank and search to its left for the augule shooter. Load it with daylight and blast Thanatos R. There’s also ammo scattered around the area as well as health and herbs to aid you in the battle.
Chapter 5 — Event Checklist
Each scenario has its own event checklist. How many events you complete is displayed as a percentage at the completion of the scenario. Many events require several play-throughs to complete. For example, unlocking the cabinet in Outbreak requires you to play as Alyssa but seeing the «Will Becomes a Zombie» movie requires you to play as Mark. This section reveals all scenario events.
Outbreak
- Built barricade out of barrels.
- Used the staff room key.
- Used the key with blue tag.
- Solved painting puzzle.
- Unlocked cabinet (Alyssa).
- Moved cargo with the forklift.
- Destroyed the liquor room shutter.
- Destroyed the wire fence on rooftop.
- Read all graffiti with lighter.
- Built patrol car barricade.
- Opened gasoline tanker valve.
- Used lighter to ignite gas.
- Activated detonator.
- Killed zombies and survived.
- Escaped zombies and survived.
- Collected every map.
- Died in gas tanker explosion.
- Obtained «newspaper.»
- Obtained «Jack’s memo.»
- Obtained «Staffer’s diary.»
- Obtained «Raccoon Today.»
- Screams in Owner’s Room.
- Screams in front of J’s Bar.
- Saw crow fly into Drawing Room.
- Saw bottle break in Wine Room.
- Saw bottle break in Liquor Room.
- Watched «Will Becomes a Zombie.»
- Watched «Bob Gets Worse.»
- Watched «Bob’s Suicide.»
- Watched «Bob Becomes A Zombie.»
- Watched «Block Staff Door.»
Below Freezing Point
- Unlocked locker with lockpick.
- Thawed frozen wrench.
- Used wrench to open panel.
- Used valve handle to open door.
- Watched «Used V-JOLT in B7F.»
- Watched «Used V-JOLT in B6F.»
- Watched «Monica Runs Off.»
- Watched «Giant Moth Attacks.»
- Watched «Comp. Room Desertion.»
- Unlocked comp. room w/ card key.
- Unlocked shutter with card key.
- Watched «Used Blowtorch.»
- Used key to activate turn table.
- Watched «Missed Turntable.»
- Watched «Turn Table Goes Up.»
- Moved locomotive.
- Watched «Defeated Mutated G.»
- Received item from researcher 1.
- Got item from staffer 2 (Yoko).
- Obtained map.
- Obtained «Top-Secret Memo.»
- Obtained «Researcher’s Will.»
- Obtained «Staff Memo.»
- Obtained «Interoffice Memo.»
- Obtained «Laboratory Memo.»
- Obtained «Monthly Passcode.»
- Obtained «Custodian’s Diary.»
The Hive
- Used blood pack.
- Used nurse call button.
- Turned on power to shutter.
- Opened 1F shutter.
- Opened waiting room shutter.
- Had the elevator get to B2F.
- Elevator reached the roof.
- Bled at the nurse station.
- Unlocked door with B1F card key.
- Unlocked door with B2F card key.
- Defeated Leech Man.
- Got item from policeman on roof.
- Used chain key.
- Obtained map.
- Obtained «Male Nurse’s Diary.»
- Obtained «Repair Work Memo.»
- Obtained «Setting Manual.»
- Obtained «Piece of Memo.»
- Got «Chemical Code Message.»
- Obtained «Researcher’s Diary.»
- Got «Investigation Request.»
- Obtained «Card Memo.»
- Obtained «Security Guard Guide.»
Hellfire
- Unlocked safe in Room 101.
- Provided emergency power.
- Solved Europe map puzzle.
- Dropped crate in owner’s room.
- Destroyed 304/305 wall.
- Cleared with Len’s tag.
- Cleared with Charlie’s tag.
- Cleared w/ Len and Charlie tags.
- Obtained Apple Inn map.
- Obtained «Guest Memo 1.»
- Obtained «Guest Memo 2.»
- Obtained «Guest Memo 3.»
- Got «Janitor’s Repair Memo.»
- Got «Janitor’s Daily Report.»
- Obtained «Guard’s Notebook.»
- Obtained «Emergency Manual.»
- Obtained «Guest List Copy.»
- Got «Hotel Charge Breakdown.»
- Defeated Regis Licker.
- Opened secret security rm. door.
- Used motorized ladder.
- Used card key to unlock door.
- Used passcode to unlock door.
- Used gold relief key.
- Used silver relief key.
- Rang front lobby bell.
- Opened locker with lockpick.
- Watched «Call over Radio.»
- Watched «Regis Licker Appears.»
Decisions, Decisions
- Set red jewel in stuffed moose.
- Set blue jewel in stuffed moose.
- Solved Cuckoo Clock Puzzle.
- Played Piano on 2F (Cindy).
- Pulled string, moved statue arm.
- Pulled string, zombies came out.
- Used V-Poison in incubator.
- Used P-Base in incubator.
- Used T-Blood in incubator.
- Used Daylight on yourself.
- Killed Thanatos R with Daylight.
- Defeated Thanatos R.
- Routed power to emission tower.
- Unlocked door with red tag key.
- Unlocked water tank area door.
- Electrocuted Thanatos.
- Thanatos came in through window.
- Collected every map.
- Used glasses on 2nd statue.
- Used card key.
- Input elevator code.
- Unlocked university doors.
- Restarted Incubator.
- Obtained «Geneology Facts.»
- Obtained «Blood-Stained Memo.»
- Got «Reagant Generation Memo.»
- Obtained «Section of a Diary.»
- Obtained «Cable Repair Request.»
- Obtained «Torn Memo.»
- Obtained «Part of Torn Memo.»
- Obtained «Orders.»
- Obtained «Peter’s Diary.»
- Obtained «Number Memo.»
- Watched «Peter Discovered.»
- Watched «Hunter Gamma Appears.»
- Watched «UBCS vs Thanatos.»
- Watched «Greg and Yoko.»
- Watched «ED: Chopper Zombie.»
- Watched «ED: George and Cindy.»
- Watched «ED: Mark and David.»
- Watched «ED: Kevin and Jim.»
- Watched «ED: Alyssa and Yoko.»
- Watched «ED: Regretful Ending.»
- Watched «ED: Remain Hopeful.»
Chapter 6 — Collection
This section reveals collection items and their cost.
Gallery
| NUMBER | ITEM | COST |
| 001 | Kevin — CG Picture of Character | 500 |
| 002 | Kevin — Character Collage | 500 |
| 003 | Kevin — CG Picture of Character | 1000 |
| 004 | Mark — CG Picture of Character | 500 |
| 005 | Mark — Character Collage | 500 |
| 006 | Mark — CG Picture of Character | 1000 |
| 007 | Jim — CG Picture of Character | 500 |
| 008 | Jim — Character Collage | 500 |
| 009 | Jim — CG Picture of Character | 1000 |
| 010 | George — CG Picture of Character | 500 |
| 011 | George — Character Collage | 500 |
| 012 | George — CG Picture of Character | 1000 |
| 013 | David — CG Picture of Character | 500 |
| 014 | David — Character Collage | 500 |
| 015 | David — CG Picture of Character | 1000 |
| 016 | Alyssa — CG Picture of Character | 500 |
| 017 | Alyssa — Character Collage | 500 |
| 018 | Alyssa — CG Picture of Character | 1000 |
| 019 | Yoko — CG Picture of Character | 500 |
| 020 | Yoko — Character Collage | 500 |
| 021 | Yoko — CG Picture of Character | 1000 |
| 022 | Cindy — CG Picture of Character | 500 |
| 023 | Cindy — Character Collage | 500 |
| 024 | Cindy — CG Picture of Character | 1000 |
| 025 | All Characters — CG Picture of Character | 1000 |
| 026 | All Characters — Alternate Character Design | 2000 |
| 027 | All Characters — Alternate Character Design | 2000 |
| 028 | CG Picture of Creature | 500 |
| 029 | CG Picture of Creature | 500 |
| 030 | CG Picture of Creature | 500 |
| 031 | CG Picture of Creature | 500 |
| 032 | CG Picture of Creature | 500 |
| 033 | CG Picture of Creature | 500 |
| 034 | CG Picture of Creature | 500 |
| 035 | CG Picture of Creature | 500 |
| 036 | CG Picture of Creature | 500 |
| 037 | CG Picture of Creature | 500 |
| 038 | Alternate Character Design | 2000 |
| 039 | Alternate Character Design | 2000 |
| 040 | Alternate Character Design | 2000 |
| 041 | Alternate Character Design | 2000 |
| 042 | Alternate Character Design | 2000 |
| 043 | «Outbreak» Background Image | 1500 |
| 044 | «Outbreak» Background Image | 1500 |
| 045 | «Outbreak» Background Image | 1500 |
| 046 | «Outbreak» Background Image | 1500 |
| 047 | «Below Freezing Point» Background Image | 1500 |
| 048 | «Below Freezing Point» Background Image | 1500 |
| 049 | «Below Freezing Point» Background Image | 1500 |
| 050 | «Below Freezing Point» Background Image | 1500 |
| 051 | «The Hive» Background Image | 1500 |
| 052 | «The Hive» Background Image | 1500 |
| 053 | «The Hive» Background Image | 1500 |
| 054 | «The Hive» Background Image | 1500 |
| 055 | «Hellfire» Background Image | 1500 |
| 056 | «Hellfire» Background Image | 1500 |
| 057 | «Hellfire» Background Image | 1500 |
| 058 | «Hellfire» Background Image | 1500 |
| 059 | «Decisions, Decisions» Background Image | 1500 |
| 060 | «Decisions, Decisions» Background Image | 1500 |
| 061 | «Decisions, Decisions» Background Image | 1500 |
| 062 | «Decisions, Decisions» Background Image | 1500 |
Costume
| NUMBER | ITEM | COST |
| 001 | Kevin: New Costume — Six Shooter | 10000 |
| 002 | Mark: New Costume — Casual Wear | 10000 |
| 003 | Jim: New Costume — Slam Dunk | 10000 |
| 004 | George: New Costume — Outdoor Expert | 10000 |
| 005 | David: New Costume — Club Scene | 10000 |
| 006 | Alyssa: New Costume — Street Scene | 10000 |
| 007 | Yoko: New Costume — Spring Fashion | 10000 |
| 008 | Cindy: New Costume — On Vacation | 10000 |
| 009 | Alyssa: New Costume — Midnight Caller | 30000 |
| 010 | Yoko: New Costume — Gym Class | 30000 |
| 011 | Cindy: New Costume — Funny Bunny | 30000 |
| 012 | NPC in «Outbreak» — Bob, Mark’s friend | 4000 |
| 013 | NPC in «Outbreak» — Will, J’s Bar waiter | 3000 |
| 014 | NPC in «Outbreak» — Raymond, Arthur, Aaron, Dorian | 5000 |
| 015 | NPC in «Outbreak» — Elliott, Eric, Harry | 5000 |
| 016 | NPC in «Outbreak» — Yoko, J’s Bar disguised | 8000 |
| 017 | NPC in «Below Freezing Point» — Monica, Umbrella researcher | 5000 |
| 018 | NPC in «Below Freezing Point» — Scholar 1 and 2, Umbrella researcher | 3000 |
| 019 | NPC in «The Hive» — Hursh, Raccoon Hospital Doctor | 4000 |
| 020 | NPC in «The Hive» — Doctor 1, 2, and 3, Raccoon Hospital | 6000 |
| 021 | NPC in «The Hive» — Nurse 1 and 2, Raccoon Hospital | 5000 |
| 022 | NPC in «Hellfire» — Danny and Danny: B, fire fighter | 5000 |
| 023 | NPC in «Hellfire» — Gill and Gill: B, fire fighter | 5000 |
| 024 | NPC in «Hellfire» — Fireman, fire fighter | 3500 |
| 025 | NPC in «Decisions, Decisions» — Peter, George’s friend | 3000 |
| 026 | NPC in «Decisions, Decisions» — Greg, ex-Umbrella researcher | 10000 |
| 027 | NPC in «Decisions, Decisions» — Frank, Raccoon University Professor | 3000 |
| 028 | NPC in «Decisions, Decisions» — UBCS 1 and 2, UBCS member | 8000 |
| 029 | NPC in «Decisions, Decisions» — U.S.S. 1, U.S.S. special forces | 5000 |
| 030 | NPC in «Decisions, Decisions» — Man 1, 2 , 3, 4, and 5 | 10000 |
| 031 | Mr. Red, Mr. Blue, Mr. Green, Mr. Gold, Mr. Black | 100000 |
Movie
| NUMBER | ITEM | COST |
| 001 | Resident Evil Outbreak Opening Movie | 500 |
| 002 | «Outbreak» — Kevin Opening and Ending Movie | 500 |
| 003 | «Outbreak» — Mark Opening and Ending Movie | 500 |
| 004 | «Outbreak» — Jim Opening and Ending Movie | 500 |
| 005 | «Outbreak» — George Opening and Ending Movie | 500 |
| 006 | «Outbreak» — David Opening and Ending Movie | 500 |
| 007 | «Outbreak» — Alyssa Opening and Ending Movie | 500 |
| 008 | «Outbreak» — Yoko Opening and Ending Movie | 500 |
| 009 | «Outbreak» — Cindy Opening and Ending Movie | 500 |
| 010 | «Outbreak» — Scene 01 Movie | 500 |
| 011 | «Outbreak» — Scene 02 Movie | 500 |
| 012 | «Below Freezing Point» — Opening Movie | 500 |
| 013 | «Below Freezing Point» — Scene 01 Movie | 500 |
| 014 | «Below Freezing Point» — Scene 02 Movie | 500 |
| 015 | «Below Freezing Point» — Scene 03 Movie | 500 |
| 016 | «Below Freezing Point» — Scene 04 Movie | 500 |
| 017 | «Below Freezing Point» — Kevin Ending Movie | 500 |
| 018 | «Below Freezing Point» — Mark Ending Movie | 500 |
| 019 | «Below Freezing Point» — Jim Ending Movie | 500 |
| 020 | «Below Freezing Point» — George Ending Movie | 500 |
| 021 | «Below Freezing Point» — David Ending Movie | 500 |
| 022 | «Below Freezing Point» — Alyssa Ending Movie | 500 |
| 023 | «Below Freezing Point» — Yoko Ending Movie | 500 |
| 024 | «Below Freezing Point» — Cindy Ending Movie | 500 |
| 025 | «The Hive» — Opening Movie | 500 |
| 026 | «The Hive» — Scene 01 Movie | 500 |
| 027 | «The Hive» — Scene 02 Movie | 500 |
| 028 | «The Hive» — Scene 03 Movie | 500 |
| 029 | «The Hive» — Kevin Ending Movie | 500 |
| 030 | «The Hive» — Mark Ending Movie | 500 |
| 031 | «The Hive» — Jim Ending Movie | 500 |
| 032 | «The Hive» — George Ending Movie | 500 |
| 033 | «The Hive» — David Ending Movie | 500 |
| 034 | «The Hive» — Alyssa Ending Movie | 500 |
| 035 | «The Hive» — Yoko Ending Movie | 500 |
| 036 | «The Hive» — Cindy Ending Movie | 500 |
| 037 | «Hellfire» — Scene 01 Movie | 500 |
| 038 | «Hellfire» — Scene 02 Movie | 500 |
| 039 | «Hellfire» — Scene 03 Movie | 500 |
| 040 | «Hellfire» — Kevin Ending Movie | 500 |
| 041 | «Hellfire» — Mark Ending Movie | 500 |
| 042 | «Hellfire» — Jim Ending Movie | 500 |
| 043 | «Hellfire» — George Ending Movie | 500 |
| 044 | «Hellfire» — David Ending Movie | 500 |
| 045 | «Hellfire» — Alyssa Ending Movie | 500 |
| 046 | «Hellfire» — Yoko Ending Movie | 500 |
| 047 | «Hellfire» — Cindy Ending Movie | 500 |
| 048 | «Decisions, Decisions» — Scene 01 Movie | 500 |
| 049 | «Decisions, Decisions» — Scene 02 Movie | 500 |
| 050 | «Decisions, Decisions» — Scene 03 Movie | 500 |
| 051 | «Decisions, Decisions» — Kevin Ending Movie | 500 |
| 052 | «Decisions, Decisions» — Mark Ending Movie | 500 |
| 053 | «Decisions, Decisions» — Jim Ending Movie | 500 |
| 054 | «Decisions, Decisions» — George Ending Movie | 500 |
| 055 | «Decisions, Decisions» — David Ending Movie | 500 |
| 056 | «Decisions, Decisions» — Alyssa Ending Movie | 500 |
| 057 | «Decisions, Decisions» — Yoko Ending Movie | 500 |
| 058 | «Decisions, Decisions» — Cindy Ending Movie | 500 |
| 059 | Epilogue Movie | 500 |
Sound
| NUMBER | ITEM | COST |
| 001 | «Outbreak» Background Music | 1000 |
| 002 | «Below Freezing Point» Background Music | 1000 |
| 003 | «The Hive» Background Music | 1000 |
| 004 | «Hellfire» Background Music | 1000 |
| 005 | «Decisions, Decisions» Background Music | 1000 |
| 006 | Battle Background Music | 2000 |
| 007 | Miscellaneous Background Music | 2000 |
| 008 | Kevin Voice | 2000 |
| 009 | Mark Voice | 2000 |
| 010 | Jim Voice | 2000 |
| 011 | George Voice | 2000 |
| 012 | David Voice | 2000 |
| 013 | Alyssa Voice | 2000 |
| 014 | Yoko Voice | 2000 |
| 015 | Cindy Voice | 2000 |
| 016 | Miscellaneous Voice | 2000 |
Extra
| NUMBER | ITEM | COST |
| 001 | «Hard Mode» is now available for all scenarios. | 2000 |
| 002 | «Very Hard Mode» is now available for all scenarios. | 3000 |
| 003 | «Lone Wolf Mode» is now available for all scenarios. | 10000 |
| 004 | «Infinity Mode» is now available for all scenarios. | 50000 |
The products discussed here were independently chosen by our editors.
GameSpot may get a share of the revenue if you buy anything featured on our site.
By Doug Radcliffe
Design by Marty Smith
Capcom continues their mastery of the survivor horror genre with Resident Evil Outbreak. Players choose from one of eight playable characters; each character offers a unique personal item and special ability. Resident Evil Outbreak is also the first Resident Evil game to feature online play. Complete tasks, solve puzzles, and battle zombies individually or as a group.
This GameSpot game guide for Resident Evil Outbreak includes:
- General Strategies: Check this section for general strategies and online tips.
- Characters: This section features vital information on the eight playable characters.
- Weapons and Items: Look here for weapon and item descriptions.
- Scenario Walk-throughs: This section provides complete solutions for all five Resident Evil Outbreak scenarios.
- Event Checklists: Look here for complete event checklists for each scenario.
- Collection: This section compiles all collection items, description, and cost.
Chapter 1 — General Strategies
This chapter offers general strategies and online tips for Resident Evil Outbreak.
- Fighting isn’t always the answer. In fact, most of the time it’s not the answer! Conserving ammunition is extremely vital to long term survival. Ammunition is scarce, particularly for the better weapons (such as the shotgun or grenade launcher). Don’t shoot every zombie you encounter. Zombies aren’t quick and it’s often easy to avoid them. Utilize your character’s special abilities to aid in avoiding combat. Knock a zombie back with Kevin’s kick or elude a zombie with Yoko’s escape maneuver. Save ammunition as a last resort.
- Non-player characters join you in the single-player game. These non-player characters can stick with you or even go around alone and perform their own tasks. They will even solve puzzles and gather important scenario items on their own. This can become an issue should the NPC perish at the hand of a zombie or other enemy. Instead of joining you at a location to hand over the important item (or to use it), the NPC’s rotting corpse may be slumped in a corner and hold the only means of continuing on. If you can’t find an NPC or an important item that NPC might hold, check the map for the red «X» that denotes the location of a dead party member. Go there and search the corpse’s inventory for the item.
- In online mode, party members can work together by trading valuable items (giving an injured teammate a health item or handing over an extra weapon to a defenseless friend). Know your character’s strengths and use them to aid your online partners. Yoko’s extra inventory slots can hold extra weapons or ammunition to aid in combat situations or more health items to help the wounded; Kevin and Mark can share weaponry early because both come equipped with their own handgun; Cindy starts with and can hold extra health items; and David can create his own weapons and share them with others by using his toolbox.
- Online party members can split up and solve scenarios faster by performing different tasks at the same time—such as getting the silver and gold keys on Hellfire or the P-base and V-Poison ingredients on Decisions, Decisions. Splitting up is riskier. Fewer players means combat situations could be tougher. Plus you won’t have a friend nearby for aid with the presentation of a health item. If you have split up and perish, return as a zombie and scare the jeebies out of your fellow online players!
- You can help your online teammates with various actions. For instance, pulling a teammate up from a ledge or carrying a wounded friend through a hall. Completing scenarios successfully and quickly is about teamwork. Work together to defeat enemy creatures and share your ammo and health items to benefit the team.
Chapter 2 — Characters
This chapter provides vital information on the eight playable characters in Resident Evil Outbreak.
Kevin Ryman
| Occupation | Police Officer | |
| Age | 31 | |
| Height | 6’0″ | |
| Weight | 197 lbs. | |
| Description | He has a high-quality handgun at game start. | |
| Personal Item | Special .45 Automatic | |
| Special Actions | Kick (Circle + R1), Take Pot Shots (Hold R1, X) |
Kevin is an excellent all-around character. He starts with a sturdy handgun (with special ammunition scattered around the scenarios) and possesses a robust kick that can push back zombies so he can make a quick escape instead of using valuable ammunition. The «Pot Shots» move enhances Kevin’s aim and damage when using his .45 handgun.
Mark Wilkins
| Occupation | Security Guard | |
| Age | 52 | |
| Height | 6’2″ | |
| Weight | 222 lbs. | |
| Description | He is strong with melee weapons. | |
| Personal Item | Handgun | |
| Special Actions | Guard (Hold R1, press Circle repeatedly), Full Swing (Hold R1, X) |
Mark Wilkins is a burly security guard and, like Kevin, begins with his own handgun, which frees up other weapons for your NPC partners. Utilize Mark’s guard move to protect yourself against most enemy damage (though not virus infection). The full swing maneuver is used with melee weapons. Though he starts with a handgun, Mark is strong with melee weapons with his full swing maneuver.
Jim Chapman
| Occupation | Subway Staff | |
| Age | 24 | |
| Height | 5’9″ | |
| Weight | 55 lbs. | |
| Description | He will rarely be attacked by enemies. | |
| Personal Item | Coin | |
| Special Actions | Play Dead (Hold R1, press and hold Circle), Item Search |
Jim lacks the weapon skill of Kevin the cop and Mark the security guard but he’s effective at playing dead! Jim Chapman’s special move is playing dead. He drops down onto the ground and nearby enemies ignore his presence. Note that it does increase your virus meter. Use it to skip past tougher enemies and avoid combat.
George Hamilton
| Occupation | Doctor | |
| Age | 39 | |
| Height | 5’10″ | |
| Weight | 175 lbs. | |
| Description | He can create many types of medicines. | |
| Personal Item | Medical Set | |
| Special Actions | Tackle (Circle + R1) |
George comes equipped with a medical set, which converts herbs into various medicines and anti-viruses. If George is an NPC or part of your group online, hand over herbs to him to create antidotes, recovery medicines, and anti-viruses. Utilize the tackle move to push back enemies and avoid further combat.
David King
| Occupation | Plumber | |
| Age | Unknown | |
| Height | 6’0″ | |
| Weight | 203 lbs. | |
| Description | He can create new weapons using tools. | |
| Personal Item | Toolbox | |
| Special Actions | Lug Wrench Throw (Circle + R1), Continuous Knife Attack (Hold R1, repeatedly press X) |
A plumber by trade, David King carries a toolbox to fix and create new weaponry. For instance, David can combine a lighter and the pesticide to create a flame weapon. You may also find broken weapons in some scenarios (like the broken shotgun in Below Freezing Point) and David can fix them. David’s special actions include the lug wrench throw (which tosses one of the lug wrenches from his toolbox) and the close-range knife attack.
Alyssa Ashcroft
| Occupation | Reporter | |
| Age | 28 | |
| Height | 5’9″ | |
| Weight | 139 lbs. | |
| Description | She is a master of unlocking things. | |
| Personal Item | Lock Picks | |
| Special Actions | Back Step (Circle + R1), Take Pot Shots (Hold R1, X) |
Alyssa is the master of unlocking things. You’ll find locked cabinets, lockers, and doors within each scenario. Utilize Alyssa’s lock pick set to open the locked areas and recover the items inside. The back step helps Alyssa dodge nearby enemies and make an escape to conserve ammunition. She also features the pot shot ability, much like Kevin.
Yoko Suzuki
| Occupation | Student | |
| Age | 20 | |
| Height | 5’3″ | |
| Weight | 127 lbs. | |
| Description | She can hold more items at one time. | |
| Personal Item | Knapsack | |
| Special Actions | Escape (Hold R1, press and hold Circle) |
Yoko’s claim to fame is her large knapsack: it holds four more items in addition to her normal four inventory slots. Thus she’s a great partner in online games. Your group can hoard more health items, more ammunition, and more vital items for the scenario. Perform Yoko’s escape maneuver to avoid enemies.
Cindy Lennox
| Occupation | Waitress | |
| Age | 24 | |
| Height | 5’9″ | |
| Weight | 142 lbs. | |
| Description | She can heal her friends. | |
| Personal Item | Herb Case | |
| Special Actions | Duck (Circle + R1) |
Cindy, the waitress at J’s bar, carries an herb case that contains and can hold additional herbs. Like Yoko, Cindy is a great support party member. She can use her herbs on other party members. Use Cindy’s duck move to elude an attack and make a quick escape without wasting ammo or risking damage.
Chapter 3 — Weapons and Items
This section offers tips on using various types of weaponry in Resident Evil Outbreak. You’ll also find a list of vital items throughout the scenarios.
Melee Weapons
The benefit of melee weapons is you don’t need ammunition to use them. But the downside is you have to move very close to the enemy in order to inflict damage. The closer you are to the enemy, the greater the risk of suffering damage and increased virus infection.
Some melee weapons also suffer damage and become less potent over time. For instance, bash zombies repeatedly with the iron pipe and it begins to bend. The bent version is less effective than its straight counterpart. Melee weapons found throughout the scenarios include the iron pipe, a crutch, a butcher knife, a stick, a scrub brush, and David’s creations.
If you must kill an enemy, use melee weapons in hit and run fashion. Inflict damage then back off and avoid the counter attack. Repeat as necessary. Don’t neglect your character’s own melee attacks, particularly the special abilities of Kevin and George. These can repel an attacker and allow you to escape or counter with another weapon.
Projectile Weapons
The benefit of projectile weapons is their longer range. You can remain at a relatively safe distance and use the projectile weapon to inflict damage on the enemy. This can keep you out of the enemy’s attack range and prevent harmful damage or viral infection. But the downside is that the projectile weapons require ammunition, which is extremely scarce throughout the scenarios.
Projectile weapons include Kevin and Mark’s handguns, the handgun SG, the burst handgun (found in night reception in The Hive), the magnum revolver (found in the open window in Outbreak), the sub machinegun (found on the roof in The Hive), the assault rifle (found in the subway car in Decisions, Decisions), the shotgun, the grenade launcher, and the rocket launcher (found in the front square at the end of Decisions, Decisions).
Conserve ammunition whenever possible by simply avoiding combat. Since ammunition is so scarce, it’s much more valuable in tougher situations, such as boss battles or against faster, tougher foes. Zombies are easier to avoid. Utilize your character’s special abilities to avoid contact or being surrounded by zombies. Be accurate with your shots and don’t use the shotgun at longer range. It’s a close-range, powerful weapon. It has the ability to down multiple enemies in a single blast. For instance, wait until several zombies approach your position and pulverize them all with a close-range shotgun blast.
Health Items
The following is a list of health items and their function in Resident Evil Outbreak.
- Green Herbs: Restore health.
- Blue Herbs: Cure poison.
- Red Herbs: Mix to enhance herb.
- Green Herb and Blue Herb Mix: Restore health and cure poison.
- First Aid Spray: Stops bleeding and restore health.
- Antidote: Cure poison.
- Anti-Virus: Temporarily stops viral infection.
- Recovery Medicine: Restores health.
- Hemostat: Stops bleeding.
Vital Items
The following chart reveals the location and use of vital items found in each scenario. This chart assumes normal difficulty level. Locations may change depending on other difficulty levels.
| SCENARIO | ITEM | LOCATION | USE |
| Outbreak | Staff Room Key | J’s Bar | Opens staff room door. |
| Outbreak | Key with Blue Tag | Staff Room | Opens door into staircase leading to liquor room. |
| Outbreak | Forklift Key | Wine Room | Activates the forklift in the liquor room. |
| Outbreak | Lighter | Drawing Room or next to officer’s corpse. | Ignites the gas from the tanker truck. |
| Outbreak | Detonator Handle and Detonator Main Unit | Amongst the corpses at the end of Outbreak | Combines to form the detonator. |
| Below Freezing Point | Frozen Wrench | B6F south passage | Once thawed, used to open the panel in the B6F security center. |
| Below Freezing Point | Valve Handle | B6F security center. | Use to open the door in the security center and raise the ladder in the Duct. |
| Below Freezing Point | VP-017 | B7F chemical storage | Combine with the UMB No. 3 to create the V-Jolt. |
| Below Freezing Point | UMB No. 3 | B7F chemical disposal room | Combine with the VP-017 to create the V-Jolt. |
| Below Freezing Point | V-Jolt | Inventory combination of VP-017 and UMB No. 3 | Use on the infected plant in the Duct. |
| Below Freezing Point | Blowtorch | 4F culture room | Used to thaw the frozen corpse in the B4F low temperature laboratory. |
| Below Freezing Point | Turn Table Key | B4F turn table | Activates the train. |
| Below Freezing Point | Lab Card Key | B4F turn table | Can be used to unlock the compute room and east area passage instead of using the passcodes. |
| The Hive | Blood Packs | Several rooms including the nurses’ center and laboratory. | Used to distract the leeches and Leech Man, particularly in the fixed temperature laboratory. |
| The Hive | Card Key Level 1 | Examination Room | Opens door into B1F south passage. |
| The Hive | Card Key Level 2 | Fixed Temperature Laboratory from Leech Man corpse. | Unlocks the door to the underpass entrance. |
| The Hive | Padlock Key | B1F south passage. | Unlock the boat. |
| Hellfire | Security Room Key Card | Boiler Room | Unlocks the security office. |
| Hellfire | Silver Key | In room 101’s safe. | Used to unlock doors with the silver locks. |
| Hellfire | Gold Key | In the horse statue in room 204. Opened after solving the Europe map puzzle. | Used to open the door into the power supply room. |
| Hellfire | Red Jewel | Plant in room 306. | Inserted into bust in security office to open hidden passage. |
| Decisions, Decisions | Red Jewel | Inside the clock in the General Manager’s Office. | Inserted into the moose head in the entrance hall. |
| Decisions, Decisions | Brass Spectacles | aiting Room | Placed on the bust in the 2F passage to open the testing passage A route. |
| Decisions, Decisions | Blue Jewel | Art Gallery (pull cord in Presidents’ Room first) | Inserted into the moose head in the Entrance Hall. |
| Decisions, Decisions | Card Key | Back Square | Opens double door back into 1F passage B. |
| Decisions, Decisions | Key with Red Tag | Water Purifying Facility | Opens locked door in the water works management office into the water tank. |
| Decisions, Decisions | Sealed Reagent Case | Water Tank | Holds the P-base. |
| Decisions, Decisions | P-base | Water Works Management Office | Held in the sealed reagent case and inserted into the reagent incubator in the 3F laboratory. |
| Decisions, Decisions | V-Poison | Emission Tower B1 | Inserted into the reagent incubator in the 3F laboratory. |
| Decisions, Decisions | T-Blood | IF Passage B | Recovered from injured Thanatos R.v |
| Decisions, Decisions | Daylight | Laboratory (from Reagent Incubator after all three items inserted and incubator reactivated) | Used to cure self and the world of the virus. Can also be shot at Thanatos R in the second battle using the shooter. |
Chapter 4 — Walk-through
This section provides complete scenario walk-throughs for Resident Evil Outbreak. The walk-throughs reveal each required path through a level even though some paths may be completed by NPC characters that have joined you in the scenario. For instance, in the Hellfire scenario, while you hunt for the silver key, an NPC may complete the tasks required to gather the gold key. If you follow the walk-throughs in this section and can’t locate an important item, check the NPCs’ inventory. If you can’t find your NPC, check the map for a red «X» denoting the death and location of an NPC. Move to their body and search them for the item. Note that these scenario walk-throughs are for the normal difficulty mode. Items and puzzles can variety depending on difficulty level.
Outbreak
Briefing: It was a typical night at J’s bar. Some uninvited guests crashed the party. Our race for survival was just beginning.
You begin inside J’s bar just before the zombies attack. All characters but Yoko begin at the bar (Yoko starts in the women’s bathroom). Grab the handgun off of the bar. If your character starts with a handgun, give it to one of the NPCs. Move toward the door and push the two barrels toward the right side in front of the door. This somewhat delays the zombies’ entrance into the bar.
The most important item in the bar is found just to the right of most characters’ start position—it’s the staff room key. Pick up the key. Before moving onward, take a moment to explore the men’s and women’s bathrooms for additional items, including a handgun and green herb in the men’s bathroom. Once you’ve finished exploring, open the staff room door to the left of the bathrooms and enter the stairs between 1F and 2F. Don’t forget to help Bob, the security guard, if you want to meet several requirements on the event checklist. You’ll have to escort him around these rooms to keep him safe.
Ascend the staircase (grabbing the green herb after the first flight, if it’s still there) and enter the staff room at the top. Cross the staff room around toward the right side and open the door ahead into the break room (ignore the hall on the left for the moment).
Inside the break room, check the garbage can for a blueprint of J’s bar and find handgun ammunition on the table. Return to the staff room. Turn down the hall on the right and enter the first door on your left into the locker room. Search the lockers for a variety of weaponry, ammunition, herbs, and a file. One locker can only be opened if you’re playing as Cindy. Exit the locker room and continue into the staff room area.
Face the desk on the left and pick up the nail gun. Return to the hallway entrance and spot the boards along the right wall. Move against the boards and use the nail gun to automatically barricade the hallway entrance. Return to the staff room and search the coffee table for a newspaper and the key with blue tag.
Return to the hallway and face the locked door on the left. Use the key with blue tag. Ascend the staircase and enter the liquor room at the top. Move around the left corner and search the wall of bottles for the alcohol bottle. Place it in your inventory and return down the stairs into the staff room.
Cross the staff room to the back corner and enter the owner’s room. Search the balcony for several herbs then approach the desk on the left side of the room. Face the painting—with the bottle-shaped hole—on the far wall. Use the alcohol bottle on the painting. This unlocks the desk to your left. Open and search the desk for a shotgun as well as a file.
Return into the staff room. You can search down the hall on the left and enter the drawing room. Beware of the crow that might enter the room. You can find a lighter on the table (for reading the graffiti as part of the event checklist and later for igniting the gas, though you’ll find another lighter later) and some ammunition. Alyssa can unlock the armoire on the other side of the room.
Move back up the stairs into the liquor room. Open the door on the right into the wine room. Cross the room and find the forklift key on the table. You can also save your position and find shotgun rounds on the left barrel. Exit and return into the liquor room.
Cross to the back end of the room and find the forklift. You just recovered the forklift key so it’s time to put it to good use. Operating the forklift raises the crates between the two shelves. With the crates raised, you can now cross the top of the shelves to find the room’s ventilation shaft exit. Note that if you are helping Bob, leave him here (kill off any zombies first) while you move through the ventilation shaft. You’ll be back for him in a moment. Climb the ladder onto the first shelf and cross the crates and the second shelf to the exit shaft. You’ll enter the 3F to rooftop stairway.
If you’re helping Bob, descend the staircase and open the door back into the liquor room. Help Bob through and up the stairs. At the top, search the desk for the storage room key. Exit through the door and onto the rooftop.
Avoid the crows and run to the opposite side of the rooftop. Use the storage room key on the door to the left and enter the storage room. It’s not mandatory but does contain some ammunition on the top shelf (use the crates). Return to the rooftop. Note that if you successfully led Bob, his journey ends on the rooftop.
Bust the section of fence across from the storage room. Use a weapon or a melee attack. Climb onto the pathway and move to the left. You’ll eventually reach a gap. Jump to the adjacent rooftop. Quickly pull yourself onto the adjacent roof (the crows can knock you off so move fast or kill the crows beforehand). Go left and enter the top floor of the apartment. Cross the room to the elevator on the right and use it. Board the elevator and enter 1F of the apartment.
Grab the herb then reach the intersection. Beware of the zombies on either side. Scamper away to the left and exit the door. You’ll reach in front of J’s bar. Descend the staircase to automatically speak with the officer.
Move to the opposite side of the nearby police car and find the vicinity map. Proceed down the street away from the officer and find the police car on the left curb. Push it forward until it stops. Return to the officer and find a second police car along the street. Push it forward until it stops. Appear in the next area automatically.
Find some first aid spray on the left side. Quickly move to the double doors on the opposite side of the area and assist the officer in breaking the doorway with weaponry or other attacks. The police officer meets an untimely fate and drops some key items. Grab the lighter (which you may already have) and his shotgun if you need another weapon. With lighter in hand, move to the right toward the tanker truck.
Lure the nearby zombie away so you can safely turn the valve, which releases the gas. Once it’s covering the ground, move to the edge of the flammable liquid and use the lighter (ensure your allies aren’t standing in the gas). The explosion sends you to the slope along the canal.
Move left to the edge and drop down. Cross the canal and enter the tunnel on the left side. Drop out and move toward the top of the screen. Continue to the right (grabbing the herb along the way) and ascend the ladder at the end to reach in front of the Apple Inn.
Exit the sewer and head to the right and find the police officer. When the officer stops moving, speak with him and become automatically transported to the next area. Once there, enter the police van and save your game if you wish. Collect the shotgun, ammo, and health items. Search the exterior for another herb. Move up the staircase across from the officer.
Find an herb in an alcove on the right side and search the open window for the magnum revolver. Ascend the staircase to the footbridge. Cross the bridge and descend the staircase on the right side and reach Main Street. Walk forward and speak with the officer. At this point you can complete the level by detonating the explosives or returning to the previous officer. You must do both methods to meet event checklist requirements.
To set off the explosives, continue across from the officer to find a group of zombies around the policemen corpses and detonator pieces. Move to the right side of the street and find the detonator handle. Cross to the left side of the street and find the detonator main unit. Combine the detonator handle and the detonator main unit to form the detonator. Move to the policeman corpse in the street’s center and use the detonator.
Below Freezing Point
Briefing: We escaped the zombies and found our way into a frozen underground facility. What truths lie beyond the cries of pain in the distance?
You begin in the tunnel. Find an herb in an alcove on the left side of the screen. Wait until the cutscene then pick up an iron pipe on the left side. Move through the open door onto the platform. Go up the ledge on the bottom portion of the screen. Walk forward until the gunshot triggers the cut scene.
Follow the narrow corridor around the left corner to the elevator. Ascend the staircase until you reach the ventilation shaft on the left side of the screen. Grab hold and pull yourself inside. Crawl through and into the next section.
At this point the level splits depending on which character you picked. Kevin and Cindy enter at B6F south passage; George and David enter at B6F east passage; Alyssa and Jim enter at B7F south passage; and Mark and Yoko enter at B7F east passage. Both B6F entrances lead essentially to the same location and goals as do the B7F entrances just in different order.
Since characters can start on entirely different floors, the order of tasks below will differ between the characters that start on B6F (Kevin, Cindy, George, and David) and B7F (Alyssa, Jim, Mark, and Yoko). Characters starting on B6F will obtain the valve handle first and use it to get to B7F to collect the chemicals. Characters starting on B7F will obtain the chemicals first, use the chemicals to kill the infected plant so they can reach B6F and obtain the valve handle.
This first section describes in order how to complete the level using Kevin, Cindy, George, and David. Skip down to the BF7 laboratory to begin the walk-through as Alyssa, Jim, Mark, or Yoko.
Enter the B6F south or east passage. Kevin or Cindy should be able to find a handgun and the frozen wrench just ahead and to the right of their start position. Beware of the zombie then turn down the left hall and open the door at the end. Enter the B6F security center. Check the room for an herb and first aid. Check the map on the left side. Exit through the opposite door into the B6F east passage. Search the lobby for handgun rounds and a knife. Move through the opposite door into the B6F break room.
George and David begin in the east passage. Search the lobby for handgun rounds and a knife. Move through the hall into the security center. Grab the items and check the map inside then continue into the B6F south passage to recover the handgun and frozen wrench. Return to the east passage and into the B6F break room.
Search the break room for first aid (carry it to the duct later if possible), an herb, and an iron pipe and check the lockers for anti-virus. Alyssa can unlock the far right locker with a lockpick. Move into the alcove on the right side of the room to find a sink filled with hot water. Move against the sink and use the frozen wrench. The warm water melts the ice and turns the frozen wrench into just the wrench.
Return through the east passage and into the B6F security center. Watch out for any zombies along the way. Cross the room to the maintenance panel on the left side. Use the wrench to loosen the bolts on the panel and pick up the valve handle inside. Move in front of the door in the security room’s center. Use the valve handle on the small hole to the door’s right. Turn the handle to open the door. Search the room for ammo then descend the ladder into the B7F laboratory.
This is the floor Alyssa, Jim, Mark, and Yoko begin on. Make your way through the B7F hallway into the B7F laboratory to begin your walk-through at this point. Once you have completed these tasks and killed the infected plant, enter the B6F level and complete the walk-through at the beginning of this section to obtain the valve handle.
Search the lab for a variety of items: a file on the cabinet ahead of you, some rounds for Kevin’s weapon, a file near the computer (note the passcode), an herb, and a chemical bottle, which can be used as a thrown weapon. Move left from this room’s entrance to find the exit door in the corner. Move into the B7F east passage. Follow the passage to the door at the end and enter the B7F chemical storage.
Beware of the zombies hanging out in here. Search the room for some items (handgun, chemical bottle, herb) then move to the computer in the back right corner. Use the computer and enter the passcode retrieved from the file in the laboratory. The code possibilities are 0634, 4509, and 9741. This moves the storage units on the other side of the room. Walk against the moved storage unit and pick up the VP-017.
Return into the B7F east passage and return to the B7F laboratory. Move through the first door on your left (watch out for a possible zombie intruder) and into the B7F south passage. Follow the hallway to the intersection and take the turn. Open the door and enter the B7F chemical disposal room.
Cross the chemical disposal room and approach the door to the left of the large window. Note the zombie inside: he comes alive when you enter the room. Inside the room, grab the UMB No. 3 and mix it with the VP-017 to create the V-Jolt, used to eradicate infected plants. Return to the B7F south passage and turn left at the intersection. Open the door into the Duct.
Examine the wounded man in the corner. Use first aid spray on him and be rewarded with a shotgun. Cross the area and reach the infected plant. Stand against the plant and use the V-Jolt to eradicate the obstruction. Climb the ladder to the first catwalk. This catwalk includes a typewriter for saving your game.
Use the valve handle on the hole to the right of the ladder. This raises the ladder to the upper catwalks. The two paths that were split at the scenario’s start (Kevin, Cindy, George and David on B6F and Alyssa, Jim, Mark, and Yoko on B7F) meet at this point.
Enter the door on this second level catwalk and find yourself in the B5F area C passage. Round the corner and beware of the crawling zombie. Pick up the file next to the zombie to recover two passcodes: one for the B5F computer room and another for the B4F east area passage.
Return to the duct and descend the ladder to the first level catwalk. Open the door and enter the B6F south passage. Follow the hall back into the B6F security center. Approach the center of the security console and enter the two passcodes revealed on the memo. The code combination possibilities are C582 and A194, A375 and B482, and J126 and D580.
Return to the B6F south passage and the Duct. Ascend the ladder to the second catwalk. Open the door into the B5F area C passage. Enter the small crawlspace into the B5F emergency passage. Traverse the path; grab the memo inside the emergency passage to learn guest access on the computer terminal. Exit the emergency passage through the other side and into the B5F area B passage.
Search the room for an herb (if you’re Yoko, talk with the man). Cross the room to the big bay door and use the console to its right. Avoid the larvae in the next room. Open the next door into the B5F computer room (which you unlocked from the security room). Investigate the compute room for some ammo and health items. Check out the computer in the corner. Use it to log on with guest access and imprint your fingerprint into the system. If the computer doesn’t work, return to the B5F emergency passage and read the memo there.
Return through area B, the emergency passage, area C, and back into the Duct. Climb the ladder to the third catwalk. Open the door into the B4F west area passage. Enter the door at the intersection into the main shaft. At this point, a gigantic mutant insect snatches your character and places you inside a cocoon back in the B5F computer room.
Wiggle your way out of the cocoon and retrace your steps back to the third catwalk and the main shaft. Avoid the giant moth and enter the center intersection. The doorways are color-coded. You arrived from the red one. Enter the blue one; this passage was previously unlocked so enter the B4F east area passage.
Turn right at the intersection and move past the frozen enemy. Use the console on the left. It requires a fingerprint, which you have previously entered into the system. Enter the open door into the B4F culture room. Search the room for first aid, ammo, chemical bottles, and a file.
The most important item is the blowtorch resting on the ground near the zombie. With blowtorch in hand, exit to the B4F east area passage. Follow the hall past the intersection into the B4F low temperature laboratory.
Search the misty ground for first aid, a file, and a broken shotgun (which if you’re David, you can fix). There’s also a typewriter for saving your position. Approach the corpse on the console. You can’t operate the lever with the corpse frozen to the console. Use the blowtorch to melt the frozen corpse. He automatically pulls the lever.
Return to the main shaft. Beware of the now-unfrozen enemies. Follow the catwalk marked with the white light and enter the B4F turn table. Avoid the zombies and approach the vehicle. Go to its left side and pick up the turn table key near the console. Use the key on the console. A countdown begins. All party members should reach the train. Hop on the back of the train to avoid the enemies in the area.
Ride the vehicle to the marshaling yard. Move forward to trigger the cut scene. Now you must battle the Mutated G. Lure the creature onto the tracks. Move around to the opposite side of the train and use the console when the Mutated G is standing on the tracks. Perform this action twice to slay the beast. You can also utilize your current weapon and ammunition to inflict damage on the creature.
Level Note: It’s possible to unlock the B5F computer room and B4F east area passage using a key card instead of the passcodes entered into the security room terminal. If you want to use the key card (which is also on the event checklist) instead of the passcode, move through the main shaft on the upper catwalk. Enter the B4F turn table and find the lab card key on the left side of the train. This card key opens the computer room and east area passage.
The Hive
Briefing: A hospital transformed into some kind of hive full of squirming «things.» We pushed on and pushed the repulsive image from our mines.
You begin in a hospital room. Explore the room (push the call button if you wish) then move toward the exit to trigger the cut scene. Exit the room into the 3F passage. Follow the hallway around to the left into the far hallway. Open the door on the left into room 302. Search the room for a couple melee weapons (stick and crutch) as well as a file on the bed. Next open the locker to find a handgun. This triggers the arrival of the Leech Man.
The Leech Man will follow you around the hospital. If you take too long in a certain area, the Leech Man drops from a vent shaft to cause problems. Don’t bother wasting ammunition on the Leech Man. You can’t kill him until later in the scenario. You can temporarily distract the Leech Man (and the smaller leeches) with blood packs. You’ll find them throughout the hospital. Place the blood pack on the ground to occupy the leeches and their Leech Man master while you explore the room or make an escape.
After the Leech Man drops into the room, escape back to the 3F passage. Return to the opposite end of the hall and enter the nurses’ center on the left. Find a map on the left side and a file on the right side of the room. Approach the back end of the room to trigger a cut scene. If a cut scene isn’t shown here then you didn’t get the handgun from room 302 to trigger the Leech Man’s arrival.
Climb over the obstruction and search the alcove for first aid and blood packs in the cooler on the right side. Fill your inventory with as many packs as possible. Avoid the zombie as you leave the room. Call the elevator opposite of the nurses’ center and proceed to floor 2F. Exit the lift into the 2F passage.
Search the lobby for items then cross to the opposite side of the hall to find the door leading into room 202. Comb the room for a variety of items including an herb, file, ammunition, and melee weapons. You can even press that nurse’s call button again if you wish! Return to the 2F passage and enter the nurses’ station opposite the elevator.
Examine the medicine cabinet on the right side of the room. When you do, a couple leeches pop out. Eliminate the leeches with a weapon or place a blood pack on the ground to distract them. Examine the medicine cabinet again to read the memo. Find the cooler in the room and open it to find more blood packs. Exit to the 2F passage and find the staircase. Descend to the 1F passage.
The large shutter ahead of you is closed and can be opened. Open the door to the shutter’s left into night reception. Search the back of the room for the burst handgun then move to the control panel and use it to open the shutter. Return to the 1F passage. Use the panel next to the shutter to open the passage. Enter the hall.
Search the hall for an herb. Cross to the opposite side and use the switch to open another shutter. Enter the door on the left to move into the office. Check the table for a memo containing a code number. Check the cabinets for medicine and beware of the leech hopping around the room. Move through the opposite door into the doctors’ station. Search the room for an herb, anti-virus, and ammunition as well as files containing important code numbers. Note the birthday of September 30th is actually an optional code.
Return to the hall and move through the other door into the central waiting room. From here enter the door into the examination room. Inside the examination room and search the slumped over corpse at the desk to find the card key level 1. A thorough search also reveals some health items. Move through the opposite door into the treatment room. Gather the health items and save your game at the typewriter if necessary.
Return to the examination room and enter the other door into the locker room. Search the lockers for items but beware of zombies. The far left locker is locked and can be opened if you’re playing as Alyssa. Return to the 1F passage. Use the elevator and descend to floor B1F.
Exit the elevator, snag the herb nearby, and enter the opposite door into the reposing room. Search the room for some items and a typewriter to save your game. Return to the B1F passage. Move down the hall and enter the first door on the left: it’s the elevator control room. Comb the room for files and items. Approach the console: it’s covered with leeches! Shoot the leeches or use a blood pack to distract them.
You need to enter a passcode into the console to unlock a new floor for the elevator. Check your files to find the code. One file, the chemical code message, reveals the following: C-4041, E-1160, T-7221, K-1210, I-2005. A second file, reveals a number with a plus sign. To get the code, add the number with the plus sign to the C, E, T, K, and I numbers. The possible codes are 8211, 5315, and 3555. Also, enter the code 0930 (the birthday date from the doctors’ station) to gain access to the rooftop.
Exit the control room and go left. Approach the door at the end of the hall (avoid the nearby zombie) and use the card key level 1 on the card reader. Open the door into the B1F south passage. Cross the hallway (snagging the herb near the entrance and the iron pipe at the intersection) and beware of the zombie at the intersection. Follow the hall into the waste liquid disposal room.
Search the left side for an herb but beware of the curious leech. Descend the stairs and avoid another leech lurking in the shallow water. Cross to the water to the far alcove and grab the padlock key near the corpse. Watch out; it’s a zombie! Exit the room and return to the elevator in the B1F passage.
If you unlocked the elevator’s ability to reach the rooftop, make the side trip now. The rooftop contains ammunition, some pesky crows, and a wounded police officer. Speak with the officer. You may be able to recover the sub machinegun from him. Return to the elevator and descend to B2F and into the B2F passage.
Open the door on the right into the laboratory. Search the lab for more blood packs (you’ll need one soon so save it) and a couple files. Exit through the opposite door into the fixed temperature laboratory. Ignore the console and enter the door into the small room. Place a blood pack in the middle of the room. Wait until the Leech Man enters the lab then lure him toward the blood pack.
While the blood pack occupies the Leech Man, return to the console and switch the temperature to «High». After the cut scene, switch the temperature to «Stop» and check around the console for some health items. Reenter the room containing the former Leech Man. Search around the corpse for the card key level 2.
Exit the labs and return to the B2F passage. Move down the hallway and use the card key level 2 on the card reader at the end of the hall. Open the door into the underpass entrance. Check this storage area for ammo and health items. Approach the padlock next to the boat. Use the padlock key on the padlock to free the boat. Use the boat.
You must now battle the gigantic leech. Utilize any weaponry in your inventory while keeping your distance. The leech can submerge its front end and attack your character’s torso from long-range. You can also lure the leech down the canal back toward the boat. Shoot the valve wheels on the ceiling with the gigantic leech moves underneath to inflict damage. You can also use black tank on the bridge section and even the gas tank near the boat’s original position to defeat the creature. Don’t stand close to the explosions. Once he falls to your attacks, run down the canal past the leech’s start position to complete the level.
Hellfire
Briefing: While avoiding blasts of flame, we proceeded through the smoke-encased hotel. We now knew the true meaning of «Hell.»
Walk forward and check out the map engraving. Turn around and enter the door to move inside the boiler room. Check near the fireman’s body to examine the radio. You’ll also find the fireman’s id tags here. A second fireman lies at the top of the ladder with similar id tags. Finish the mission with both id tags to meet an event checklist requirement. Climb the ladder and move past the second fireman. Open the door into the area marked Apple Inn square.
Avoid the zombies in this hallway. Search the right side for a handgun then move around to the left side and enter the door. You’re now in the northwest passage 3. Turn left and approach the open window. Check room 301 on the left for an herb. Exit through the open window.
You must traverse the narrow ledge going to the left. Pestering crows hover around the area and can knock you off the ledge. Pull up quickly before a crow attacks again. Avoid getting blasted by the fire out of the windows around the other side (the blast can kill a crow if you’re fortunate). Upon reaching the fire escape, descend the ladder and enter the door into the northwest passage 2.
Turn right and open the first door on the left into the store room, which contains various items such as ammo, files, and health items. Return to the passage and enter the next door on the left into the corridor. Follow the corridor to the boiler management office. Continue into the next room, the boiler room, and find the security room card key on the ground. Return to the northwest passage 2.
Move to the end of the hall and enter room 201. Avoid the zombie inside and search the area for anti-virus and an herb. Return to the passage and make your way back to the first door to the left of the entrance. Use the security room card key to unlock the door. Enter the security room. Search it for files and health items. There’s also a typewriter to save your game.
Return to the northwest passage 2 and follow the hall to the end door on the right. It’s the owner’s room. There’s a typewriter here if you need it. Push the wooden crate through the hole in the floor. Once it falls, drop down into the room below. Search the room for an important file, the guest registry. Note the guest names and the corresponding three digit code. Exit the door into northwest passage 1.
Search the bench for a shotgun but beware of the monster on the ceiling above you. He’s hard to see just don’t linger in the hall for very long. Open the door to its right into room 101. Search the room for health items then grab the file on the bed. It reveals who is staying in this room. Match the name with the guest registry file in your inventory. Approach the safe on the back wall and enter the corresponding code. Open the safe and collect the silver key.
Exit room 101 into the northwest passage 1 and find the first door on your right. It’s locked and requires the silver key. Use the silver key to unlock the door and enter the corridor. Search the right alcove for a handgun then move through the fiery hall to the left side. Enter the second door on the left into room 102. Search the room for a file and check out the painting of Finland. This painting, and others like it in rooms 103, 104, and 202 are part of the Europe map puzzle. Leave the painting alone until you enter room 204.
Search the remaining rooms in the hall (103 and 104) for various items, ammo, files, etc. Break down locked doors or, if you’re Alyssa, use a lockpick. Move down the corridor to its end to find the stairs leading to the second story. Open the first door on the right into room 204.
Check out the four panels on the wall. These are part of the Europe map puzzle. Your goal is to light all four panels. If any panels are not lit, you must return to room 102, 103, 104, or 202 (down the hall from your current location) and use the switch on the painting. Each panel corresponds to a particular painting. Panel 1 corresponds to room 102; panel 2 corresponds to room 103; panel 3 is matched with room 104; and panel 4 is matched with room 202.
With all panels lit, move to the opposite side of the room and use the horse statue to open and recover the gold key. Search the rest of the room for a file, health items, and ammo.
Return to the lounge stairs and take the stairs to the third floor. Open the door into the area marked Apple Inn square. Beware of the zombies and enter the door on the left into the room marked 30X. Search the room for ammo then find the hole on the right wall. Crawl through the hole into the adjacent room. Find the grenade launcher inside. Exit the room into the Apple Inn square.
Enter the door on the right into room 306. Grab the red jewel from the plant on the cabinet. Exit room 306 and descend the staircases. Return through northwest passage 2 and into the owner’s room. Drop down the hole in the owner’s room and enter northwest passage 1. Find the locked door requiring the gold key. Use the gold key to enter the power supply room.
Use the control panel inside the power supply room. The goal is to turn all of the console lights on. Hitting a button causes all buttons that surround the one you touched to light up. With all buttons lit, the power is restored. Exit the power supply room back into the northwest passage 1.
Enter the owner’s room and climb the table and pull yourself up to the upper section. Exit into the northwest passage 2. Head left and follow the hall to the security office on the right side. Move left around the far side of the table. Push the bookcase toward the statue to reveal the hidden passage. Use the red jewel on the statue to open the passage. Enter the Apple Inn front lobby.
Search the upper catwalks for items then use the box to the left of the ladder. Lower the ladder and descend into the room. Search the lower section for items before attempting to exit through the left hall. This triggers the scenario’s boss encounter with the Regis Licker. Additional lickers enter the lobby and attack from ground level. To get rid of the ground lickers, ring the bell on the front desk. You could also shoot them but it’s better to use your ammunition on the boss creature.
When battling the Regis Licker, attempt to remain out of range of its tongue attack. Watch the Regis Licker and when it begins to shake, retreat quickly and out of range to avoid taking damage from the attack. Defeat the creature and leave the inn to complete the mission.
Decisions, Decisions
Briefing: Destruction. Darkness. We quickly raced forward knowing all too well that each decision we made held newfound hope or endless despair.
You begin in the entrance hall. Head left into the bottom left corner to find the 1F passage elevator. You’ll use this eventually to visit other floors. Check the area for several items, including map, herb, typewriter for saving the game, iron pipe, and a lighter. Return to the entrance hall and cross to the other side. Enter the center door into the student affairs office.
Beware of the zombie in the room and grab a file off of the desk. Search the back left side of the room for a book containing information on the moose in the entrance hall. Exit through the rear door into the general manager’s room. Find a memo on the left desk with unusual number patterns. It’s actually part of a puzzle in the same room. The number patterns form four larger numbers. For instance, in normal mode notice how the first page has the number four down the center. It basically forms the number «1» in the pattern. Check the other pages for similar patterns.
Find the painting in the front left corner of the room. Use the painting to reveal a switch. Push the switch to activate the clock on the back wall of the room. Grab the nearby herb then approach the clock. You must set the clock to the four digit time revealed in the «number memo» in your inventory. The time setting differs for each difficulty level. On easy, set the clock to 3:25; on normal, set the clock to 10:05; on hard, set the clock to 7:40; and on very hard, set the clock to 2:50. Grab the red jewel from the clock.
Return through the student affairs office to the entrance hall. Move along the right side of the entrance hall to find the moose head on the wall. Use the red jewel on the moose head to place the jewel in the moose’s eye. Return to the other side of the entrance hall (where the student affairs entrance is) and enter the door in the right corner. You’ll enter the waiting room.
Move through the hall and avoid the zombie. Search the bust on the right side to grab the brass spectacles. Enter the far door into 1F passage A. Continue through this hallway. Note that you can push the dressers along the side walls and reveal hidden items (such as ammo or health items). Traverse the hall around a couple corners to the back door. Enter 1F passage B.
Check the debris on the left side near the door to find a part of a torn menu with a three digit number. Continue through the hall and take note of the switch on the right wall. You don’t need to use it now but it comes into play later in the scenario. Grab the blue herbs or leave them there for later. Enter the door on the right back into the entrance hall.
Climb the staircase inside the entrance hall and search the upper floor for items. Enter the door into the 2F passage. Once again you can push the dressers to reveal items. Avoid the zombie presence here and move to the very back of this passage to find another bust. Place the brass spectacles on the bust to reveal a hidden door to the bust’s left side.
Return down the hall to the two doors on either side. Enter the door on the right into the drawing room. Search the room for herbs, a weapon, and anti-virus. Find the next door and enter the Presidents’ room. Search the room for ammo (if your character fits under the couch) and other items before moving to the fireplace. Pull one of the cords within the fireplace. Hopefully a random zombie appears, which completes the «pulled string, zombies came out» segment of the event checklist.
Return to the 2F passage and enter the door across the hall into the art gallery. Cross the room to the statue and grab the blue jewel. Comb the room; if you’ve selected Cindy as your character, play the piano as part of the event checklist. Return to the 2F passage. Enter the secret door opened by the brass spectacles. It’s testing passage A, a shortcut downstairs. Cross the catwalk and descend the ladder. Search the bottom route for some ammo before exiting through the left door into the 1F passage B. Move through this passage back to the entrance hall.
Go to the far side of the entrance hall to the moose head on the wall. Insert the blue jewel into the moose’s eye to open a secret passage behind your position. Enter the passage into the study room. Descend the staircase until the cut scene interrupts the action.
Search the right side of the desk for the second piece of the torn memo. Look at the left side of the desk for a couple notes pertaining to ingredients. Search the rest of the room for anti-virus and other health items before ascend the stairs back into the entrance hall.
Return to the 1F passage elevator and operate the console. The code to activate the elevator is on the two pieces of the torn memo. Possible code variants include 4161, 4284, 4032, and 4927. Enter the appropriate activation code into the console then cross the room to the elevator. Proceed to floor B2F and reach the B2F passage elevator.
Search this storage area for various items, such as the first aid spray on the top of the shelf (use the crates to reach it). You’ll even find poor George slumped against the wall—unless you’re playing as George. Find the door and exit to the pier. Cross the pier going left quickly to avoid becoming shark food. Grab the first aid spray if you wish but be quick. Ascend the stairs on the far side. Find a couple herbs near the next door that leads into the back square.
Watch the cut scene then move forward and find the blue herb. Move along the right side of the area to find the corpse near the truck. Grab the card key off of the corpse. It unlocks the double door to the right of the truck, which you can do so now but don’t move inside yet. Continue across the courtyard and pick up the memo next to the other corpse. Go to the back wall on the right side and check out the map. Now move to the left side and descend the ladder through the man hole.
You’ll enter the water purifying facility. Walk onto the crates and jump up to grab the overhead bar. Shimmy to the right until you’re over the platform. Drop down. Check the platform for ammunition before moving to the left side and finding another overhead bar. Jump straight up and grab hold. Shimmy to the left and drop down on the adjacent walkway. Search the top of the crate for some ammo for Kevin’s weapon and down the catwalk to the far left to find standard handgun rounds.
Move along the catwalk to the far right until the cut scene interrupts the action. Now you have a new beast to deal with. Search the ground to the right of the container to find the key with a red tag. Return to the left and avoid or kill the beast. Check the restroom (the left door) to find a grenade launcher. Exit and open the door on the right into the underground tunnel. Cross the catwalk and open the door into passage B.
Walk through the passage and search the alcove on the right for handgun rounds. Continue to the far door into passage A. Avoid the zombie and grab the herb. Enter the door on the left to search the shed for the grenade launcher, which uses the burst rounds. Exit and continue past the shelving and into the next door. Open the door at the end of the passage on the right. It leads to the water works management office.
There’s a reagent case on the table. If you’ve been reading files you’d know this could be important. Unfortunately it’s not sealed so it’s worthless. Discard it. Check the table for ammo and a file. There’s also a typewriter in the room to save your game and an herb in the corner. The container holding the «P-base» is here but you’ll need to find a sealed reagent case to obtain the item.
Cross the room to the locked door. Use the key with a red tag to unlock the door. Enter the water tank. Grab the nearby herb then cross toward the bottom of the screen. Avoid or kill the beasts and go up toward the console. Use the console to release the water tank lock. Pick up some ammo on the right side.
Retrace your steps through passage A and B into the water purifying facility. Return over the overhead bars to the room’s start location. After the second bar, go left through the opening in the fence. Open the door on the right into the quality assurance testing room. Search the room for an herb and anti-virus then enter the far door into the underground tunnel. Avoid the beast and enter the water tank across the catwalk.
Move along the narrow ledge and climb the short ladder. Enter the door. Search the small room for the sealed reagent case. Exit the water tank. Instead of returning to the purifying facility, go to the left. Drop down and you’re back to where you unlocked the water tank. Climb out of the water to avoid the beasts. Return to the water works management office.
Use the sealed reagent case on the P-base to obtain the item. Retrace your steps through passage A and take the intersection to the right into the east waterway. Avoid the zombie and descend the ladder into the shallow water. Avoid another creature and proceed through the gate into the west waterway. Follow it to a ladder. Climb up to the B2F passage elevator. Go left to the lift and hit the 3F button. Enter the 3F passage elevator.
Search the desks to the far left for ammo. Enter the door on the right into the experiment preparation room. Check the front desk near the computer for anti-virus and the desk in the back of the room for medicine. Exit through the door into the laboratory. Move to the back of the room and use the sealed P-base on the reagent incubator. Return to the lift and descend to the B4F. Enter the B4F corridor.
Move right to the intersection. Grab the antidote off of the ground. Move forward and find additional items as well as check the map on the wall before entering the door on the left into the access waterway. Move toward the stairs and encounter the first of several giant spiders. Blow it apart with the grenade launcher or just avoid the creature. Go down the hall and drop down into the sewer.
Avoid the next spider as you move forward. Beware of another in an alcove on the left. Climb up and move into the next area marked the old subway tracks. Check the platform on the left for a blue herb (which cures poison from the spiders if necessary). Run down the tracks to the right until you enter the old subway tunnel.
Enter the subway car on the left. You’ll enter the south car. Search the car (while avoiding the zombie inside) for first aid and the assault rifle on the seat in the upper left corner. Enter the door into the north car. Avoid the zombies while picking up the assault rifle ammo on the seat to the right. Exit the car into the old subway tunnel.
Avoid the wasps overhead and run to the blue door on the right side of the screen. Enter the T-shaped passage. Grab the first aid out of the container on the right. Check the underground management office. Grab the anti-virus and check out the map to the right of the typewriter (which can be used to save your game). You’ll also find some ammo on the table. Exit and check the control room across the hall for additional items. Exit and cross the hallway to the end. Crawl through the hole at the bottom of the wall into the emission tower inside wall.
Grab the herb. Wasps fly overhead and will knock you off the ledge. Take time to shoot them if you have the ammo. Just face a particular direction and wait for the wasp to attack above you. Shoot until it dies. Move across the ledge toward the right side. Reach the next platform and pick up the blue herb. Crawl through the hole into the storeroom.
Avoid the zombie inside. Cross the room and push the cabinet (to the door’s right) to the right to expose a hole. Crawl through the hole into the spare power supply room. Use the console. It’s another light switch puzzle. When you hit a button, that button and the adjacent diagonal button will be lit up. Solve the puzzle to restore power to the emission tower.
Exit the door into the T-shaped passage. Turn left at the intersection and climb the ladder into the emission tower access passage. Go left at the intersection and find some pesticide spray in the container (handy if you’re David). Proceed to the right and find a handgun in the back corner. Open the door on the left wall into the emission tower lower part.
Beware of the wasps and run onto the lift. Use the lift to enter the emission tower elevator. More wasps buzz overhead. Get into the back left or right corner of the lift and aim upward. When a wasp moves overhead to attack, shoot it. Try to conserve ammunition with accurate shots. Reach the top of the lift into the emission tower B1.
Move around the catwalk and find the V-Poison on the back wall (within the wasp construction). Return to the staircase and ascend. Search the upper catwalk for a blue herb then enter the door into the emission tower station. Grab the anti-virus off of the table. Check the room for first aid and antidote. Exit through the back door into the back square. Enter the double door on the left side of the screen (unlocked with the card key earlier) and return to the 1F passage B.
Maneuver through the passage and open the first door on the right. You’re back in the entrance hall—and so is Thanatos R, the creature from earlier. Avoid him and return inside the 1F passage elevator. Use the lift to 3F into the 3F passage elevator. Move through the experimental preparation room and into the laboratory. Use the V-Poison on the reagent incubator. Two items down, one item to go.
Retrace your steps back into the entrance hall. You must retrieve the last item from Thanatos R. Lure him into 1F passage B. Remember the switch that activated the electricity-filled wires? You must lure Thanatos R under those wires. Move through the waiting room then 1F passage A and into 1F passage B. Remain near the switch until Thanatos R arrives. Shock him when he’s underneath the wires by pressing the button. Pick up the T-Blood.
Return to the entrance hall and the 1F elevator passage. Use the elevator to 3F and the 3F elevator passage. Move through the experimental preparation room and the laboratory. Use the T-Blood on the reagent incubator.
Exit through the opposite door into the machine storage room. Search the first lab room for various items, including first aid and a grenade launcher. Move through the plastic drapery into the second hall. At this point you have a few decisions to make. You can save the world and yourself by operating the computer console and use it to reactivate the reagent incubator. It makes «Daylight» which counteracts the virus. Use the left computer to reactivate the reagent incubator. You can also pick up a handgun near the doctor’s body.
Use the computer on the right to release all locks on the University premises. Even if you don’t want to use the reagent incubator to save the world, you still need to use the lock release. If you want to use the reagent incubator, return through the machine storage room and into the laboratory. Move to the incubator and wait for it to eject vials of «Daylight» and grab one to use on yourself and at least one other to end the game with (to save the world!). You can also grab a third if you want to use a vial on Thanatos R to make the end battle a bit easier. The incubator takes time to create each vial but you should have plenty of time on the countdown.
Return to the second hall and enter the door on the left side of the room. It’s testing passage B. Cross the catwalk and descend the ladder. Go through the door into the Presidents’ room. Continue through the drawing room and into the 2F passage. Use testing passage A, which you opened earlier. Avoid Thanatos R and go left into the testing passage. Descend the ladder and exit into 1F passage B.
Avoid Thanatos R and move down the hall to the double doors in the back corner. Exit into the back square. Proceed toward the exit door. It’s in the back right corner near the map. Wait for the countdown to conclude. After the cut scene, avoid the wasps and proceed again to that exit door. Open it into the unloading passage.
Proceed through the passage. Check the scaffolding on the left (and subsequently the top of the truck) for first aid and ammo. Descend to ground level and climb across the truck. Check the hole for more first aid. Continue forward until the cut scene interrupts the action. It’s time to battle Thanatos R.
Stay away from Thanatos R; don’t get close or you’ll suffer at the hands of his melee superiority. Instead, use weapon fire to break the red cabinet on the right wall (near the scaffolding). It contains the rocket launcher. Keep away from Thanatos R and wait for him to jump. Watch the ground for Thanatos’ shadow and move away. He’s vulnerable after landing. Blast him with a rocket. You automatically move to the canal and then the front square upon defeating Thanatos R the first time.
That’s right…the first time. He’s back. You have a couple options here, particularly if you brought an extra vial of «Daylight» with you. Approach the tank and search to its left for the augule shooter. Load it with daylight and blast Thanatos R. There’s also ammo scattered around the area as well as health and herbs to aid you in the battle.
Chapter 5 — Event Checklist
Each scenario has its own event checklist. How many events you complete is displayed as a percentage at the completion of the scenario. Many events require several play-throughs to complete. For example, unlocking the cabinet in Outbreak requires you to play as Alyssa but seeing the «Will Becomes a Zombie» movie requires you to play as Mark. This section reveals all scenario events.
Outbreak
- Built barricade out of barrels.
- Used the staff room key.
- Used the key with blue tag.
- Solved painting puzzle.
- Unlocked cabinet (Alyssa).
- Moved cargo with the forklift.
- Destroyed the liquor room shutter.
- Destroyed the wire fence on rooftop.
- Read all graffiti with lighter.
- Built patrol car barricade.
- Opened gasoline tanker valve.
- Used lighter to ignite gas.
- Activated detonator.
- Killed zombies and survived.
- Escaped zombies and survived.
- Collected every map.
- Died in gas tanker explosion.
- Obtained «newspaper.»
- Obtained «Jack’s memo.»
- Obtained «Staffer’s diary.»
- Obtained «Raccoon Today.»
- Screams in Owner’s Room.
- Screams in front of J’s Bar.
- Saw crow fly into Drawing Room.
- Saw bottle break in Wine Room.
- Saw bottle break in Liquor Room.
- Watched «Will Becomes a Zombie.»
- Watched «Bob Gets Worse.»
- Watched «Bob’s Suicide.»
- Watched «Bob Becomes A Zombie.»
- Watched «Block Staff Door.»
Below Freezing Point
- Unlocked locker with lockpick.
- Thawed frozen wrench.
- Used wrench to open panel.
- Used valve handle to open door.
- Watched «Used V-JOLT in B7F.»
- Watched «Used V-JOLT in B6F.»
- Watched «Monica Runs Off.»
- Watched «Giant Moth Attacks.»
- Watched «Comp. Room Desertion.»
- Unlocked comp. room w/ card key.
- Unlocked shutter with card key.
- Watched «Used Blowtorch.»
- Used key to activate turn table.
- Watched «Missed Turntable.»
- Watched «Turn Table Goes Up.»
- Moved locomotive.
- Watched «Defeated Mutated G.»
- Received item from researcher 1.
- Got item from staffer 2 (Yoko).
- Obtained map.
- Obtained «Top-Secret Memo.»
- Obtained «Researcher’s Will.»
- Obtained «Staff Memo.»
- Obtained «Interoffice Memo.»
- Obtained «Laboratory Memo.»
- Obtained «Monthly Passcode.»
- Obtained «Custodian’s Diary.»
The Hive
- Used blood pack.
- Used nurse call button.
- Turned on power to shutter.
- Opened 1F shutter.
- Opened waiting room shutter.
- Had the elevator get to B2F.
- Elevator reached the roof.
- Bled at the nurse station.
- Unlocked door with B1F card key.
- Unlocked door with B2F card key.
- Defeated Leech Man.
- Got item from policeman on roof.
- Used chain key.
- Obtained map.
- Obtained «Male Nurse’s Diary.»
- Obtained «Repair Work Memo.»
- Obtained «Setting Manual.»
- Obtained «Piece of Memo.»
- Got «Chemical Code Message.»
- Obtained «Researcher’s Diary.»
- Got «Investigation Request.»
- Obtained «Card Memo.»
- Obtained «Security Guard Guide.»
Hellfire
- Unlocked safe in Room 101.
- Provided emergency power.
- Solved Europe map puzzle.
- Dropped crate in owner’s room.
- Destroyed 304/305 wall.
- Cleared with Len’s tag.
- Cleared with Charlie’s tag.
- Cleared w/ Len and Charlie tags.
- Obtained Apple Inn map.
- Obtained «Guest Memo 1.»
- Obtained «Guest Memo 2.»
- Obtained «Guest Memo 3.»
- Got «Janitor’s Repair Memo.»
- Got «Janitor’s Daily Report.»
- Obtained «Guard’s Notebook.»
- Obtained «Emergency Manual.»
- Obtained «Guest List Copy.»
- Got «Hotel Charge Breakdown.»
- Defeated Regis Licker.
- Opened secret security rm. door.
- Used motorized ladder.
- Used card key to unlock door.
- Used passcode to unlock door.
- Used gold relief key.
- Used silver relief key.
- Rang front lobby bell.
- Opened locker with lockpick.
- Watched «Call over Radio.»
- Watched «Regis Licker Appears.»
Decisions, Decisions
- Set red jewel in stuffed moose.
- Set blue jewel in stuffed moose.
- Solved Cuckoo Clock Puzzle.
- Played Piano on 2F (Cindy).
- Pulled string, moved statue arm.
- Pulled string, zombies came out.
- Used V-Poison in incubator.
- Used P-Base in incubator.
- Used T-Blood in incubator.
- Used Daylight on yourself.
- Killed Thanatos R with Daylight.
- Defeated Thanatos R.
- Routed power to emission tower.
- Unlocked door with red tag key.
- Unlocked water tank area door.
- Electrocuted Thanatos.
- Thanatos came in through window.
- Collected every map.
- Used glasses on 2nd statue.
- Used card key.
- Input elevator code.
- Unlocked university doors.
- Restarted Incubator.
- Obtained «Geneology Facts.»
- Obtained «Blood-Stained Memo.»
- Got «Reagant Generation Memo.»
- Obtained «Section of a Diary.»
- Obtained «Cable Repair Request.»
- Obtained «Torn Memo.»
- Obtained «Part of Torn Memo.»
- Obtained «Orders.»
- Obtained «Peter’s Diary.»
- Obtained «Number Memo.»
- Watched «Peter Discovered.»
- Watched «Hunter Gamma Appears.»
- Watched «UBCS vs Thanatos.»
- Watched «Greg and Yoko.»
- Watched «ED: Chopper Zombie.»
- Watched «ED: George and Cindy.»
- Watched «ED: Mark and David.»
- Watched «ED: Kevin and Jim.»
- Watched «ED: Alyssa and Yoko.»
- Watched «ED: Regretful Ending.»
- Watched «ED: Remain Hopeful.»
Chapter 6 — Collection
This section reveals collection items and their cost.
Gallery
| NUMBER | ITEM | COST |
| 001 | Kevin — CG Picture of Character | 500 |
| 002 | Kevin — Character Collage | 500 |
| 003 | Kevin — CG Picture of Character | 1000 |
| 004 | Mark — CG Picture of Character | 500 |
| 005 | Mark — Character Collage | 500 |
| 006 | Mark — CG Picture of Character | 1000 |
| 007 | Jim — CG Picture of Character | 500 |
| 008 | Jim — Character Collage | 500 |
| 009 | Jim — CG Picture of Character | 1000 |
| 010 | George — CG Picture of Character | 500 |
| 011 | George — Character Collage | 500 |
| 012 | George — CG Picture of Character | 1000 |
| 013 | David — CG Picture of Character | 500 |
| 014 | David — Character Collage | 500 |
| 015 | David — CG Picture of Character | 1000 |
| 016 | Alyssa — CG Picture of Character | 500 |
| 017 | Alyssa — Character Collage | 500 |
| 018 | Alyssa — CG Picture of Character | 1000 |
| 019 | Yoko — CG Picture of Character | 500 |
| 020 | Yoko — Character Collage | 500 |
| 021 | Yoko — CG Picture of Character | 1000 |
| 022 | Cindy — CG Picture of Character | 500 |
| 023 | Cindy — Character Collage | 500 |
| 024 | Cindy — CG Picture of Character | 1000 |
| 025 | All Characters — CG Picture of Character | 1000 |
| 026 | All Characters — Alternate Character Design | 2000 |
| 027 | All Characters — Alternate Character Design | 2000 |
| 028 | CG Picture of Creature | 500 |
| 029 | CG Picture of Creature | 500 |
| 030 | CG Picture of Creature | 500 |
| 031 | CG Picture of Creature | 500 |
| 032 | CG Picture of Creature | 500 |
| 033 | CG Picture of Creature | 500 |
| 034 | CG Picture of Creature | 500 |
| 035 | CG Picture of Creature | 500 |
| 036 | CG Picture of Creature | 500 |
| 037 | CG Picture of Creature | 500 |
| 038 | Alternate Character Design | 2000 |
| 039 | Alternate Character Design | 2000 |
| 040 | Alternate Character Design | 2000 |
| 041 | Alternate Character Design | 2000 |
| 042 | Alternate Character Design | 2000 |
| 043 | «Outbreak» Background Image | 1500 |
| 044 | «Outbreak» Background Image | 1500 |
| 045 | «Outbreak» Background Image | 1500 |
| 046 | «Outbreak» Background Image | 1500 |
| 047 | «Below Freezing Point» Background Image | 1500 |
| 048 | «Below Freezing Point» Background Image | 1500 |
| 049 | «Below Freezing Point» Background Image | 1500 |
| 050 | «Below Freezing Point» Background Image | 1500 |
| 051 | «The Hive» Background Image | 1500 |
| 052 | «The Hive» Background Image | 1500 |
| 053 | «The Hive» Background Image | 1500 |
| 054 | «The Hive» Background Image | 1500 |
| 055 | «Hellfire» Background Image | 1500 |
| 056 | «Hellfire» Background Image | 1500 |
| 057 | «Hellfire» Background Image | 1500 |
| 058 | «Hellfire» Background Image | 1500 |
| 059 | «Decisions, Decisions» Background Image | 1500 |
| 060 | «Decisions, Decisions» Background Image | 1500 |
| 061 | «Decisions, Decisions» Background Image | 1500 |
| 062 | «Decisions, Decisions» Background Image | 1500 |
Costume
| NUMBER | ITEM | COST |
| 001 | Kevin: New Costume — Six Shooter | 10000 |
| 002 | Mark: New Costume — Casual Wear | 10000 |
| 003 | Jim: New Costume — Slam Dunk | 10000 |
| 004 | George: New Costume — Outdoor Expert | 10000 |
| 005 | David: New Costume — Club Scene | 10000 |
| 006 | Alyssa: New Costume — Street Scene | 10000 |
| 007 | Yoko: New Costume — Spring Fashion | 10000 |
| 008 | Cindy: New Costume — On Vacation | 10000 |
| 009 | Alyssa: New Costume — Midnight Caller | 30000 |
| 010 | Yoko: New Costume — Gym Class | 30000 |
| 011 | Cindy: New Costume — Funny Bunny | 30000 |
| 012 | NPC in «Outbreak» — Bob, Mark’s friend | 4000 |
| 013 | NPC in «Outbreak» — Will, J’s Bar waiter | 3000 |
| 014 | NPC in «Outbreak» — Raymond, Arthur, Aaron, Dorian | 5000 |
| 015 | NPC in «Outbreak» — Elliott, Eric, Harry | 5000 |
| 016 | NPC in «Outbreak» — Yoko, J’s Bar disguised | 8000 |
| 017 | NPC in «Below Freezing Point» — Monica, Umbrella researcher | 5000 |
| 018 | NPC in «Below Freezing Point» — Scholar 1 and 2, Umbrella researcher | 3000 |
| 019 | NPC in «The Hive» — Hursh, Raccoon Hospital Doctor | 4000 |
| 020 | NPC in «The Hive» — Doctor 1, 2, and 3, Raccoon Hospital | 6000 |
| 021 | NPC in «The Hive» — Nurse 1 and 2, Raccoon Hospital | 5000 |
| 022 | NPC in «Hellfire» — Danny and Danny: B, fire fighter | 5000 |
| 023 | NPC in «Hellfire» — Gill and Gill: B, fire fighter | 5000 |
| 024 | NPC in «Hellfire» — Fireman, fire fighter | 3500 |
| 025 | NPC in «Decisions, Decisions» — Peter, George’s friend | 3000 |
| 026 | NPC in «Decisions, Decisions» — Greg, ex-Umbrella researcher | 10000 |
| 027 | NPC in «Decisions, Decisions» — Frank, Raccoon University Professor | 3000 |
| 028 | NPC in «Decisions, Decisions» — UBCS 1 and 2, UBCS member | 8000 |
| 029 | NPC in «Decisions, Decisions» — U.S.S. 1, U.S.S. special forces | 5000 |
| 030 | NPC in «Decisions, Decisions» — Man 1, 2 , 3, 4, and 5 | 10000 |
| 031 | Mr. Red, Mr. Blue, Mr. Green, Mr. Gold, Mr. Black | 100000 |
Movie
| NUMBER | ITEM | COST |
| 001 | Resident Evil Outbreak Opening Movie | 500 |
| 002 | «Outbreak» — Kevin Opening and Ending Movie | 500 |
| 003 | «Outbreak» — Mark Opening and Ending Movie | 500 |
| 004 | «Outbreak» — Jim Opening and Ending Movie | 500 |
| 005 | «Outbreak» — George Opening and Ending Movie | 500 |
| 006 | «Outbreak» — David Opening and Ending Movie | 500 |
| 007 | «Outbreak» — Alyssa Opening and Ending Movie | 500 |
| 008 | «Outbreak» — Yoko Opening and Ending Movie | 500 |
| 009 | «Outbreak» — Cindy Opening and Ending Movie | 500 |
| 010 | «Outbreak» — Scene 01 Movie | 500 |
| 011 | «Outbreak» — Scene 02 Movie | 500 |
| 012 | «Below Freezing Point» — Opening Movie | 500 |
| 013 | «Below Freezing Point» — Scene 01 Movie | 500 |
| 014 | «Below Freezing Point» — Scene 02 Movie | 500 |
| 015 | «Below Freezing Point» — Scene 03 Movie | 500 |
| 016 | «Below Freezing Point» — Scene 04 Movie | 500 |
| 017 | «Below Freezing Point» — Kevin Ending Movie | 500 |
| 018 | «Below Freezing Point» — Mark Ending Movie | 500 |
| 019 | «Below Freezing Point» — Jim Ending Movie | 500 |
| 020 | «Below Freezing Point» — George Ending Movie | 500 |
| 021 | «Below Freezing Point» — David Ending Movie | 500 |
| 022 | «Below Freezing Point» — Alyssa Ending Movie | 500 |
| 023 | «Below Freezing Point» — Yoko Ending Movie | 500 |
| 024 | «Below Freezing Point» — Cindy Ending Movie | 500 |
| 025 | «The Hive» — Opening Movie | 500 |
| 026 | «The Hive» — Scene 01 Movie | 500 |
| 027 | «The Hive» — Scene 02 Movie | 500 |
| 028 | «The Hive» — Scene 03 Movie | 500 |
| 029 | «The Hive» — Kevin Ending Movie | 500 |
| 030 | «The Hive» — Mark Ending Movie | 500 |
| 031 | «The Hive» — Jim Ending Movie | 500 |
| 032 | «The Hive» — George Ending Movie | 500 |
| 033 | «The Hive» — David Ending Movie | 500 |
| 034 | «The Hive» — Alyssa Ending Movie | 500 |
| 035 | «The Hive» — Yoko Ending Movie | 500 |
| 036 | «The Hive» — Cindy Ending Movie | 500 |
| 037 | «Hellfire» — Scene 01 Movie | 500 |
| 038 | «Hellfire» — Scene 02 Movie | 500 |
| 039 | «Hellfire» — Scene 03 Movie | 500 |
| 040 | «Hellfire» — Kevin Ending Movie | 500 |
| 041 | «Hellfire» — Mark Ending Movie | 500 |
| 042 | «Hellfire» — Jim Ending Movie | 500 |
| 043 | «Hellfire» — George Ending Movie | 500 |
| 044 | «Hellfire» — David Ending Movie | 500 |
| 045 | «Hellfire» — Alyssa Ending Movie | 500 |
| 046 | «Hellfire» — Yoko Ending Movie | 500 |
| 047 | «Hellfire» — Cindy Ending Movie | 500 |
| 048 | «Decisions, Decisions» — Scene 01 Movie | 500 |
| 049 | «Decisions, Decisions» — Scene 02 Movie | 500 |
| 050 | «Decisions, Decisions» — Scene 03 Movie | 500 |
| 051 | «Decisions, Decisions» — Kevin Ending Movie | 500 |
| 052 | «Decisions, Decisions» — Mark Ending Movie | 500 |
| 053 | «Decisions, Decisions» — Jim Ending Movie | 500 |
| 054 | «Decisions, Decisions» — George Ending Movie | 500 |
| 055 | «Decisions, Decisions» — David Ending Movie | 500 |
| 056 | «Decisions, Decisions» — Alyssa Ending Movie | 500 |
| 057 | «Decisions, Decisions» — Yoko Ending Movie | 500 |
| 058 | «Decisions, Decisions» — Cindy Ending Movie | 500 |
| 059 | Epilogue Movie | 500 |
Sound
| NUMBER | ITEM | COST |
| 001 | «Outbreak» Background Music | 1000 |
| 002 | «Below Freezing Point» Background Music | 1000 |
| 003 | «The Hive» Background Music | 1000 |
| 004 | «Hellfire» Background Music | 1000 |
| 005 | «Decisions, Decisions» Background Music | 1000 |
| 006 | Battle Background Music | 2000 |
| 007 | Miscellaneous Background Music | 2000 |
| 008 | Kevin Voice | 2000 |
| 009 | Mark Voice | 2000 |
| 010 | Jim Voice | 2000 |
| 011 | George Voice | 2000 |
| 012 | David Voice | 2000 |
| 013 | Alyssa Voice | 2000 |
| 014 | Yoko Voice | 2000 |
| 015 | Cindy Voice | 2000 |
| 016 | Miscellaneous Voice | 2000 |
Extra
| NUMBER | ITEM | COST |
| 001 | «Hard Mode» is now available for all scenarios. | 2000 |
| 002 | «Very Hard Mode» is now available for all scenarios. | 3000 |
| 003 | «Lone Wolf Mode» is now available for all scenarios. | 10000 |
| 004 | «Infinity Mode» is now available for all scenarios. | 50000 |
The products discussed here were independently chosen by our editors.
GameSpot may get a share of the revenue if you buy anything featured on our site.
Автор:
legusor · Опубликовано: 7 минут назад
Интересно только, как до сих пор со всеми “вражескими” странами торговля идёт полным ходом, в т.ч. и ураном, а у прямого врага не пострадали ни одна трубокачка и подъездные пути для транспортировки оружия…
Вы представьте: разгар второй мировой — Сталинградские сражения, блокада Ленинграда, прочие ужасные и трагические события, а Сталин с Гитлером друг к другу в гости летают, по телефончику в дружеских беседах созваниваются и торговлю ведут, а потом обратно — каждый к себе — и дают отмашку своим пропагандистам месить каждый другого по всем информационным фронтам. Не представляется, потому что невозможное.
Сегодня же сплошь подмена понятий, двойные стандарты, искажение реальной картины вещей и сути событий — дебилизация холопов для отъема бабла и выполнение плана по тягловой повинности под популистские бравады с обещанием в рай, в общем.
Как же забавляет фантасмагорический чуланный микрокарлик, вернее, его PR-обслуга с этим экзальтированным ватным бредом травмированного обиженного рибёначка, у которого отобрали родную омерику.
В квитанциях ЖКХ каждый месяц пролетарии всё сильнее замечают, что санкции с треском провалились, вернее, что паханы за счет тяглового быдла издержки компенсируют более наглыми способами.
Вся эта движуха с пиратизацией ПО направлена лишь на то, чтобы за ворованное у “запада” платить налог родному царю и денежку в магазин, но свой, духовный. Очередной способ стрижки тяглового сословия для компенсации издержек от действий “коллективного запада”.
А уж про то, что архистратиг с братвой сидят под глобальным проектом, не обладая и милиграммом суверенитета, и говорить нечего, иначе бы профицитный триллион бюджета 2022 за полгода не превращался в дефицитные 3 триллиона. На этот год вообще 5 трлн. дефицита по плану, вот и думайте.