Introduction[]
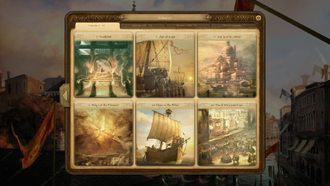
Anno 1404 comes with six scenario maps that act as a bridge between the campaign and continuous mode. The scenarios contain small story vignettes with a few main goals, and completing each scenario unlocks an achievement, new player title, and a medal. There are two easy, two medium, and two hard scenarios.
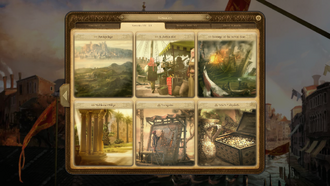
Anno 1404: Venice adds fifteen new scenarios, each with stronger story elements (introductory and ending cut-scenes, voice acting through the quest stages) than the original six scenarios from the main game. Several of the first scenarios act as tutorials for the new game mechanics of Venice, such as espionage, the city council, and the Bailiwick building. New achievements, player titles, and medals are awarded for completing certain Venice scenarios.
Note: the original six Anno 1404 scenarios can also be played in the Venice expansion, under the «Classic» tab in the scenarios menu. These are identical to the originals, however all the new Venice game mechanics and changes are applied to each. Therefore, the original six scenarios are a bit easier when played in Venice, due chiefly to having a third trading partner and being able to buy cities.
Classic Scenarios[]
Elector / Electress[]
Difficulty: ![]() (easy) Build your population
(easy) Build your population
Winning conditions[]
- Accumulate 150,000 Gold coins.
- Settle 5,000 Inhabitants worldwide.
- Settle 2,000 Noblemen worldwide.
Starting Conditions
- Warehouse with Full Storage
- 80,000 Gold Coins
- Full Refund of Construction Costs
Difficulty Settings
- Small map
- Large Islands
- Easy Island difficulty
- Abundant Fertilities
- Abundant Resources
- No Disasters
AI Powers
- All Mentors (Lord Richard Northburgh, Al Zahir, Giacomo Garibaldi)
- No Corsairs
- No Expanding Computer Players
- Few Neutral Powers
Master Builder[]
Difficulty: ![]() (easy)
(easy)
Use large fertile islands on which to build cities that will be the envy of all.
Winning conditions[]
- Build an Imperial cathedral
- Settle 10,000 Inhabitants worldwide
- Settle 5,000 Noblemen worldwide
Starting Conditions
- Full Warehouse
- 50,000 Gold Coins
- Full Refund of Construction Costs
Difficulty Settings
- Medium sized map
- Large Islands
- Easy Island difficulty
- Abundant Fertilities
- Abundant Resources
- No Disasters
AI Powers
- All Mentors (Lord Richard Northburgh, Al Zahir, Giacomo Garibaldi)
- Weak Corsairs
- 1 Easy Expanding Computer Player (Leif Jorgensen, Hildegard von Lewenstein, Willem van der Mark)
- Some Neutral Powers
Diplomat[]
Difficulty: ![]() Medium
Medium
Discover the culture of the Orient and act as an ambassador between the two people.
Winning conditions[]
- Build a Sultan’s mosque.
- Settle 5,000 Envoys worldwide.
- Complete 5 quests for the Sultan.
Starting Conditions
- Flagship with standard item
- 30,000 Gold Coins
- 50% Refund of Construction Costs
Difficulty Settings
- Large map
- Medium sized Islands
- Medium Island difficulty
- Normal Fertilities
- Normal Resources
- All Disasters excluding Tornado
AI Powers
- All Mentors (Lord Richard Northburgh, Al Zahir, Giacomo Garibaldi)
- Medium Corsairs
- 2 Medium Expanding Computer Players (Sir Gavin Langton, Marie d’Artois, Helena Flores, Guy Forcas)
- Some Neutral Powers
Tips[]
This scenario allows you to focus nearly exclusively on your oriental settlement. 5,000 Envoys can easily fit on a moderately sized island, so it’s easiest to only build one main oriental settlement. It’s best to try to build the Sultan’s mosque as fast as possible, since upon completion the Sultan will arrive at Al Zahir’s island and then offer you quests at random intervals. Note that sometimes the Sultan can take a long time to offer quests and there’s no way to speed up the process.
Guild Master[]
Difficulty: ![]() Medium
Medium
Use thrift to turn your meagre start capital into a huge amount of wealth.
Winning conditions[]
- Accumulate 500,000 Gold coins.
- Obtain an Alliance with all the other players simultaneously.
- Complete 5 Quests for the Emperor.
Starting Conditions
- Flagship
- 10,000 Gold Coins
- 50% Refund of Construction Costs
Difficulty Settings
- Huge map
- Medium sized Islands
- Medium Island difficulty
- Normal Fertilities
- Normal Resources
- All Disasters excluding Tornado
AI Powers
- All Mentors (Lord Richard Northburgh, Al Zahir, Giacomo Garibaldi)
- Medium Corsairs
- 1 Easy Expanding Computer Player
- 2 Medium Expanding Computer Players
- Many Neutral Powers
Tips[]
- Simultaneously blocking the AI’s advancement and befriending them: it is possible to monopolize an island without the AI being too angry about it. The trick is to allow them to settle the island, but not give them enough room to actually build anything useful. If you block all coastal areas of an island and stop the AI from settling entirely, they complain about it repeatedly, eventually leading to war. If you allow them to build a warehouse, but nothing more, then they will complain once about your settlement on the island, then settle it themselves, and be happy with their own ‘settlement’. I recommend doing this for herbs: it is the rarest of the northern patrician-level resources, and will stop the AI from advancing to Nobleman level. Depending on the map, you might also consider monopolizing a different commodity. Cornering the Indigo market, for example, will prevent the AI making Carpets or Books.
- You do not need to maintain your alliances with the AI once you have obtained them. Once the victory condition is fulfilled, it cannot be lost. After you have lured them all into alliances, you are free to betray and exterminate them, if you want to. Note that you can build within the AI’s military radius when you are allied with them.
- If you are in a game with Marie d’Artois and Sir Gavin Langton as AI’s, postpone your alliance with Sir Gavin until you are allied with Marie. Sir Gavin tends to break the alliance and every time you re-ally with him, you lose up to 8 reputation points with Marie.
General[]
Difficulty: ![]() Hard
Hard
Bring all your adversaries to their knees.
Winning conditions[]
- Be the last survivor.
- Sink 40 ships.
Starting Conditions
- Flagship
- 10,000 Gold Coins
- No Refund of Construction Costs
Difficulty Settings
- Huge map
- Medium sized Islands
- Medium Island difficulty
- Normal Fertilities
- Normal Resources
- All Disasters
AI Powers
- All Mentors (Lord Richard Northburgh, Al Zahir, Giacomo Garibaldi)
- Strong Corsairs
- 1-2 Medium Expanding Computer Players
- 1-2 Hard Expanding Computer Players (Giovanni Di Mercante, Baronessa Constanza Zanchi)
- Some Neutral Powers
Tips[]
- See Scenario: General for main article.
- See also Hard AI guide.
Imperator / Imperatrix[]
Difficulty: ![]() Hard
Hard
Build your own empire under the most difficult conditions!
Winning conditions[]
- Be the last survivor.
- Secure all Attainments.
- Build an Imperial cathedral and a Sultan’s mosque.
- Accumulate 1 million Gold coins.
- Settle 10,000 Noblemen worldwide.
- Settle 10,000 Envoys worldwide.
- Complete 15 Quests for the Sultan or the Emperor.
The Latin word Imperator was a title originally roughly equivalent to commander during the period of the Roman Republic.
Starting Conditions
- Flagship
- 10,000 Gold Coins
- No Refund of Construction Costs
Difficulty Settings
- Huge map
- Medium sized Islands
- Medium Island difficulty
- Normal Fertilities
- Few Resources
- All Disasters
AI Powers
- All Mentors (Lord Richard Northburgh, Al Zahir, Giacomo Garibaldi)
- Strong Corsairs
- All Hard Expanding Computer Players (Giovanni Di Mercante, Baronessa Constanza Zanchi, Cardinal Lucius)
- Many Neutral Powers
Tips[]
- See also: Hard AI guide.
- See also: Imperator Scenario: Early Game Tips
- First get rid of all your opponents, and then start worrying about any other assignments.
- As such, you’re basically re-doing General, but now with Kardinal Lucius present. See Scenario: General for tips on how to do this. The example map listed there is also one of the possible maps for Imperator. You may have to resort to warfare sooner than in General though, as it is very hard to stay at peace with Lucius. Otherwise there is little difference with the opponents you’ve faced in General.
- Without items granting additional ascension rights, you’re going to need 857 occidental and 572 oriental houses to reach 10,000 noblemen/envoys[1]. Each bonus item will save you at least 50 houses, so keep your eyes open for them at Northburgh/Al Zahir after constructing the monuments!
- The 250 noblemen houses you’ll need all fit within the influence range of a single imperial cathedral. That means you can demolish those debtor’s prisons.
Venice Scenarios[]
The addon Venice includes fifteen new scenarios.

I: Vendetta[]
Difficulty: ![]() Easy
Easy
Focus: Diplomacy
Objective: Drop the enemy’s population morale to zero.
- Place a Base of Operations within your city’s limits.
- Send a spy to various safe houses and commit acts of espionage until morale reaches zero.
Tips[]
You must use the Venetian Base of Operations to send a spy into the enemy island, where he can commit acts of Espionage. Espionage reduces the morale of the enemy population and lowers your reputation with whomever you commit the acts against. When your enemy’s population reaches zero morale, the scenario is won. If your reputation drops too low, the enemy will declare war on you, and you will lose the scenario.
Gavin Langton is a medium AI and is not easily provoked into War.
Remember to use the Relationships screen (F7) to occasionally check your reputation with the enemy, and pay tribute to him to raise reputation if necessary.
II: Ray of hope[]
Difficulty: ![]() Easy
Easy
Focus: Adventure
Objectives[]
Help Willem by finding some clues as to his daughter’s whereabouts.
The hope of finding his daughter has brought new life to the otherwise melancholic Willem. However, with age taking its toll, he is glad that you have agreed to his request to help him with the investigations. Willem is convinced that together you will be able to track down the long lost Beatrice.
Tips[]
- You have a mercenaries’ castle on your settlement that you can make use for taking over Guy’s island. All you need is to buy some weapons from the NPCs.
III: The key to power[]
Difficulty: ![]() Medium
Medium
Focus: Diplomacy
Achievement: There’s an achievement for purchasing the key to the city on all three of Leif’s Occidental islands. This means you must purchase at least three council seats on each of his three Occidental islands in order to buy the keys on each. Make sure you buy the keys to the two secondary islands before his main island since acquiring the main island key ends the scenario!
Tips[]
You must buy three council seats from your opponent’s main island in order to buy the key to the city, thus winning the scenario. In order to buy council seats in another city, you must have the Venetian attainment «Hostile Takeover,» which is not available until the Patrician level. Grow your city until Patricians move in.
Once you reach the Patrician level, buy Hostile Takeover from the attainments menu (F10) and begin buying your opponent’s council seats without starting a war. There are continual, optional side quests from the neutral powers that generate large amounts of money to aid in buying the seats and key, which can be very expensive.
Furthermore, if you use the arson sabotage and burn down a few houses the cost of the key to the city will be reduced.
Also, if you’re only short a few gold to buy the key, you can increase your tax rates to orange or red to bring in lots of money since it doesn’t matter if your people get mad since you’re about to win.
IV: Reign of the elements[]
Difficulty: ![]() Easy
Easy
Focus: Adventure
Tips[]
You must recover three artifacts on three islands using a mining unit (called «Treasure hunters» by the game). However, every time you settle an island with an artifact, Witches will cause a disaster on the island. You must deliver goods to friendly powers to help them stop the disasters in order to retrieve the artifacts.
This scenario is very easy, with the hardest part being the final quest which requires providing 10t clay and 10t herbs. To prepare for this, be sure to expand your occidental city to 550 patricians and your oriental city to 440 nomads and reach «The Sheik’s Ally» diplomatic rank.
V: Close to the wind[]
Difficulty: ![]() Medium
Medium
Focus: Adventure
Tips[]
1040 envoys plus all required production buildings crammed onto the small oriental island.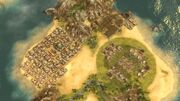
1) This scenarios is all about winning boat races. You need a fast ship with good items to win these races. See the Ships & Items page for more information. Oriental Ships are faster than Occidental ones. Being able to construct an oriental trading ship from the Oriental Shipyard requires 1,040 envoys, which requires 42 full houses. However, it’s much easier to ascend roughly 65 houses, which each have 16/25 residents, because envoys will not move into newly ascended envoy housing unless you provide them more goods like coffee.
Fitting 1,040 envoys plus all the required production on the small island provided requires efficient use of space. Remember that the noria exploit can be used to provide full yield farms without all fields.
For ship speed, get 2x +10% speed «Sails» items from the beggar island, and your ship is capable of winning the final race. Be warned that on the final race you will be attacked by enemy ships between waypoint 3 and 5.
2) Building an oriental trading ship is not the only solution. You can win the first 2 races with your flag ship (you will need the help of some sockets). I used the small caravel, much faster, and gave it the 10% flags. I won. The third race I used a war ship from Al Zahir (exchange with some honor); ensure you have the white flag and another trump card like the repairman. You’ll win easy as the other ships will be destroyed. When you get to the final race, I did as noted in the third solution. I WON :):):)
3) There is a third solution, probably easier still! — Take advantage of the large island which is alongside the course of this race. Build a warehouse at one end and a harbour master’s office at the other. Use one ship to drop off the treasure at one end, and another ship to pick up the treasure from the other end and take it to the finish. Credit for this solution to vulcanjedi on the Ubi forums «Close to the Wind — 4th Race»
For an alternative approach to this scenario, which requires minimal building work, see this page: Close to the Wind solution
4) The 4th solution, the most easiest for now.
Position near the lair.
You can take an advantage by glitch position near Hassan ben Sahid lair. Oriental warship was used with 2 +10% sail improvements and the 1st level attainment «Oriental Shipbuilding». Position your ship on the right side of the lair near the shore and Hassan ben Sahid will offer to start the race. Move camera to checkpoint, send the ship and then agree by clicking the tick mark.
VI: The di Mercante case[]
Difficulty: ![]() Medium
Medium
Focus: Adventure, Trade, Logistics
Tips[]
There is an achievement available called «Master detective» which requires you to complete all five sidequests during this scenario. This achievement was originally glitched and unable to be obtained, but the Venice patch 2.1 fixed it so it is attainable.
Three of the sidequests will start as you play the mission, but the «Groundless» quest only starts if you sail just a bit southwest of Al Zahir’s island and see the grounded ship. The next sidequest «Unknown Cargo» will immediately begin after completing the prior.
VII: Archipelago[]
Difficulty: ![]() Medium
Medium
Focus: Development, Economy
Tips[]
You will need at least 92 occidental houses to get noblemen. You can win by using about 2/3 of your main island for houses. The other 1/3 can be used for Cider farms, Lumberjacks huts, Forest glassworks, ect.
You will need at least 20 oriental houses in order to produce Indigo, which is necessary for Books.
Hemp can be grown on the small island east of your main island. Bread, beer, wood, tools, and stone can be obtained from the island to the far west of your main island. Pigs can be placed on the small oriental island to the southeast of your main island and then transported north to the only occidental island that has a river.
Note: There is an achievement for settling on all islands in this scenario titled «Lord of the Reefs»
VIII: A rotten bet[]
Difficulty: ![]() Medium
Medium
Focus: Development, Economy
Description[]
This scenario requires fulfilling the following conditions and maintaining them for 60 seconds.
- Have at least 1000 beggars in your settlement
- Your balance in positive
- Your population is at least «Happy»
The beggar mechanics are slightly different than normal in this scenario.
- Many more beggars than normal arrive.
- Beggars refuse to enter hospices. This will be a serious drain on your capital: roughly 1500 gold per minute for 1000 beggars.
Note: There is an achievement for asking tribute from Northburgh, Al Zahir, or Garibaldi. It’s a good idea to ask for tribute repeatedly anyway.
Tips[]
- Refused or evicted beggars will not return. The only way to get more beggars is to expand your settlement further.
- Maintaining a positive balance: The number of beggar in your settlement is proportionate to the number of citizens (and up) you have. This means that you can have as many peasants and nomads/envoys as you like without being flooded with beggars. Create a large peasant city and slowly upgrade them to citizens to grow your beggar population without risk of going bankrupt.
- You only have to meet the requirements for 60 seconds. If you have problems maintaining a positive balance, but meet the other requirements, stockpile enough goods to keep your population «Happy», then start deleting your production buildings. This will quickly bring your balance to positive, thus allowing your to meet the objectives for 60 seconds.
- Don’t forget to set your oriental population to be happy in order to get the 60 second countdown started.
IX: Scourge of the seven seas[]
Difficulty: ![]() Medium
Medium
Focus: Adventure, Military
Story[]
In this scenario you will start at the dead center of the map with a single corsair ship with 6 attack and the inherent auto repair ability. To increase your fleet size and rank with the corsairs you will have to pillage and plunder. With the money from the loot you gather from the ships and warehouses (mainly ships), you can buy corsair ships with 8 attack, these ships are brilliantly fast and have their auto repair. But the more you plunder the more large war ships start wrecking your party. These are quite hard beat and can destroy several of your corsair ships.
Eventually you will be so admired by Hassan he will send you to destroy a fleet of 4 large warships and 1 large trading ship. This trading ship holds an item called «loot» which finishes he scenario when given to Hassan.
You can buy a large fleet but another possibility is to just buy the key of power from Hassan. (Nobleman item) Sail into the ships and sink them. After that just sink that trading ship and you’ve won the scenario.
Achievements[]
There are three achievements possible:
- Defeat 15 Navy (red) ships
- Acquire 80,000 total bounty (will be done naturally as you progress through the level usually)
- Achieve both the above achievements for the final one.
Tips[]
- Most important tip would be, keep clicking the refresh button as often as you can to make sure you have boarding teams to board large war ships. The first one I took was with the starter ship and one bought ship, simply dragged out the battle until one of my ships was almost destroyed then I used the other to board and it succeeded.
- Building on what the above tip said, make sure you take control of quest enemy ships. These ships are mainly named «Enemy Small Warship» or something similar with either 500 or 800 health. These ships are slow as dirt, have one item slot and cargo hold and they do either 6 or 10 damage pending on their size. Despite being limited, they have no upkeep cost and will not be attacked by the emperor’s navy, an AI’s navy or any military buildings. This is most likely a glitch, but these quest ships can be left in front of a harbor to build up your bounty and they will never be destroyed. Also good for finishing off the final quest as they once again will not be attacked.
- The bought ships are perfect for taking out small ships and getting away with the booty and doing so continuously, so keep buying them.
- Basic fighting skills like focusing all fire power on a single ship generally makes for a won battle.
- Blocking the main port of a player gives quite a lot of loot at once, just put one or two large war ships in front of it beyond the range of the towers and let the corsair ships pick up everything. Be sure to get away before an overwhelming force of large war ships arrives though.
- Enemy ship AI is rather stupid. They will typically focus on one of your ships and ignore the rest, allowing you to move the focused ship just out of range of the enemy while the rest of your ships continues shooting without counterattack. This is especially true in the final battle: those warship do not move at all, allowing you to pick them off one at a time.
- To get money without increasing your rank among the corsairs, board large trade-ships, repair them, and fill with valuable cargo. Then sell ship at a much higher price. The cargo will be dropped in front of the corsair trade building and can be reused for next ship.
X: Noblesse oblige[]
Difficulty: ![]() Medium
Medium
Focus: Development, Trade, Logistics
Objectives[]
Your task is to reach noblemen, using oriental islands only. The scenario is won as soon as you obtain your first nobleman.
Note that although the quest description states that you are to build a Metropolis, you do not need to reach «Metropolis» city status (3500 noblemen/5240 envoys). A status of «City» (1190 patricians) is enough to produce the single nobleman that is required.
Tips[]
This is actually a quite tricky scenario. It requires you to play quite differently because there aren’t the proper fertilities to grow all the goods you need. The key to winning is to set up many passive purchase orders on all your islands and to also use customs items to boost your goods.
- You cannot produce cider, hemp, wheat, or herbs. Northburgh will never sell seeds for this either. You must use Passive Trading for these items. Withholding goods from your Occidental population is critical to conserve supply. You can restrict Peasants from Cider & Citizens from Linen without revolting.
- Adjust the sliders in the Passive Trading to set not only how much Cider and Hemp you want, but also how much you are willing to pay. You can do this at each island you have which will encourage more frequent visits from traders.
- You can optionally choose to not buy linen garments but buy hemp instead and produce the garments yourself. This is cheaper but Northburgh is the only one who sells Hemp and he prefers to not sell much, so you may want to buy both.
- Lumber and Coal are hard to find on Oriental Islands, but a Noria can be used to make fertile terrain and you can plant trees yourself to reach 100% productivity.
- You can produce books and leather jerkins entirely without buying goods. But so few books are needed to reach noblemen that you don’t even need to setup books production. You can just buy books.
- Focus on setting up a large Oriental island with at least 2 Bazaars with or nomad houses.
- Karim may offer «Duty Levied» items on occasion if you accomplish his quests. Therefore, you may consider developing your oriental population to at least 1040 Envoys in order to complete his tasks.
- Occasional sandstorms may affect the world, possibly halting production or causing the population to move out. Therefore don’t forget to check twice if the houses are full before letting the population consume goods that need to be bought in order to avoid upgrading delay and unnecessary loss of goods.
- Hoard Cider through passive trading, once you have enough to start ascending Citizens (40-50), get just enough Citizens enough to produce Iron & Tools, then start cutting off cider to Peasants and then focus on building up a huge Oriental Population all the way to at least 1 Envoy and passively/active sell Carpets or other profitable goods.
- Max out the Trading Fleet Attainments for Zahir and Northburgh to encourage frequent trades with them.
- Hoard Hemp and use your own weaver hut. One will be enough if you’re restricting supply. Once you have around 100 Linen, Advance enough Patricians to reach Glass. Then restrict linens to just Patricians. At this point you should only be needing a steady source of Hemp and Cider. Build the Church when you can.
- Start hoarding Wheat and Herbs and produce a large supply of Bread and Beer. Never let Patricians consume these goods until you’re ready to advance them. You can let them consume Jerkins as Pigs can be made anywhere. Actively buy Paper from Northburgh and horde it in your Occidental City, along with sufficient Indigo to produce books quickly.
- When you have around 50 Beer, 50 Bread, 100 Linens, and 150 Cider, and a large stockpile of Glass, Stone, Tools, and Wood in your Occidental City; start aggressively advancing the entire population. Move all their sliders into Euphoric. Once you reach the second last stage of the Patricians, you’ll need to build books quickly. Put down 2-3 Print Houses to quickly pump out books to keep up with the demand. As soon as you have the Debtor’s Prison, plunk it down and advance a single Patrician to win the scenario.
- Get the attainment Imperial Merchant Fleet. This allows you to buy more goods, and more frequently[2].
XI: Incognito[]
Difficulty: ![]() Hard
Hard
Focus: Development, Logistics
Objectives[]
This scenarios is comprised of several assignments with a time limit. If you fail to complete any of the tasks within the time limit, you also have the option to pay a fine. Failing to pay the fine will fail the scenario.
- Introduction. Time available: 8 minutes. Task: visit Garibaldi’s ship. Upon expiry of time: automatically advance to first assignment.
- First inspection. Time available: 30 minutes. Upon expiry of time: a fine of 20,000 gold coins, to be paid within 4 minutes. Task: build the following.
- a city wall connecting the two existing towers
- 1 gatehouse
- 2 watchtowers
- 2 large statues
- Second inspection. Time available: +30 minutes. Upon expiry of time: a fine of 30,000 gold coins, to be paid within 4 minutes. Tasks:
- 1 church
- 1 bailiwick
- no beggars on the streets
- Third inspection. Time available: +30 minutes. Upon expiry of time: a fine of 45,000 gold coins, to be paid within 4 minutes. Tasks: build the following.
- 10 nomad houses
- 1 mosque
- 13 palm trees
- Fourth inspection. Upon expiry of time: a fine of 100,000 gold coins, to be paid within 4 minutes. Time available: +30 minutes. Tasks:
- 1190 patricians
- 1 manorial palace
- 4 corners
- 4 residential wings
- 1 gatehouse (ornamental)
Tips[]
Winning this scenario is pretty easy, but the real challenge is completing the scenario with at least 30 minutes to spare to get the achievement ‘I work best under pressure’.
This scenario is about fast and cost-effective building. There is plenty of space, so don’t bother about efficient building.
The inspector uses the 4 platforms to «check» if you’ve built what is required, so don’t build around these spaces. Each platform has an influence area when you click on them that reveal the circle the game ‘checks’ to see if the required buildings are present. The administrator will stand there for inspection and you have to build the assignments within his influence area (also the nomad houses and mosque of the third inspection!).
Once you’ve completed an assignment you are free to demolish the buildings. This applies mostly for the Towers and Mosque as they offer your city little when built and have a reasonable upkeep.
Building all structures requires at least 1190 Patricians (for Manorial Palace), and at least 450 Nomads with enough favor to gain access to Quartz and a Mosque. Aim for these objectives while simultaneously completing the require objectives.
Use as much from the introduction time as possible since you don’t get a reward for unused time. Time left from the assignments creates honour and bonus time, so always complete each stage as fast as possible!!
Also request quests from the mentors to get honour faster. You really only need honour for buying enough diplomatic ranks to reach «Sheik’s Ally». Once that happens, use all additional honour to ask for grants from all the mentors.
Walkthrough[]
Start by immediately setting up three complete tools production chains on your main island. Connect Brother Hilarious and buy extra goods and buy all the Tools from Northburgh who is just north of your island. from him in the beginning. Also set up all four stonemason huts and about 10 lumberjacks. You can grab an additional Stonemason Hut on the Spice Island and ship this over.
Build a harbour masters office in the south-west for more efficient handling of the oriental trade routes. Edit the current spice route to go to your new harbour.
Do not colonize another occidental island (no need) but do colonize one of the two large oriental islands in the south or southwest.
One trick is to immediately demolish the oriental houses on ‘Aschgabad’ and change the trading route to bring both spices and dates to your main island. Now build a new oriental city right by your occidental city (where the south-east little platform is below your main city layout. Now build goat farms on your occidental island. Build an extra noria or two on ‘Aschgabad’ and build 2 more spice farms and 2 more dates farms.
Get enough nomads to unlock the quartz mines, mosaic quarries, and mosque (440 nomads). Now build two quartz mines on either large oriental island and ship it back. You need 75 Glass & Stone to complete the Manorial Palace.
You’ll probably run out of money before the final stage where you have to build the very costly manorial palace parts. Produce extra linen garments, bread, tools, and ropes for a nice cash boost. Actively sell and passively sell as many surplus goods as possible and request Grants from the NPCs. Generate more money out of passive sales by maximizing the trading fleets in the attainments menu.
If you’re really efficient, you can beat this level with close to an hour left. Note that the «I work best under pressure» achievement for completing the scenario with 30 minutes or more remaining on the clock was supposedly fixed to work in version 2.1, but sometimes you still don’t get the achievement. The Unofficial Patch can be used to force this achievement.
- Note: One devious strategy is to demolish each manorial segment after you build it. For instance, once all four corners are built, demolish all them. This saves the maintenance, although this method is a bit of an exploit.
XII: Istar’s labyrinth[]
Difficulty: ![]() Hard
Hard
Focus: Adventure
Objectives[]
Find 16 treasures hidden in the labyrinth.
Tips[]
[Spoiler Warning!] Here’s a map of the labyrinth including locations of all items, goods, and treasures.
Notice in the storm on the right side, you can find a boarding crew. With this item you can take over one of the small war ships.
XIII: Elysium[]
Difficulty: ![]() Hard
Hard
Focus: Development, Economy
Objectives[]
Attain 1404 noblemen. Tax income is disabled.
Tips[]
With tax income disabled, you will have to make your money from trade. Active trade and passive trade are both viable options for gathering enough money to complete this scenario.
XIV: Pact with a bard[]
Difficulty: ![]() Hard
Hard
Focus: Development, Military
Objectives[]
Destroy Baroness Zanchi’s manorial palace on her main island. Do not allow Leif to be destroyed.
The player starts with neutral reputation with Zanchi and an alliance with Leif. Ingratiation and tributes to Zanchi are disabled. Zanchi will make regular demands for tribute. Failing to pay these results in war.
Note: There is an achievement for beating this scenario in only 1 real-life hour. This means you can and should use fast-forward as much as possible to make this deadline.
Tips[]
The easiest method to victory is to only recruit Trebuchets through the Robber Baron’s Castle. You simply wait about 20 minutes and accumulate about 10 of these units. While waiting, expand production to meet your people’s needs, such as more Cider, Linen Garments, and Bread. Then declare war, and land right at the upper part of the Baroness’s island. Then destroy the main gate with all your Trebuchets. Move directly on to destroying the Manorial Palace. Keep building more Trebuchets. You’ll probably have to do a couple waves of attack.
Meanwhile, have your 4 starting ships go stay by her Warehouse and keep destroying all her ships. You shouldn’t ever need to build any more Ships. The Baroness is very stupid and victory can be had if you trick her into sailing her troops into the water so you can kill them. If she was smart, this mission would become nearly impossible.
*or*
You can also try for a slower, more economic route to victory. At the start you can expand settling Leif’s main island and claim the river sites. Those will come in very handy when producing leather jerkins and books. Ingratiate him and pay a bit of tribute to compensate for the lost reputation.
It is possible to buy out Zanchi’s main island. This will be very expensive. When you buy the key to the city, you become owner of the Manorial Palace and can simply demolish it to achieve victory.
*or*
You want to aim for 3 large military camps, and 2 trebuchet positions from Barnabas.
You can complete this scenario in 20 minutes, really easily. Build a few more houses, an extra hemp production chain, a weapons chain, 2 more stone masons, and a spare weapons smelter near your other tools production (but keep it deactivated for now). Also build another beer chain. Set the tax income for your Patricians and nomads to happy (light-green), and once you have enough patrician houses (enough for 38 unit limit — around 36-38 Patrician houses), also change the tax income on your Citizens.
Build the keep, and enable your second weapons smithy, disabling the toolmakers as long as you have a surplus (probably around 25t) of tools. This is so you can rebuild your city when it gets sabotaged. Before you run out of money, donate your honor for money (the 150 honor interaction), to get some extra funds. Also attempt to sell any surplus goods you have.
Position your military camps (transport ships) near the beach which is nearest to the Palace, along with your warships. By quickly declaring war, using your ships to protect your ships, land using one of the trebuchet units, and quickly place all 4 of your remaining troops down, making sure that one of your large military camps is the first to land, so it can tank the shots from the gatehouse. Now, send all your camps to attack the gatehouse, and once its destroyed, move them up next to the Manorial Palace. You can place your trebuchet position in direct range of the Palace, without having to destroy any of the smaller buildings. Now, just set it to attack the Palace, and protect it with your 3 military camps. You may end up loosing the Castle that you landed with, but don’t worry. As long as you destroy the Palace, you automatically win.
XV: Barren lands[]
Difficulty: ![]() Hard
Hard
Focus: Development, Trade, Logistics
Objectives[]
- Build a city with 4,000 noblemen in a world with minimal fertility.
- Rid the world of the corsairs. Each island cleared gives 400 honour and 5000 gold coins. Upon completion of this quest (the keep and the three Watchtowers around it can be left intact despite the Quest’s «63» Tower count which should be «60»), the player receives The last contingent.
- The last contingent. Destroy a fleet of 13 corsair ships. Completion enables trade (both passive and active) with Hassan ben Sahid. The corsairs are the only source of seeds on this map.
Tips[]
It’s best to play this map in two distinct phases: fighting the corsairs & building the cathedral.
- Fighting the corsairs:
- Build a settlement and begin to gather coin in order to buy honour from Lord Richard Northburgh.
- You can get tools by trading with Lord Richard Northburgh or by buying them from a monastery located on the island you start on.
- There is an excavation site on the island; I highly recommend providing the required equipment for the excavation as it will create items. Most of the items will be useless but can later be traded for a large sum of honour from Lord Richard Northburgh.
- With enough honour buy 2 small war ships and explore the map. Find the Grand Vizier Al Zahir so you are able to trade honour for large oriental warships.
- Destroy the 60 Harbour Towers located around the coasts of islands. You do NOT need to destroy the Keep and three Watchtowers on the upper-right island, despite the game counting the Watchtowers in its total 63 towers. You just need to destroy the armies.
- You can destroy the corsair’s armies with your ships. Build a warehouse on one of their islands and any armies on it will move in to destroy it, putting them in range of your ship’s cannons.
- Now complete the fraternization quest, which requires destroying the Corsair fleet.
- The 13 ships of The last contingent can be taken out with a single harbour defence tower. See screenshot for demonstration. Only the center ship fights back, the rest completely ignores the tower. They all eventually die without putting up much of a fight. This method exploits the bad AI, so you may wish to use the old fashioned method of attacking with Ships, retreating to heal, and repeating until you win. Although, you will lose many Ships trying to attack them.
Taking out 13 corsair ships with one tower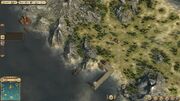
- Building the cathedral:
- Buy seeds from Hassan. Grow Cider and Hemp on islands.
-
You cannot buy any seeds from the corsairs until you have completed the missions.
- You require 521 Houses total, with no Beggars or Envoys, to settle 4000 Noblemen.
- The entire game you will only be able to plant cider and hemp seeds (date fertility is already provided) so all other resources will have to be traded for.
- Settle all islands and put in purchase orders for Bread, Beer, and other goods. Then set up trade routes to bring these goods to your main island.
- Settle the volcanic island and buy a geologist, who will allow you to make any number of the types of mines he provides. For example, you can build five salt mines with just one brine geologist.
- Disallow Goods for your people that you cannot produce yourself. Only briefly allow all goods to push for further city levels. Don’t worry about upsetting your population.
- Other resources:
- Article on Barren lands on German Anno Wiki
- Great Walkthrough from Thread on Barren lands on Ubi forums
Notes[]
- ↑ Calculated using the Population Calculator
- ↑ http://forums-de.ubi.com/eve/forums/a/tpc/f/6331056277/m/3651092838
Introduction[]
Anno 1404 comes with six scenario maps that act as a bridge between the campaign and continuous mode. The scenarios contain small story vignettes with a few main goals, and completing each scenario unlocks an achievement, new player title, and a medal. There are two easy, two medium, and two hard scenarios.
Anno 1404: Venice adds fifteen new scenarios, each with stronger story elements (introductory and ending cut-scenes, voice acting through the quest stages) than the original six scenarios from the main game. Several of the first scenarios act as tutorials for the new game mechanics of Venice, such as espionage, the city council, and the Bailiwick building. New achievements, player titles, and medals are awarded for completing certain Venice scenarios.
Note: the original six Anno 1404 scenarios can also be played in the Venice expansion, under the «Classic» tab in the scenarios menu. These are identical to the originals, however all the new Venice game mechanics and changes are applied to each. Therefore, the original six scenarios are a bit easier when played in Venice, due chiefly to having a third trading partner and being able to buy cities.
Classic Scenarios[]
Elector / Electress[]
Difficulty: ![]() (easy) Build your population
(easy) Build your population
Winning conditions[]
- Accumulate 150,000 Gold coins.
- Settle 5,000 Inhabitants worldwide.
- Settle 2,000 Noblemen worldwide.
Starting Conditions
- Warehouse with Full Storage
- 80,000 Gold Coins
- Full Refund of Construction Costs
Difficulty Settings
- Small map
- Large Islands
- Easy Island difficulty
- Abundant Fertilities
- Abundant Resources
- No Disasters
AI Powers
- All Mentors (Lord Richard Northburgh, Al Zahir, Giacomo Garibaldi)
- No Corsairs
- No Expanding Computer Players
- Few Neutral Powers
Master Builder[]
Difficulty: ![]() (easy)
(easy)
Use large fertile islands on which to build cities that will be the envy of all.
Winning conditions[]
- Build an Imperial cathedral
- Settle 10,000 Inhabitants worldwide
- Settle 5,000 Noblemen worldwide
Starting Conditions
- Full Warehouse
- 50,000 Gold Coins
- Full Refund of Construction Costs
Difficulty Settings
- Medium sized map
- Large Islands
- Easy Island difficulty
- Abundant Fertilities
- Abundant Resources
- No Disasters
AI Powers
- All Mentors (Lord Richard Northburgh, Al Zahir, Giacomo Garibaldi)
- Weak Corsairs
- 1 Easy Expanding Computer Player (Leif Jorgensen, Hildegard von Lewenstein, Willem van der Mark)
- Some Neutral Powers
Diplomat[]
Difficulty: ![]() Medium
Medium
Discover the culture of the Orient and act as an ambassador between the two people.
Winning conditions[]
- Build a Sultan’s mosque.
- Settle 5,000 Envoys worldwide.
- Complete 5 quests for the Sultan.
Starting Conditions
- Flagship with standard item
- 30,000 Gold Coins
- 50% Refund of Construction Costs
Difficulty Settings
- Large map
- Medium sized Islands
- Medium Island difficulty
- Normal Fertilities
- Normal Resources
- All Disasters excluding Tornado
AI Powers
- All Mentors (Lord Richard Northburgh, Al Zahir, Giacomo Garibaldi)
- Medium Corsairs
- 2 Medium Expanding Computer Players (Sir Gavin Langton, Marie d’Artois, Helena Flores, Guy Forcas)
- Some Neutral Powers
Tips[]
This scenario allows you to focus nearly exclusively on your oriental settlement. 5,000 Envoys can easily fit on a moderately sized island, so it’s easiest to only build one main oriental settlement. It’s best to try to build the Sultan’s mosque as fast as possible, since upon completion the Sultan will arrive at Al Zahir’s island and then offer you quests at random intervals. Note that sometimes the Sultan can take a long time to offer quests and there’s no way to speed up the process.
Guild Master[]
Difficulty: ![]() Medium
Medium
Use thrift to turn your meagre start capital into a huge amount of wealth.
Winning conditions[]
- Accumulate 500,000 Gold coins.
- Obtain an Alliance with all the other players simultaneously.
- Complete 5 Quests for the Emperor.
Starting Conditions
- Flagship
- 10,000 Gold Coins
- 50% Refund of Construction Costs
Difficulty Settings
- Huge map
- Medium sized Islands
- Medium Island difficulty
- Normal Fertilities
- Normal Resources
- All Disasters excluding Tornado
AI Powers
- All Mentors (Lord Richard Northburgh, Al Zahir, Giacomo Garibaldi)
- Medium Corsairs
- 1 Easy Expanding Computer Player
- 2 Medium Expanding Computer Players
- Many Neutral Powers
Tips[]
- Simultaneously blocking the AI’s advancement and befriending them: it is possible to monopolize an island without the AI being too angry about it. The trick is to allow them to settle the island, but not give them enough room to actually build anything useful. If you block all coastal areas of an island and stop the AI from settling entirely, they complain about it repeatedly, eventually leading to war. If you allow them to build a warehouse, but nothing more, then they will complain once about your settlement on the island, then settle it themselves, and be happy with their own ‘settlement’. I recommend doing this for herbs: it is the rarest of the northern patrician-level resources, and will stop the AI from advancing to Nobleman level. Depending on the map, you might also consider monopolizing a different commodity. Cornering the Indigo market, for example, will prevent the AI making Carpets or Books.
- You do not need to maintain your alliances with the AI once you have obtained them. Once the victory condition is fulfilled, it cannot be lost. After you have lured them all into alliances, you are free to betray and exterminate them, if you want to. Note that you can build within the AI’s military radius when you are allied with them.
- If you are in a game with Marie d’Artois and Sir Gavin Langton as AI’s, postpone your alliance with Sir Gavin until you are allied with Marie. Sir Gavin tends to break the alliance and every time you re-ally with him, you lose up to 8 reputation points with Marie.
General[]
Difficulty: ![]() Hard
Hard
Bring all your adversaries to their knees.
Winning conditions[]
- Be the last survivor.
- Sink 40 ships.
Starting Conditions
- Flagship
- 10,000 Gold Coins
- No Refund of Construction Costs
Difficulty Settings
- Huge map
- Medium sized Islands
- Medium Island difficulty
- Normal Fertilities
- Normal Resources
- All Disasters
AI Powers
- All Mentors (Lord Richard Northburgh, Al Zahir, Giacomo Garibaldi)
- Strong Corsairs
- 1-2 Medium Expanding Computer Players
- 1-2 Hard Expanding Computer Players (Giovanni Di Mercante, Baronessa Constanza Zanchi)
- Some Neutral Powers
Tips[]
- See Scenario: General for main article.
- See also Hard AI guide.
Imperator / Imperatrix[]
Difficulty: ![]() Hard
Hard
Build your own empire under the most difficult conditions!
Winning conditions[]
- Be the last survivor.
- Secure all Attainments.
- Build an Imperial cathedral and a Sultan’s mosque.
- Accumulate 1 million Gold coins.
- Settle 10,000 Noblemen worldwide.
- Settle 10,000 Envoys worldwide.
- Complete 15 Quests for the Sultan or the Emperor.
The Latin word Imperator was a title originally roughly equivalent to commander during the period of the Roman Republic.
Starting Conditions
- Flagship
- 10,000 Gold Coins
- No Refund of Construction Costs
Difficulty Settings
- Huge map
- Medium sized Islands
- Medium Island difficulty
- Normal Fertilities
- Few Resources
- All Disasters
AI Powers
- All Mentors (Lord Richard Northburgh, Al Zahir, Giacomo Garibaldi)
- Strong Corsairs
- All Hard Expanding Computer Players (Giovanni Di Mercante, Baronessa Constanza Zanchi, Cardinal Lucius)
- Many Neutral Powers
Tips[]
- See also: Hard AI guide.
- See also: Imperator Scenario: Early Game Tips
- First get rid of all your opponents, and then start worrying about any other assignments.
- As such, you’re basically re-doing General, but now with Kardinal Lucius present. See Scenario: General for tips on how to do this. The example map listed there is also one of the possible maps for Imperator. You may have to resort to warfare sooner than in General though, as it is very hard to stay at peace with Lucius. Otherwise there is little difference with the opponents you’ve faced in General.
- Without items granting additional ascension rights, you’re going to need 857 occidental and 572 oriental houses to reach 10,000 noblemen/envoys[1]. Each bonus item will save you at least 50 houses, so keep your eyes open for them at Northburgh/Al Zahir after constructing the monuments!
- The 250 noblemen houses you’ll need all fit within the influence range of a single imperial cathedral. That means you can demolish those debtor’s prisons.
Venice Scenarios[]
The addon Venice includes fifteen new scenarios.
I: Vendetta[]
Difficulty: ![]() Easy
Easy
Focus: Diplomacy
Objective: Drop the enemy’s population morale to zero.
- Place a Base of Operations within your city’s limits.
- Send a spy to various safe houses and commit acts of espionage until morale reaches zero.
Tips[]
You must use the Venetian Base of Operations to send a spy into the enemy island, where he can commit acts of Espionage. Espionage reduces the morale of the enemy population and lowers your reputation with whomever you commit the acts against. When your enemy’s population reaches zero morale, the scenario is won. If your reputation drops too low, the enemy will declare war on you, and you will lose the scenario.
Gavin Langton is a medium AI and is not easily provoked into War.
Remember to use the Relationships screen (F7) to occasionally check your reputation with the enemy, and pay tribute to him to raise reputation if necessary.
II: Ray of hope[]
Difficulty: ![]() Easy
Easy
Focus: Adventure
Objectives[]
Help Willem by finding some clues as to his daughter’s whereabouts.
The hope of finding his daughter has brought new life to the otherwise melancholic Willem. However, with age taking its toll, he is glad that you have agreed to his request to help him with the investigations. Willem is convinced that together you will be able to track down the long lost Beatrice.
Tips[]
- You have a mercenaries’ castle on your settlement that you can make use for taking over Guy’s island. All you need is to buy some weapons from the NPCs.
III: The key to power[]
Difficulty: ![]() Medium
Medium
Focus: Diplomacy
Achievement: There’s an achievement for purchasing the key to the city on all three of Leif’s Occidental islands. This means you must purchase at least three council seats on each of his three Occidental islands in order to buy the keys on each. Make sure you buy the keys to the two secondary islands before his main island since acquiring the main island key ends the scenario!
Tips[]
You must buy three council seats from your opponent’s main island in order to buy the key to the city, thus winning the scenario. In order to buy council seats in another city, you must have the Venetian attainment «Hostile Takeover,» which is not available until the Patrician level. Grow your city until Patricians move in.
Once you reach the Patrician level, buy Hostile Takeover from the attainments menu (F10) and begin buying your opponent’s council seats without starting a war. There are continual, optional side quests from the neutral powers that generate large amounts of money to aid in buying the seats and key, which can be very expensive.
Furthermore, if you use the arson sabotage and burn down a few houses the cost of the key to the city will be reduced.
Also, if you’re only short a few gold to buy the key, you can increase your tax rates to orange or red to bring in lots of money since it doesn’t matter if your people get mad since you’re about to win.
IV: Reign of the elements[]
Difficulty: ![]() Easy
Easy
Focus: Adventure
Tips[]
You must recover three artifacts on three islands using a mining unit (called «Treasure hunters» by the game). However, every time you settle an island with an artifact, Witches will cause a disaster on the island. You must deliver goods to friendly powers to help them stop the disasters in order to retrieve the artifacts.
This scenario is very easy, with the hardest part being the final quest which requires providing 10t clay and 10t herbs. To prepare for this, be sure to expand your occidental city to 550 patricians and your oriental city to 440 nomads and reach «The Sheik’s Ally» diplomatic rank.
V: Close to the wind[]
Difficulty: ![]() Medium
Medium
Focus: Adventure
Tips[]
1040 envoys plus all required production buildings crammed onto the small oriental island.
1) This scenarios is all about winning boat races. You need a fast ship with good items to win these races. See the Ships & Items page for more information. Oriental Ships are faster than Occidental ones. Being able to construct an oriental trading ship from the Oriental Shipyard requires 1,040 envoys, which requires 42 full houses. However, it’s much easier to ascend roughly 65 houses, which each have 16/25 residents, because envoys will not move into newly ascended envoy housing unless you provide them more goods like coffee.
Fitting 1,040 envoys plus all the required production on the small island provided requires efficient use of space. Remember that the noria exploit can be used to provide full yield farms without all fields.
For ship speed, get 2x +10% speed «Sails» items from the beggar island, and your ship is capable of winning the final race. Be warned that on the final race you will be attacked by enemy ships between waypoint 3 and 5.
2) Building an oriental trading ship is not the only solution. You can win the first 2 races with your flag ship (you will need the help of some sockets). I used the small caravel, much faster, and gave it the 10% flags. I won. The third race I used a war ship from Al Zahir (exchange with some honor); ensure you have the white flag and another trump card like the repairman. You’ll win easy as the other ships will be destroyed. When you get to the final race, I did as noted in the third solution. I WON :):):)
3) There is a third solution, probably easier still! — Take advantage of the large island which is alongside the course of this race. Build a warehouse at one end and a harbour master’s office at the other. Use one ship to drop off the treasure at one end, and another ship to pick up the treasure from the other end and take it to the finish. Credit for this solution to vulcanjedi on the Ubi forums «Close to the Wind — 4th Race»
For an alternative approach to this scenario, which requires minimal building work, see this page: Close to the Wind solution
4) The 4th solution, the most easiest for now.
Position near the lair.
You can take an advantage by glitch position near Hassan ben Sahid lair. Oriental warship was used with 2 +10% sail improvements and the 1st level attainment «Oriental Shipbuilding». Position your ship on the right side of the lair near the shore and Hassan ben Sahid will offer to start the race. Move camera to checkpoint, send the ship and then agree by clicking the tick mark.
VI: The di Mercante case[]
Difficulty: ![]() Medium
Medium
Focus: Adventure, Trade, Logistics
Tips[]
There is an achievement available called «Master detective» which requires you to complete all five sidequests during this scenario. This achievement was originally glitched and unable to be obtained, but the Venice patch 2.1 fixed it so it is attainable.
Three of the sidequests will start as you play the mission, but the «Groundless» quest only starts if you sail just a bit southwest of Al Zahir’s island and see the grounded ship. The next sidequest «Unknown Cargo» will immediately begin after completing the prior.
VII: Archipelago[]
Difficulty: ![]() Medium
Medium
Focus: Development, Economy
Tips[]
You will need at least 92 occidental houses to get noblemen. You can win by using about 2/3 of your main island for houses. The other 1/3 can be used for Cider farms, Lumberjacks huts, Forest glassworks, ect.
You will need at least 20 oriental houses in order to produce Indigo, which is necessary for Books.
Hemp can be grown on the small island east of your main island. Bread, beer, wood, tools, and stone can be obtained from the island to the far west of your main island. Pigs can be placed on the small oriental island to the southeast of your main island and then transported north to the only occidental island that has a river.
Note: There is an achievement for settling on all islands in this scenario titled «Lord of the Reefs»
VIII: A rotten bet[]
Difficulty: ![]() Medium
Medium
Focus: Development, Economy
Description[]
This scenario requires fulfilling the following conditions and maintaining them for 60 seconds.
- Have at least 1000 beggars in your settlement
- Your balance in positive
- Your population is at least «Happy»
The beggar mechanics are slightly different than normal in this scenario.
- Many more beggars than normal arrive.
- Beggars refuse to enter hospices. This will be a serious drain on your capital: roughly 1500 gold per minute for 1000 beggars.
Note: There is an achievement for asking tribute from Northburgh, Al Zahir, or Garibaldi. It’s a good idea to ask for tribute repeatedly anyway.
Tips[]
- Refused or evicted beggars will not return. The only way to get more beggars is to expand your settlement further.
- Maintaining a positive balance: The number of beggar in your settlement is proportionate to the number of citizens (and up) you have. This means that you can have as many peasants and nomads/envoys as you like without being flooded with beggars. Create a large peasant city and slowly upgrade them to citizens to grow your beggar population without risk of going bankrupt.
- You only have to meet the requirements for 60 seconds. If you have problems maintaining a positive balance, but meet the other requirements, stockpile enough goods to keep your population «Happy», then start deleting your production buildings. This will quickly bring your balance to positive, thus allowing your to meet the objectives for 60 seconds.
- Don’t forget to set your oriental population to be happy in order to get the 60 second countdown started.
IX: Scourge of the seven seas[]
Difficulty: ![]() Medium
Medium
Focus: Adventure, Military
Story[]
In this scenario you will start at the dead center of the map with a single corsair ship with 6 attack and the inherent auto repair ability. To increase your fleet size and rank with the corsairs you will have to pillage and plunder. With the money from the loot you gather from the ships and warehouses (mainly ships), you can buy corsair ships with 8 attack, these ships are brilliantly fast and have their auto repair. But the more you plunder the more large war ships start wrecking your party. These are quite hard beat and can destroy several of your corsair ships.
Eventually you will be so admired by Hassan he will send you to destroy a fleet of 4 large warships and 1 large trading ship. This trading ship holds an item called «loot» which finishes he scenario when given to Hassan.
You can buy a large fleet but another possibility is to just buy the key of power from Hassan. (Nobleman item) Sail into the ships and sink them. After that just sink that trading ship and you’ve won the scenario.
Achievements[]
There are three achievements possible:
- Defeat 15 Navy (red) ships
- Acquire 80,000 total bounty (will be done naturally as you progress through the level usually)
- Achieve both the above achievements for the final one.
Tips[]
- Most important tip would be, keep clicking the refresh button as often as you can to make sure you have boarding teams to board large war ships. The first one I took was with the starter ship and one bought ship, simply dragged out the battle until one of my ships was almost destroyed then I used the other to board and it succeeded.
- Building on what the above tip said, make sure you take control of quest enemy ships. These ships are mainly named «Enemy Small Warship» or something similar with either 500 or 800 health. These ships are slow as dirt, have one item slot and cargo hold and they do either 6 or 10 damage pending on their size. Despite being limited, they have no upkeep cost and will not be attacked by the emperor’s navy, an AI’s navy or any military buildings. This is most likely a glitch, but these quest ships can be left in front of a harbor to build up your bounty and they will never be destroyed. Also good for finishing off the final quest as they once again will not be attacked.
- The bought ships are perfect for taking out small ships and getting away with the booty and doing so continuously, so keep buying them.
- Basic fighting skills like focusing all fire power on a single ship generally makes for a won battle.
- Blocking the main port of a player gives quite a lot of loot at once, just put one or two large war ships in front of it beyond the range of the towers and let the corsair ships pick up everything. Be sure to get away before an overwhelming force of large war ships arrives though.
- Enemy ship AI is rather stupid. They will typically focus on one of your ships and ignore the rest, allowing you to move the focused ship just out of range of the enemy while the rest of your ships continues shooting without counterattack. This is especially true in the final battle: those warship do not move at all, allowing you to pick them off one at a time.
- To get money without increasing your rank among the corsairs, board large trade-ships, repair them, and fill with valuable cargo. Then sell ship at a much higher price. The cargo will be dropped in front of the corsair trade building and can be reused for next ship.
X: Noblesse oblige[]
Difficulty: ![]() Medium
Medium
Focus: Development, Trade, Logistics
Objectives[]
Your task is to reach noblemen, using oriental islands only. The scenario is won as soon as you obtain your first nobleman.
Note that although the quest description states that you are to build a Metropolis, you do not need to reach «Metropolis» city status (3500 noblemen/5240 envoys). A status of «City» (1190 patricians) is enough to produce the single nobleman that is required.
Tips[]
This is actually a quite tricky scenario. It requires you to play quite differently because there aren’t the proper fertilities to grow all the goods you need. The key to winning is to set up many passive purchase orders on all your islands and to also use customs items to boost your goods.
- You cannot produce cider, hemp, wheat, or herbs. Northburgh will never sell seeds for this either. You must use Passive Trading for these items. Withholding goods from your Occidental population is critical to conserve supply. You can restrict Peasants from Cider & Citizens from Linen without revolting.
- Adjust the sliders in the Passive Trading to set not only how much Cider and Hemp you want, but also how much you are willing to pay. You can do this at each island you have which will encourage more frequent visits from traders.
- You can optionally choose to not buy linen garments but buy hemp instead and produce the garments yourself. This is cheaper but Northburgh is the only one who sells Hemp and he prefers to not sell much, so you may want to buy both.
- Lumber and Coal are hard to find on Oriental Islands, but a Noria can be used to make fertile terrain and you can plant trees yourself to reach 100% productivity.
- You can produce books and leather jerkins entirely without buying goods. But so few books are needed to reach noblemen that you don’t even need to setup books production. You can just buy books.
- Focus on setting up a large Oriental island with at least 2 Bazaars with or nomad houses.
- Karim may offer «Duty Levied» items on occasion if you accomplish his quests. Therefore, you may consider developing your oriental population to at least 1040 Envoys in order to complete his tasks.
- Occasional sandstorms may affect the world, possibly halting production or causing the population to move out. Therefore don’t forget to check twice if the houses are full before letting the population consume goods that need to be bought in order to avoid upgrading delay and unnecessary loss of goods.
- Hoard Cider through passive trading, once you have enough to start ascending Citizens (40-50), get just enough Citizens enough to produce Iron & Tools, then start cutting off cider to Peasants and then focus on building up a huge Oriental Population all the way to at least 1 Envoy and passively/active sell Carpets or other profitable goods.
- Max out the Trading Fleet Attainments for Zahir and Northburgh to encourage frequent trades with them.
- Hoard Hemp and use your own weaver hut. One will be enough if you’re restricting supply. Once you have around 100 Linen, Advance enough Patricians to reach Glass. Then restrict linens to just Patricians. At this point you should only be needing a steady source of Hemp and Cider. Build the Church when you can.
- Start hoarding Wheat and Herbs and produce a large supply of Bread and Beer. Never let Patricians consume these goods until you’re ready to advance them. You can let them consume Jerkins as Pigs can be made anywhere. Actively buy Paper from Northburgh and horde it in your Occidental City, along with sufficient Indigo to produce books quickly.
- When you have around 50 Beer, 50 Bread, 100 Linens, and 150 Cider, and a large stockpile of Glass, Stone, Tools, and Wood in your Occidental City; start aggressively advancing the entire population. Move all their sliders into Euphoric. Once you reach the second last stage of the Patricians, you’ll need to build books quickly. Put down 2-3 Print Houses to quickly pump out books to keep up with the demand. As soon as you have the Debtor’s Prison, plunk it down and advance a single Patrician to win the scenario.
- Get the attainment Imperial Merchant Fleet. This allows you to buy more goods, and more frequently[2].
XI: Incognito[]
Difficulty: ![]() Hard
Hard
Focus: Development, Logistics
Objectives[]
This scenarios is comprised of several assignments with a time limit. If you fail to complete any of the tasks within the time limit, you also have the option to pay a fine. Failing to pay the fine will fail the scenario.
- Introduction. Time available: 8 minutes. Task: visit Garibaldi’s ship. Upon expiry of time: automatically advance to first assignment.
- First inspection. Time available: 30 minutes. Upon expiry of time: a fine of 20,000 gold coins, to be paid within 4 minutes. Task: build the following.
- a city wall connecting the two existing towers
- 1 gatehouse
- 2 watchtowers
- 2 large statues
- Second inspection. Time available: +30 minutes. Upon expiry of time: a fine of 30,000 gold coins, to be paid within 4 minutes. Tasks:
- 1 church
- 1 bailiwick
- no beggars on the streets
- Third inspection. Time available: +30 minutes. Upon expiry of time: a fine of 45,000 gold coins, to be paid within 4 minutes. Tasks: build the following.
- 10 nomad houses
- 1 mosque
- 13 palm trees
- Fourth inspection. Upon expiry of time: a fine of 100,000 gold coins, to be paid within 4 minutes. Time available: +30 minutes. Tasks:
- 1190 patricians
- 1 manorial palace
- 4 corners
- 4 residential wings
- 1 gatehouse (ornamental)
Tips[]
Winning this scenario is pretty easy, but the real challenge is completing the scenario with at least 30 minutes to spare to get the achievement ‘I work best under pressure’.
This scenario is about fast and cost-effective building. There is plenty of space, so don’t bother about efficient building.
The inspector uses the 4 platforms to «check» if you’ve built what is required, so don’t build around these spaces. Each platform has an influence area when you click on them that reveal the circle the game ‘checks’ to see if the required buildings are present. The administrator will stand there for inspection and you have to build the assignments within his influence area (also the nomad houses and mosque of the third inspection!).
Once you’ve completed an assignment you are free to demolish the buildings. This applies mostly for the Towers and Mosque as they offer your city little when built and have a reasonable upkeep.
Building all structures requires at least 1190 Patricians (for Manorial Palace), and at least 450 Nomads with enough favor to gain access to Quartz and a Mosque. Aim for these objectives while simultaneously completing the require objectives.
Use as much from the introduction time as possible since you don’t get a reward for unused time. Time left from the assignments creates honour and bonus time, so always complete each stage as fast as possible!!
Also request quests from the mentors to get honour faster. You really only need honour for buying enough diplomatic ranks to reach «Sheik’s Ally». Once that happens, use all additional honour to ask for grants from all the mentors.
Walkthrough[]
Start by immediately setting up three complete tools production chains on your main island. Connect Brother Hilarious and buy extra goods and buy all the Tools from Northburgh who is just north of your island. from him in the beginning. Also set up all four stonemason huts and about 10 lumberjacks. You can grab an additional Stonemason Hut on the Spice Island and ship this over.
Build a harbour masters office in the south-west for more efficient handling of the oriental trade routes. Edit the current spice route to go to your new harbour.
Do not colonize another occidental island (no need) but do colonize one of the two large oriental islands in the south or southwest.
One trick is to immediately demolish the oriental houses on ‘Aschgabad’ and change the trading route to bring both spices and dates to your main island. Now build a new oriental city right by your occidental city (where the south-east little platform is below your main city layout. Now build goat farms on your occidental island. Build an extra noria or two on ‘Aschgabad’ and build 2 more spice farms and 2 more dates farms.
Get enough nomads to unlock the quartz mines, mosaic quarries, and mosque (440 nomads). Now build two quartz mines on either large oriental island and ship it back. You need 75 Glass & Stone to complete the Manorial Palace.
You’ll probably run out of money before the final stage where you have to build the very costly manorial palace parts. Produce extra linen garments, bread, tools, and ropes for a nice cash boost. Actively sell and passively sell as many surplus goods as possible and request Grants from the NPCs. Generate more money out of passive sales by maximizing the trading fleets in the attainments menu.
If you’re really efficient, you can beat this level with close to an hour left. Note that the «I work best under pressure» achievement for completing the scenario with 30 minutes or more remaining on the clock was supposedly fixed to work in version 2.1, but sometimes you still don’t get the achievement. The Unofficial Patch can be used to force this achievement.
- Note: One devious strategy is to demolish each manorial segment after you build it. For instance, once all four corners are built, demolish all them. This saves the maintenance, although this method is a bit of an exploit.
XII: Istar’s labyrinth[]
Difficulty: ![]() Hard
Hard
Focus: Adventure
Objectives[]
Find 16 treasures hidden in the labyrinth.
Tips[]
[Spoiler Warning!] Here’s a map of the labyrinth including locations of all items, goods, and treasures.
Notice in the storm on the right side, you can find a boarding crew. With this item you can take over one of the small war ships.
XIII: Elysium[]
Difficulty: ![]() Hard
Hard
Focus: Development, Economy
Objectives[]
Attain 1404 noblemen. Tax income is disabled.
Tips[]
With tax income disabled, you will have to make your money from trade. Active trade and passive trade are both viable options for gathering enough money to complete this scenario.
XIV: Pact with a bard[]
Difficulty: ![]() Hard
Hard
Focus: Development, Military
Objectives[]
Destroy Baroness Zanchi’s manorial palace on her main island. Do not allow Leif to be destroyed.
The player starts with neutral reputation with Zanchi and an alliance with Leif. Ingratiation and tributes to Zanchi are disabled. Zanchi will make regular demands for tribute. Failing to pay these results in war.
Note: There is an achievement for beating this scenario in only 1 real-life hour. This means you can and should use fast-forward as much as possible to make this deadline.
Tips[]
The easiest method to victory is to only recruit Trebuchets through the Robber Baron’s Castle. You simply wait about 20 minutes and accumulate about 10 of these units. While waiting, expand production to meet your people’s needs, such as more Cider, Linen Garments, and Bread. Then declare war, and land right at the upper part of the Baroness’s island. Then destroy the main gate with all your Trebuchets. Move directly on to destroying the Manorial Palace. Keep building more Trebuchets. You’ll probably have to do a couple waves of attack.
Meanwhile, have your 4 starting ships go stay by her Warehouse and keep destroying all her ships. You shouldn’t ever need to build any more Ships. The Baroness is very stupid and victory can be had if you trick her into sailing her troops into the water so you can kill them. If she was smart, this mission would become nearly impossible.
*or*
You can also try for a slower, more economic route to victory. At the start you can expand settling Leif’s main island and claim the river sites. Those will come in very handy when producing leather jerkins and books. Ingratiate him and pay a bit of tribute to compensate for the lost reputation.
It is possible to buy out Zanchi’s main island. This will be very expensive. When you buy the key to the city, you become owner of the Manorial Palace and can simply demolish it to achieve victory.
*or*
You want to aim for 3 large military camps, and 2 trebuchet positions from Barnabas.
You can complete this scenario in 20 minutes, really easily. Build a few more houses, an extra hemp production chain, a weapons chain, 2 more stone masons, and a spare weapons smelter near your other tools production (but keep it deactivated for now). Also build another beer chain. Set the tax income for your Patricians and nomads to happy (light-green), and once you have enough patrician houses (enough for 38 unit limit — around 36-38 Patrician houses), also change the tax income on your Citizens.
Build the keep, and enable your second weapons smithy, disabling the toolmakers as long as you have a surplus (probably around 25t) of tools. This is so you can rebuild your city when it gets sabotaged. Before you run out of money, donate your honor for money (the 150 honor interaction), to get some extra funds. Also attempt to sell any surplus goods you have.
Position your military camps (transport ships) near the beach which is nearest to the Palace, along with your warships. By quickly declaring war, using your ships to protect your ships, land using one of the trebuchet units, and quickly place all 4 of your remaining troops down, making sure that one of your large military camps is the first to land, so it can tank the shots from the gatehouse. Now, send all your camps to attack the gatehouse, and once its destroyed, move them up next to the Manorial Palace. You can place your trebuchet position in direct range of the Palace, without having to destroy any of the smaller buildings. Now, just set it to attack the Palace, and protect it with your 3 military camps. You may end up loosing the Castle that you landed with, but don’t worry. As long as you destroy the Palace, you automatically win.
XV: Barren lands[]
Difficulty: ![]() Hard
Hard
Focus: Development, Trade, Logistics
Objectives[]
- Build a city with 4,000 noblemen in a world with minimal fertility.
- Rid the world of the corsairs. Each island cleared gives 400 honour and 5000 gold coins. Upon completion of this quest (the keep and the three Watchtowers around it can be left intact despite the Quest’s «63» Tower count which should be «60»), the player receives The last contingent.
- The last contingent. Destroy a fleet of 13 corsair ships. Completion enables trade (both passive and active) with Hassan ben Sahid. The corsairs are the only source of seeds on this map.
Tips[]
It’s best to play this map in two distinct phases: fighting the corsairs & building the cathedral.
- Fighting the corsairs:
- Build a settlement and begin to gather coin in order to buy honour from Lord Richard Northburgh.
- You can get tools by trading with Lord Richard Northburgh or by buying them from a monastery located on the island you start on.
- There is an excavation site on the island; I highly recommend providing the required equipment for the excavation as it will create items. Most of the items will be useless but can later be traded for a large sum of honour from Lord Richard Northburgh.
- With enough honour buy 2 small war ships and explore the map. Find the Grand Vizier Al Zahir so you are able to trade honour for large oriental warships.
- Destroy the 60 Harbour Towers located around the coasts of islands. You do NOT need to destroy the Keep and three Watchtowers on the upper-right island, despite the game counting the Watchtowers in its total 63 towers. You just need to destroy the armies.
- You can destroy the corsair’s armies with your ships. Build a warehouse on one of their islands and any armies on it will move in to destroy it, putting them in range of your ship’s cannons.
- Now complete the fraternization quest, which requires destroying the Corsair fleet.
- The 13 ships of The last contingent can be taken out with a single harbour defence tower. See screenshot for demonstration. Only the center ship fights back, the rest completely ignores the tower. They all eventually die without putting up much of a fight. This method exploits the bad AI, so you may wish to use the old fashioned method of attacking with Ships, retreating to heal, and repeating until you win. Although, you will lose many Ships trying to attack them.
Taking out 13 corsair ships with one tower
- Building the cathedral:
- Buy seeds from Hassan. Grow Cider and Hemp on islands.
-
You cannot buy any seeds from the corsairs until you have completed the missions.
- You require 521 Houses total, with no Beggars or Envoys, to settle 4000 Noblemen.
- The entire game you will only be able to plant cider and hemp seeds (date fertility is already provided) so all other resources will have to be traded for.
- Settle all islands and put in purchase orders for Bread, Beer, and other goods. Then set up trade routes to bring these goods to your main island.
- Settle the volcanic island and buy a geologist, who will allow you to make any number of the types of mines he provides. For example, you can build five salt mines with just one brine geologist.
- Disallow Goods for your people that you cannot produce yourself. Only briefly allow all goods to push for further city levels. Don’t worry about upsetting your population.
- Other resources:
- Article on Barren lands on German Anno Wiki
- Great Walkthrough from Thread on Barren lands on Ubi forums
Notes[]
- ↑ Calculated using the Population Calculator
- ↑ http://forums-de.ubi.com/eve/forums/a/tpc/f/6331056277/m/3651092838

Сложность: средняя
Откройте культуру Востока и действуйте, как посол между двумя людьми.
Условия выигрыша
— Построение Мечети Султана.
— Населить по миру 5000 Посланников.
— Выполнить 5 заданий для Султана.
Советы
Этот сценарий позволяет вам сконцентрироваться почти исключительно на вашем восточном поселении. 5000 Посланников легко могут быть размещены на острове средних размеров, поэтому проще всего построить одно главное восточное поселение.
Попытайтесь построить Мечеть Султана как можно раньше, так как после ее завершения Султан прибудет на остров AI Захира, и будет предлагать вам задания со случайными интервалами. Заметим, что иногда Султану может потребоваться много времени, чтобы предложить задание, и не существует способа ускорить этот процесс.
Интересные статьи
Обновлено: 01.02.2023
Вообще, редактор карт можно много где скачать, но после этого у многих возникает проблема. А именно: он не устанавливается на русскую версию игры, требуя английскую, которую найти ой как непросто.
Поэтому я решил выложить уже установленный редактор карт. Он-то точно (ну, почти наверняка) не будет ругаться на русскую версию игры.
Чтобы использовать его, вы должны перекинуть (с заменой) содержимое архива в папку с установленной игрой Анно 1404: Венеция.
Что касается работы в редакторе, то есть несколько важных файлов:
— WorldEditor2.exe — редактор карт в буквальном смысле данного слова, то есть в нём редактируются. карты. Размещаются острова, плодородные культуры и ресурсы, устанавливаются конкуренты, создаётся освещение, располагаются нейтральные силы. Также здесь меняется размер, название и описание карты. Только для оригинальной игры, без аддона!
— WorldEditor2AddonUserContent.bat — (да, запускается именно с .bat-файла, не с .exe !) — аналогично предыдущему, но для Венеции. Соответственно, содержит венецианские острова и тому подобное. Все карты для аддона создавать исключительно в нём.
— ToolOne.exe — редактор квестов, наград за квесты, особенностей поведения конкурентов, кораблей, зданий, предметов, товаров, цен, текстов,названий и многого, многого другого.
— ToolOneUserContent_Addon.bat — аналогично предыдущему, но для Венеции. Естественно, карты аддона редактируются в нём, а не в прошлом файле. Содержит не только предметы, корабли и другой контент оригинала, но и контент Венеции.
Также, что важно, в toolone можно переключить язык на русский (вкладка texteditor, рядом с вкладками file, edit, view, mode).


Так держать. Как раз сегодня утром пытался третий раз скачать подходящую версию игры, но ничего не вышло. Психонул — удалил всю игру и пакеты установщика. Через пару часов Вы нашли идеальный вариант. Вот же совпадения бывают. Так получается, что теперь та версия 1.1 нам не нужна теперь? Редактор островов есть, редактор мира теперь (благодаря вам) тоже есть.
Joel Alkosso Я уже расписал в комментарии под IslandEditor’ом. В общем, я думаю, что 1.1 не нужна. Спасибо, кстати, за скачивание. Приятно видеть, что труды не бесполезны, особенно, когда дело касается, к сожалению, далеко не самой популярной игры.
Turnox Теперь, после нервных недель, я должен заново скачать anno. Буду пробовать создавать острова ещё раз.
Наконец-то кто-то это сделал! А то кидают только установщики, а английскую версию игры мне искать лень, её ещё и устанавливать надо.. Вообщем огромное спасибо!)
Вот собственно моя карта для дополнения Венеция.
Карту делал для удобства(по скрину отметил два главных острова красным цветом)(синим отмечены острова Норберта,Венеция,Корсары и визирь.)(И оранжевым отмечены острова представляющие большую ценность. (первый-весьма необычный вулканический.второй-небольшой райский остров на котором растут все ресурсы!:)))

—
(Карта сделана на основе игровой карты «65432»)
Вес карты 88 кб
—
И некоторые,нужные параметры карты:
Игроки:Гай Форкас,Констанция Занхи,Луций.
Корсары-норм
Возмещение при сносе здания-полное
Поручения-норм
Катастрофы:песчаная буря,грозовая буря,извержение вулкана.
Старт-Флагман
Деньги-норм (30000)
Слава-мало (100)
Предмет-сильный
Карта-открыта
Шпионаж и гор.совет включены
Условий победы нет
—
Установка:(для win7) В Документах заходим в папку «ANNO 1404 Венеция» там создаем папку «Scenarios» и в нее кидаем файл с картой.
Заходим в игру,и жмем кнопку «Пользовательские сценарии»
Жмем на карту и играем!)
Удачи=)
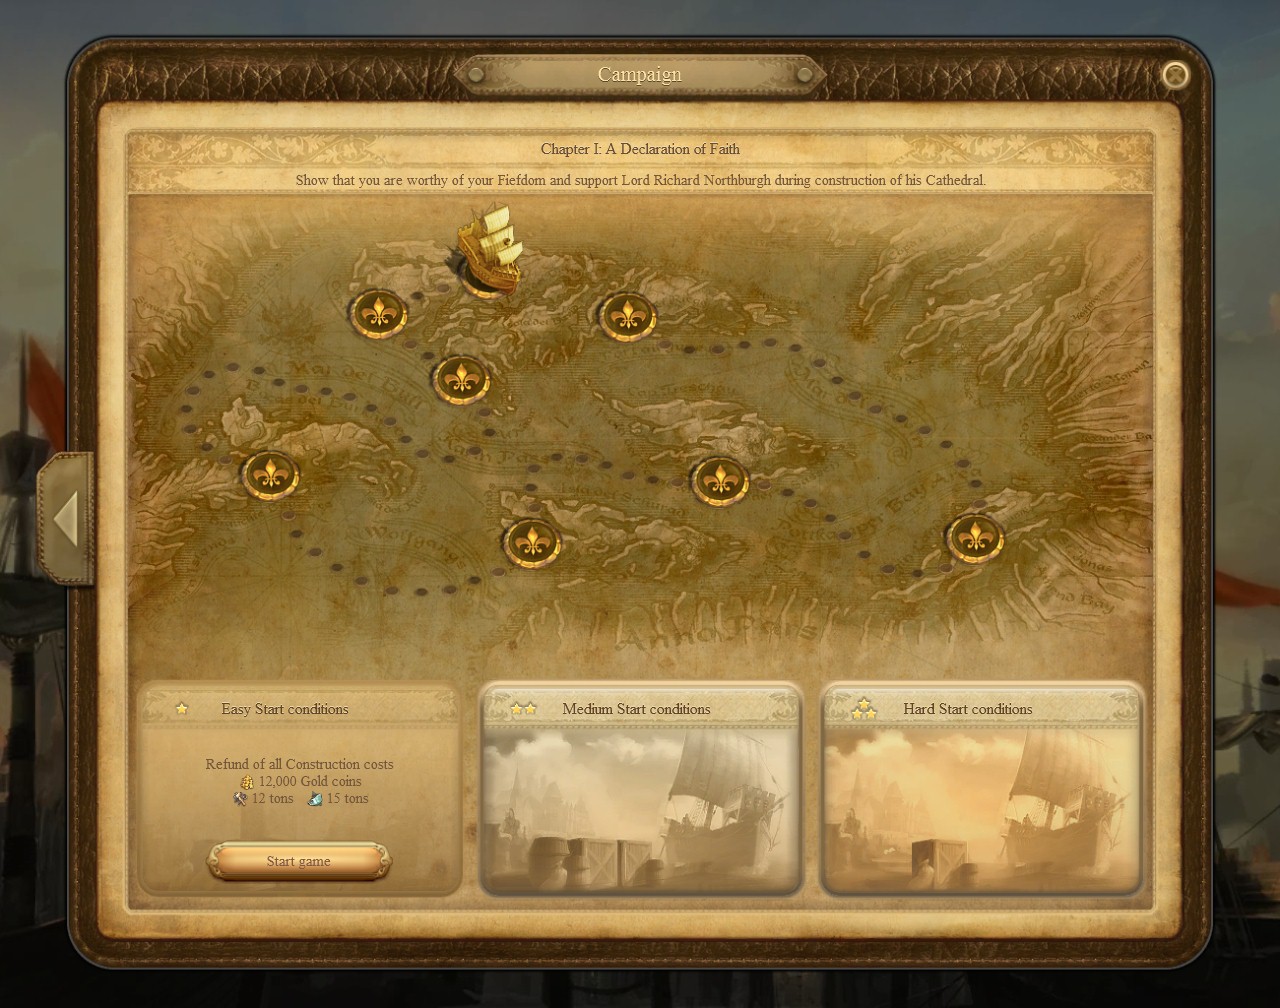
Anno 1404 features a single-player story mode known as the Campaign. It tells the story of planned crusade-turned-plot to overthrow the Emperor. Besides introducing characters, it also doubles as a tutorial and introduction to the basics of Anno 1404 game-play.
It’s recommended that new players play through the Campaign before trying the scenarios or continuous mode.
Note: The cities you build in each chapter do not carry over to the next chapter.
There are special medals and achievements awarded for completing the campaign on easy, medium, and hard (You only need to play on the hard difficulty to unlock all three) and for completing every single quest in every single story mission.
Chapter 5: A Storm Breaks Out [ ]
«Avert the threat of War between the Occident
and the Orient and expose Guy Forcas
for the deceitful wretch he is.»
Chapter 7: The Man with the Mask [ ]
«Rescue Lord Ricard from exile with Al Zahir’s help, and save the Emperor’s life.»
Chapter 3: Departure for the Promised Land [ ]
«Build Guy Forcas a Harbour and prepare
the Crusader fleet for departure.»
Chapter 2: In the Sign of the Cross [ ]
«Expand your Settlement and supply
the growing Crusader army.»
Chapter 4: The Lost Children [ ]
«Solve the mystery of the missing Children and
establish the first contacts with the Orient.»
Chapter 6: Caught in a trap [ ]
«Stand up to Cardinal Lucius and help
Marie d’Artois defend her City.»
Points [ ]
Each of the 8 chapters contains a certain static amount of quests that are each worth a certain amount of points. Upon completing each chapter a victory screen will be displayed that lists the total points you earned. There is an achievement for completing all quests in all chapters on hard, which unlocks a special title as well. This achievement is also needed to get «The Gold Ship» achievement.
Most quests you can’t avoid and you’ll complete as you play each chapter, but there are a number of missable sidequests. A few of these are very easy to miss. The walkthrough labels all sidequests and tells you how and when to complete them, but be aware that if you skip around in the walkthrough, you might miss them.
Chapter 1: A Declaration of Faith [ ]
«Show that you are worthy of your Fiefdom and support Lord Richard Northburgh during construction of his Cathedral.»
Chapter 8: Pillars of Justice [ ]
«Complete the Cathedral construction in an unequal contest and put a stop to Cardinal
Lucius once and for all.»
Сообщество Империал: [Anno 1404] Любимый сценарий — Сообщество Империал

В Anno 1404 помимо бесконечной игры, с дополнением Venice предлагаются следующие сценарии:
-
Крутой бейдевинд
Продемонстрируйте свои способности, выиграв в гонке с контролем времени.
Специализация: приключения
-
Инкогнито
Подготовьте свой город для тайной встречи Джакомо Гарибальди
Специализация: строительство, логистика
А какой сценарий выбираете вы? Часто ли вам удаётся одержать в нём победу?
Читайте также:
- Leisure suit larry кончить с отличием
- Скайрим уровневые списки
- Aion скрытая истина
- Партизаны подмосковья 1941 1942 имена
- Mass effect andromeda стоит ли играть
Содержание
- 1 Установка и инструкции
- 2 Вступление
- 3 «Символ веры»
- 4 «Под знаком креста»
- 5 «Отплытие в Землю Обетованную»
- 6 «Пропавшие дети»
- 7 «И грянул гром»
- 8 «Пойманные в ловушку»
- 9 «Человек в маске»
- 10 «Столпы правосудия»
- 11 Хитрости в игре
- 12 Дополнение «Венеция»
- 13 Anno 1404 как получить дипломатический ранг
Установка и инструкции
Назовите свой город «BonanzaCreek» и вы получите сообщение
что в игре нет читов, титу «Cheater», достижение «Cheater»
и 10 драгоценных камней.
Установите соответствующую дату на компьютер чтобы
получить 10 драгоценных камней, достижение и титул:
14 апреля — титул «Anno 1404 fan»
15 марта — титул «1503 A.D. fan»
16 февраля — титул «1602 A.D. fan»
17 января — титул «1701 A.D. fan»
Начните игру между 3:00 и 5:00 утра и получите 10 камней и достижение
Начните игру 11 ноября в 11:11 утра и получите 10 камней и достижение
Назовите свой корабль следующим именем и получите 10 драгоценных
камней и достижение:
Также вы можете получить достижение за:
— Постройку 1000 крестьянских домов за игру
— 24 часа беспрерывной игры
— снятие 500 скриншотов
— 2 часа игры при максимальном приближении
— 10 часов игры при среднем приближении
— 20 часов игры на максимальном удалении камеры
— 250 раз нажать паузу
— уничтожить 2500 вражеских кораблей
— ускорить игру в течении часа
Неограниченное количество золота:
Сначала загрузите бесплатную программа «ArtMoney»
погуглите ссылку ее домашней страницы.
Установите и запустите ArtMoney. Теперь запустите Anno 1404
и перейдите к главному меню. Используйте [Alt] + [Tab],
чтобы переключаться между игрой и ArtMoney.
В ArtMoney вы должны выбрать имя процесса, найти Anno 1404.
Теперь перейдите в поле поиска и введите значение 80000.
Теперь перенесите все значения слева направо, дважды щелкнув по нему.
Каждое значение должно быть выбран только один раз,
не более 60 значений в общей сложности.
Теперь выберите значение и поставить 999999999 в поле,
и вставить эти значение все до низу.
Когда вы сделали это, вы можете вернуться к Anno 1404.
Выберите contineous игру, выберите нужные параметры.
Теперь для золота выбрать 80000. Также надо выбрать судно,
а не параметры хранилища. Запустите игру,
и вы должны получить 999,9 млн золота в распоряжение.
Теперь вы можете наслаждаться игрой и не беспокоиться о золоте

Многие геймеры любят игры от Blue Byte. Что и неудивительно – практически каждая стратегия этой компании становится настоящим хитом. И «Анно 1404», прохождение которой может занять игрока на многие недели, не является исключением. Игрушка получилась действительно удачной, укрепив успех и без того популярной серии. Поэтому рассказать немного о прохождении игры «Анно 1404» будет вовсе не лишним.
Вступление
Сюжет игры переносит геймера в далекий 1404 год. Непросто жить в это время в Европе, и тем более сложно быть хорошим руководителем. А ведь игра Anno 1404 начинается как раз с того, что геймер получает назначение на пост правителя небольшого поселения. Нужно постараться развивать его, обеспечивая жителей всем необходимым, заодно выполняя различные поручения от союзников и начальства.
К примеру, нужно помочь лорду Ричарду Норбергу – казначею империи. Дело в том, что император болен, а его кузен (он и есть Норберг) планирует возвести шикарный кафедральный собор, куда простые люди смогут приходить, чтобы молиться о здоровье правителя.
А тут еще и кардинал Луций решил устроить очередной крестовый поход, отправив крестоносцев усмирять сарацин в диких песках Востока – руководителем станет Гай Форкас, и он также нуждается в поддержке. И ведь это только самое начало! Дальше все будет еще серьезнее. Появятся новые персонажи, которым нужно будет помогать справляться с различными заданиями. Поэтому приготовьтесь к действительно захватывающему приключению – иначе назвать прохождение «Анно 1404» никак нельзя! Расскажем про самые важные первостепенные квесты в игре.
«Символ веры»
Начинается игра с назначения игрока губернатором поселения на небольшом островке.
Квест «Хранитель императорской печати» максимально прост – нужно лишь щелкнуть по кораблю возле пристани, выделенному желтой звездочкой, после чего прослушать речь и получить награду, причитающуюся за выполнение задания.
«Домашний очаг» — еще одно довольно простое задание. Нужно всего-то построить 3 простых хижины, чтобы увеличить население поселения.
«Вероисповедание» — уже более сложное задание. Жителям острова остро не хватает религиозного рвения – негде помолиться, исповедаться, покаяться в грехах. Поэтому нужно как можно скорее возвести на острове часовню. Для этого в поселении должно жить минимум 90 человек. Располагать часовню нужно так, чтобы в зоне ее влияния располагалось не меньше 8 домов.
«Важнейший строительный материал» — задание, которое поможет лучше разобраться в механике игры. Чтобы получить достаточно древесины, игрок должен построить две хижины лесоруба. Причем строить их нужно поближе к деревьям, чтобы не пришлось далеко ходить за материалом.
Задание «Помощь голодающим» также направлено на изучение игры. Чтобы снабдить жителей необходимыми продуктами, постройте в подходящем месте хижину рыбака – это резко снизит проблему голода в поселении.
«Древесина для императорского собора» — здесь все просто. Нужно накопить 10 тонн древесины и согласиться отдать их на строительство. Награда – 1000 монет, что очень неплохо, и наш собственный корабль!
«Мореходство» — лорд Нортберг хотел подарить нам ящик с ценным грузом, но он был потерян во время бури. Придется поплавать по морю и отыскать его.
«Рыба к столу» — нужно накормить строителей собора. Накопите 10 тонн рыбы, загрузите на корабль и отправьте к острову нашего покровителя лорда Нортберга.
«Достойное завершение» — здесь придется поработать посыльным. Все довольно просто – забрать каменные элементы для собора в одном месте и выгрузить в другом.
На этом первая глава игры завершается.
«Под знаком креста»
Начинается игра с прибытия армии крестоносцев на соседний остров. Придется всячески помогать их руководителю Гаю Форкасу – без этого прохождение «Анно 1404» невозможно.
«Снабжение Христова войска» — Форкас требует для нужд армии 15 тонн рыбы и 3 тонны яблочного сидра. С рыбой проблем не будет, а вот ферму по производству сидра, как и яблочные сады для получения сырья, придется обустроить с нуля.
«Крытый рынок» — здесь все просто. Нужно построить крытый рынок на приличном расстоянии от имеющегося, чтобы покрыть большую территорию.
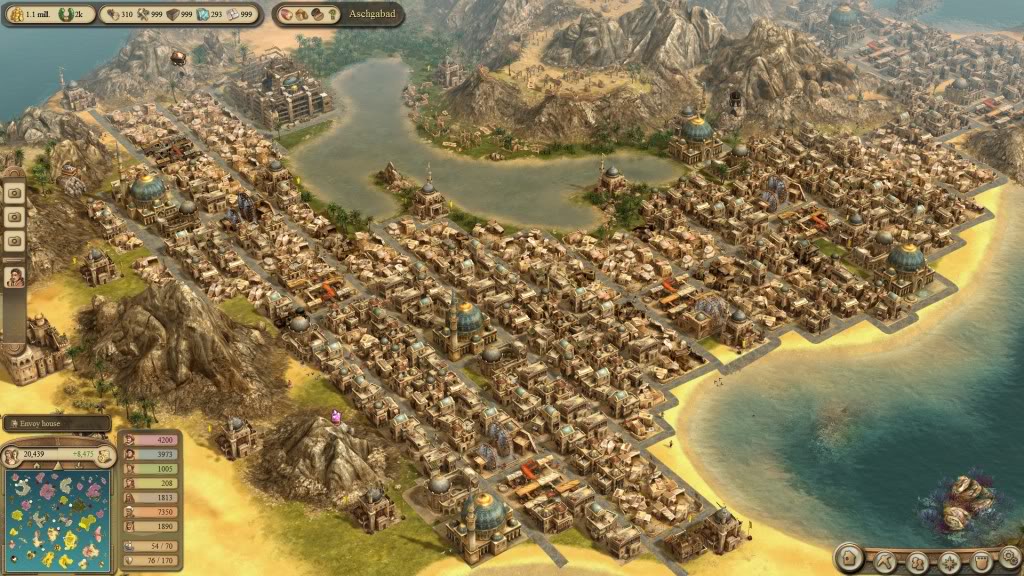
«Посол войны» — нужно доставить письмо от Гая Форкаса на остров, расположенный в северной части карты – здесь его ждет девушка-рыцарь Мари д’Артуа. По дороге можно прочитать письмо из любопытства.
«В новом одеянии» — теперь Форкас требует приготовить 5 тонн одежды из хорошего полотна. Придется построить ткацкий цех и посадить поля конопли – они обеспечат цех качественным сырьем. Но постройка будет доступна, только когда в городе появится 15 горожан – до этого жители были крестьянами. Придется улучшить один из домов или дать людям больше припасов (рыбы, сидра), чтобы они сделали это сами.
«Перевязь и копье» — нужно доставить на корабле сундук с оружием из пункта А в пункт Б – они подсвечены, если навести мышку на иконку задания.
«Спасение утопающих» — наша знакомая Мари плыла на корабле, который налетел на рифы неподалеку от нашего острова. Срочно на помощь! Загрузим на корабль 10 тонн дерева и доставим к ее судну, чтобы моряки смогли заделать брешь в борту.
«Канатное дело» — Форкас никак не уймется. Теперь он просит 3 тонны канатов. Строим еще и канатную мастерскую – благо сырье в виде конопли уже имеется в достаточном количестве.
«Поиск клирика» — отправляемся на остров, где живет священник брат Хиларий. Строим здесь контору и забираем священнослужителя, доставляем его к Форкасу.
«Отплытие в Землю Обетованную»
Теперь нужно обеспечить крестоносцев необходимыми запасами для путешествия. Ведь прохождение «Анно 1404» на эпоху Крестовых походов приходится. Поэтому лениться нельзя!
«Порт для крестоносцев» — здесь все просто. Нужно лишь построить верфь – накопите припасы (если надо – сократите затраты крестьянами) и возведите здание.
«Строительство началось» — загрузите на борт корабля 2 тонны инструментов и 3 древесины. Отправьте его на остров Порт Сакрал и постройте здесь контору.
«Контора начальника порта» — Форкас требует построить контору начальника порта. Для этого нужен камень. Строим каменоломню на острове, откуда забрали брата Хилария. Когда ресурсы накопятся – строим требуемое здание.
«Транспортный корабль» — нужно увеличить флот, чтобы успевать своевременно перебрасывать товары между островами.
«Провиант для тысяч людей» — нужно лишь улучшить контору на Порт Сакрале. Для этого нужно 4 тонны камня, 3 инструментов и 2 древесины.
«Последние приготовления» — для хранения товаров необходимо возвести на Порт Сакрале четыре склада. Запаситесь для каждой постройки 4 тоннами камня и 16 древесины и инструментов.
«Сверкающее железо» — Форкас требует доставить ему железо. Строим рудник на Хагенберге. Здесь же возводим хижину угольщика и доменную печь. Накапливаем ресурсы и отдаем заказчику.
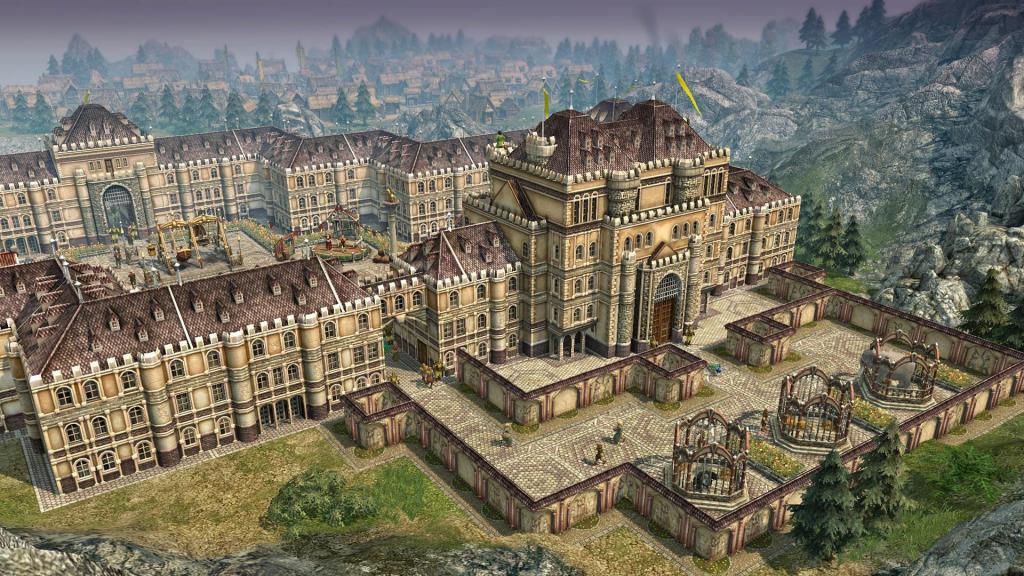
«Безопасность превыше всего» — строим на Порт Сакрале ремонтный кран, чтобы починить судно Мари, которая снова повредила в спешке корабль. Что и говорить, карта «Анно 1404» имеет немало мест, где девушка может угробить судно.
«Пропавшие дети»
Работорговцы похитили большую группу детей. Нужно срочно остановить их!
«Из огня да в полымя» — сложное задание. Сначала строим возле монастыря крытый рынок и прокладываем дорогу. Брат Хиларий рассказывает о кораблях работорговцев. Преследуем их на судне и находим обломки и часть выживших детей посреди моря. Спасаем их всех.
«Благоустройство» — из-за последнего шторма корабли прилично потрепало. Нужно обзавестись ремонтным краном. Для этого на острове должно быть 355 горожан.
«Просьба о помощи» — отвозим подарок от лорда Нортберга в поселение Аль-Захира, налаживая дипломатические связи с иноземцами. После этого можно будет строить новые здания из вкладки «Кочевники».
«Несчастье на море» — производим 3 тонны канатов и отвозим кораблю Аль-Захира, застрявшему посреди моря.
«Дорога к Кариму» — начинаем колонизацию острова на западе от земель Аль-Захира по знакомой схеме.
«Рука руку моет» — местный житель Карим просит построить 10 домов, козью ферму, базар и плантацию фиников. Выполняем задание.
«Жизнь со вкусом» — строим на новом острове здание для производства специй.
«По корсарскому следу» — получаем наводку на корабли пиратов. Плывем туда и находим судно с пленными детьми на борту.
«Помощь Аль-Захира» — накапливаем 5 тонн оружия и доставляем его Аль-Захиру, получаем абордажную команду.
«На абордаж» — захватываем замеченный ранее корабль, освобождаем детей.
«И грянул гром»
Нужно помочь Аль-Захиру, который оказался в сложном положении. Да, секреты «Анно 1404» довольно многочисленны, и неожиданных поворотов здесь хватает.
«Помощь для Аль-Захира» — нужно произвести 8 тонн кожаных камзолов и доставить их восточному союзнику.
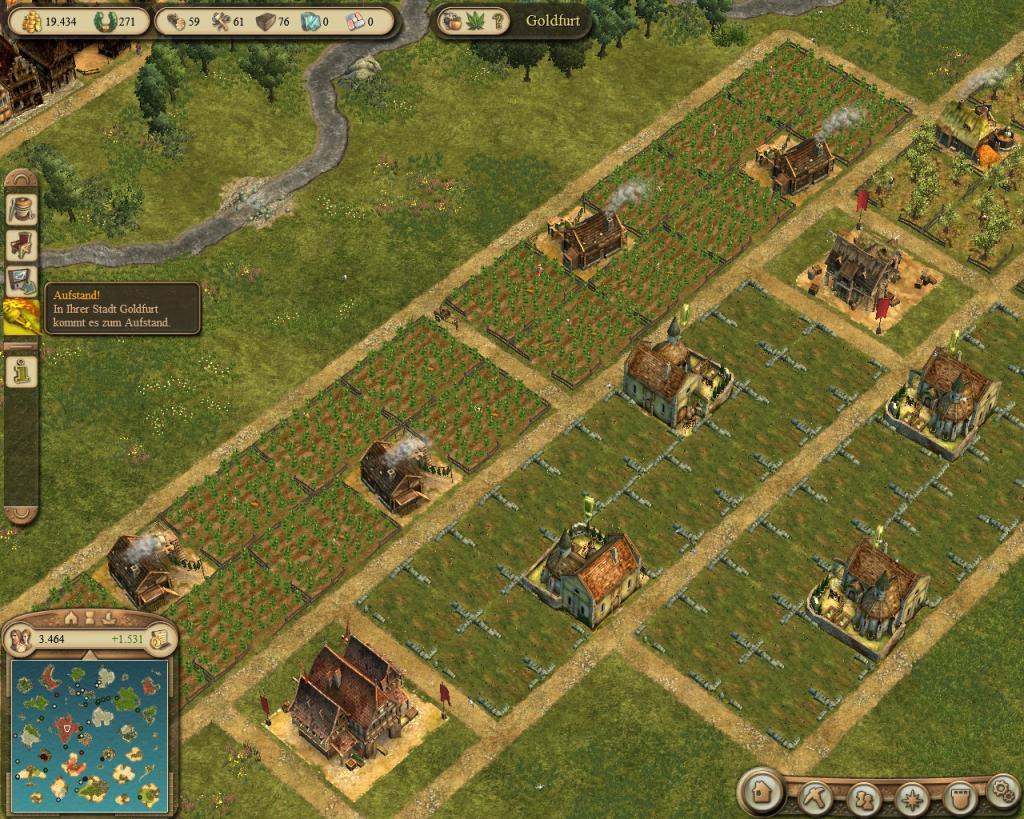
«Показания очевидца» — доставляем отчет Аль-Захира о зверствах крестоносцев Форкаса Мари д’Артуа. Увы, она не поверит сообщению.
«Поддержка беженцев» — чтобы накормить беженцев, Аль-Захир просит привезти 10 тонн молока и столько же фиников. В награду отдаст целый остров!
«Подозрительные обломки» — обыскиваем на корабле участок моря, найдя журнал капитана.
«Журнал» — для расшифровки потребуется помощь эксперта – знакомого Аль-Захира. А он просит бумагу и индиго. Для производства бумаги в «Анно 1404» патриции нужны – не меньше 940 человек. А для индиго – 295 кочевников.
«Обломки на жемчужном рифе» — обыскиваем море и находим еще два места крушения кораблей. Забираем ценные находки.
«Конец крестового похода» — доставляем информацию Мари, используя для этого белый флаг, чтобы корабли Форкаса не атаковали. Умная девушка быстро поймет, что к чему, и выйдет из войны.
«Пойманные в ловушку»
Кардинал Луций не в восторге от поступка Мари – он считает ее предательницей. Придется помочь ей.
«Последний бастион» — быстро развиваем экономику. Строим крытый рынок, новые хижины рыбаков, две плантации конопли, хижины лесорубов и каменоломни – ресурсов для затяжной войны потребуется много.
«Боевое крещение» — бросаем отряды в бой и стараемся разбить войска противника. Крепость защищать не нужно – она бессмертная.
«Железный резерв» — Мари просит построить две мастерские для производства военных машин – они пригодятся в бою против опасного врага.
«Божественное видение» — отбиваем вторую волну врага. Возможно, при этом будут разрушены некоторые ценные постройки. Их нужно будет перестроить в более безопасном месте.
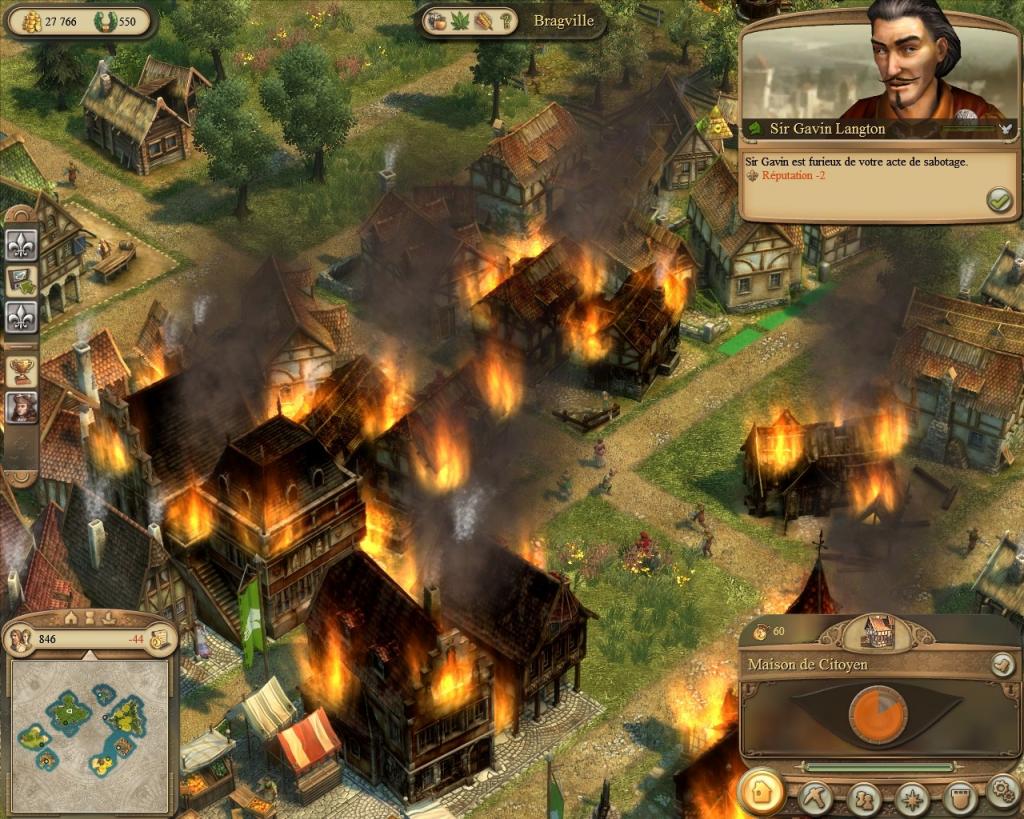
«Глаза врага» — кардинал Луций понял, что в честном бою вас не взять. Поэтому решает использовать шпионов – их можно узнать по синему свечению. Поймайте троих, чтобы выяснить дальнейшие планы врага.
«Человек в маске»
Война с Луцием не окончена – многим городам в «Анно 1404» по-прежнему угрожает опасность!
«Восточные сладости» — строим в селении Дийя плантацию фиников.
«Помощь свыше» — расширяем производство молока в Дийе и накапливаем 15 тонн. Его придется отдать ведьме Гекате за бутылку с посланием лорда.
«Отважный план» — передаем бутылку Измиру, который может расшифровать послание. Узнаем местоположение лорда Нортберга. Для изготовления карты потребуется 6 тонн индиго и 5 бумаги.
«Добровольцы» — нужны подрывники, чтобы спасти лорда из тюрьмы ассасинов. Развиваем деревню Дийя, чтобы получить их.
«Освобождение» — спасаем лорда из тюрьмы при помощи подрывников. Улучшаем крепость, превращая ее в контору.
«Наконец свободны!» — Аль-Рашид, возмущенный повреждением крепости союзником, требует материалы для ее ремонта. Потребуется 20 тонн мозаики и столько же глины.
«Последняя надежда» — ищем ведьм, которые знают рецепт лекарства, позволяющего исцелить императора. Догоняем корабль с вором, который похитил свиток с рецептом.
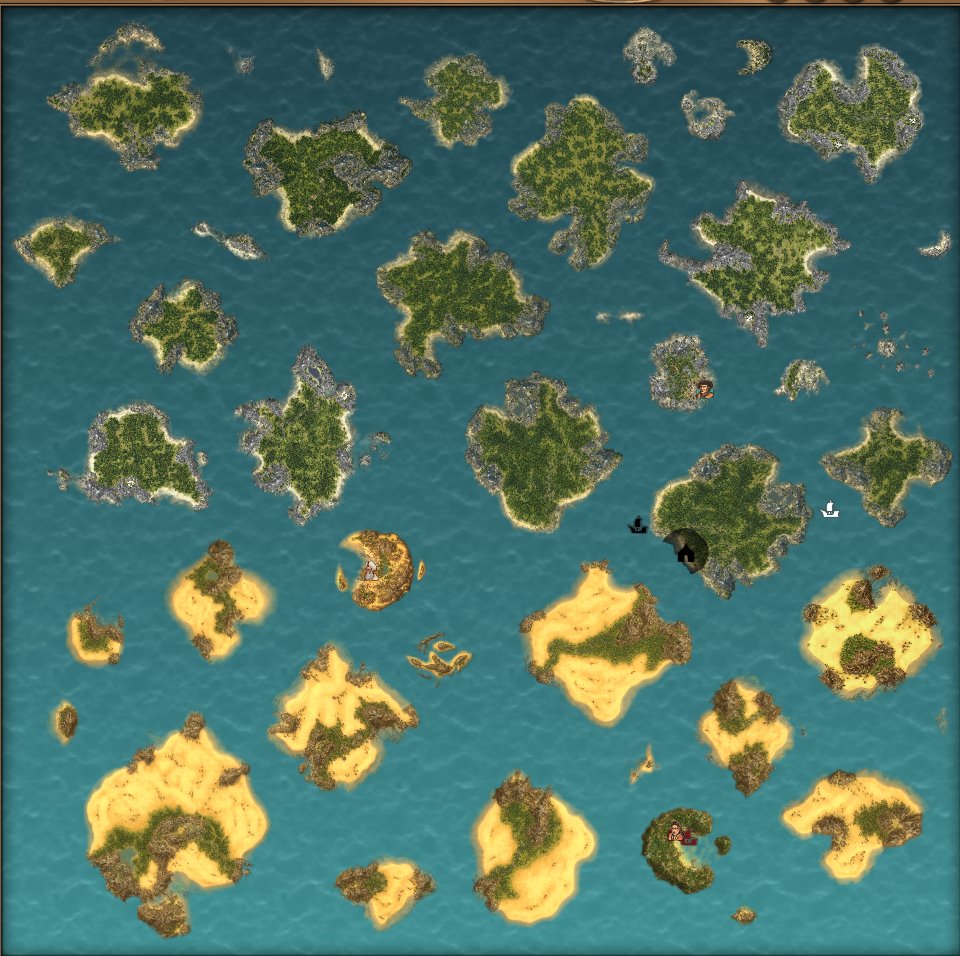
«Надежда для императора?» — добываем необходимые ингредиенты (черную жемчужину и фиал с соком четверки) и доставляем их Гекате. Возможно, готовое лекарство поможет исцелить императора.
«Столпы правосудия»
Последняя глава, к которой геймер уже отлично знает, как играть в «Анно 1404», разобравшись во всех тонкостях.
«Строительная гонка» — нужно построить собор. Но дело это не быстрое – придется выполнить несколько промежуточных заданий.
«Наперегонки со временем» — потребуется много ресурсов для строительства, которое возглавит лорд Нортберг – 400 тонн инструментов и 240 древесины.
«Наперегонки со временем-2» — для постройки стен нужно 500 тонн инструментов и 750 камня.
«Наперегонки со временем-3» — установки витражей. Запаситесь 800 тоннами инструментов и 400 стекла. При необходимости развивайте производство – иначе уложиться в срок не удастся.
«Конец кардинала» — собираем все силы и готовимся отражать атаку кораблей кардинала. Вскоре на помощь придет флот императора с правителем во главе. Это последняя глава в Anno 1404. На этом игра успешно завершится.
Хитрости в игре
Некоторые игроки часто используют в «Анно 1404» читы. Благодаря им можно значительно упростить прохождение. Правда, и уровень удовольствия от игры может серьезно снизиться – ведь важно не победить любой ценой, а справиться честно. Но все-таки иногда коды в «Анно 1404» могут оказаться полезными.
Например, 10 драгоценных камней можно получить, если назвать корабль одним из следующих имен: Discovery, Gotham, Hispaniola, U-96, Nautilus.
Также камни можно получить, назвав свой город BonanzaCreek.
Эта же награда предусмотрена игрокам, которые играют 11 числа 11 месяца в 11:11 – весьма интересная задумка!
Изменяя дату на компьютере перед игрой, можно также получить по 10 драгоценных камней. Эти даты: 14 апреля, 15 марта, 16 февраля и 17 января.
Как видите, читы в «Анно 1404» немногочисленны, но довольно оригинальны и интересны.
Дополнение «Венеция»
Немалой популярностью среди поклонников игры пользуется дополнение «Венеция».
Как понятно из названия, сюжет закручен вокруг города Венеции. Это могущественный сосед, от которого можно получать различные задания, а также торговать с ним. Благодаря дополнению «Венеция» прохождение «Анно 1404» затянется на многие часы – ведь здесь предусмотрено 15 совершенно новых миссий. А также появляется режим мультиплеера для совместной игры в режиме реального времени.
Anno 1404 как получить дипломатический ранг
Автор Ёергей Филиппов задал вопрос в разделе Прочие
КАК ПОДНЯТЬ АВТОРИТЕТ В ИГРЕ anno 1404?»?? и получил лучший ответ
Ответ от Bigger BlooD[гуру]
Нужно сделать подарок там за 100 или за 50 можно купить кувшины или что-то наподобии там будет описании к ним, их нужно приобретать на острове у твоего командира или любого другого кто не с востока
после подплываешь к острову Восточных людей и там появится окошко жмешь да, ну разберешься

Anno 1404 — замечательная игра, но то, как она предоставляет информацию, оставляет желать лучшего.
Поэтому я буду перечислять как можно больше вопросов, которые могут возникнуть у новых игроков, и предоставлять столько ответов, сколько смогу.
Они будут разделены на 3 категории: городское строительство, военные и квесты.
Городское строительство
- Как мне колонизировать остров?
Скорее всего, вы начали с корабля, выберите его и переместите к береговой линии острова. если на берег не претендует другой игрок, вы сможете построить склад с помощью кнопки, появившейся в меню корабля.
- Как строить дороги?
Выбрав строительство грунтовой дороги в меню строительства, а затем один раз щелкнув левой кнопкой мыши на плитке на принадлежащем вам острове, вы сможете переместите его в любое место на вашей территории, которое не заблокировано, и дорога увеличится в длину. как только ваш контент будет иметь форму, вы можете снова щелкнуть левой кнопкой мыши, чтобы создать его.
- У меня закончились ресурсы, где я могу получить больше?
Есть много способов получить то, что вам нужно. такие вещи, как инструменты и дерево, можно купить в нейтральных гаванях или даже в собственной гавани, выбрав свое торговое здание и нажав зеленый значок +. это позволяет вам покупать товары у проходящих кораблей по ценам и в количествах, которые вы можете настроить самостоятельно. платишь меньше — меньше продается и наоборот. всегда будут плавать нейтральные корабли, поэтому вам не нужно беспокоиться, если нет игроков с искусственным интеллектом. Конечно, более стабильный способ получения ресурсов — производить их самостоятельно. хижины лесорубов для дровяных и железных рудников, плавильных заводов, угольных горелок и кузниц инструментов — все это открывается, когда вы развиваете свое население.
- На моем острове не производят сидр, почему это?
Большие стартовые острова часто производят сидр и коноплю, но не все. вы можете увидеть изобилие островов прямо к северу от вашего экрана, когда вы смотрите на остров, вы можете щелкнуть левой кнопкой мыши по нему, чтобы увидеть его минеральные залежи. В Anno 1404 есть много товаров, и не все из них доступны на одном острове, поэтому вам, вероятно, придется колонизировать другой, чтобы отправить нужные товары обратно в ваш город. однако на некоторых островах в меню плодородия есть вопросительный знак, это означает, что если вы можете найти тип семян, вы можете посадить их на острове. Вы можете купить семена в некоторых нейтральных гаванях и принести их обратно в свое торговое здание. Слева от него есть специальная вкладка в виде сундука с сокровищами, здесь хранятся специальные предметы, вы можете вставить их в гнезда наверху в меню торгового здания. Различные торговые здания имеют разное количество слотов для этих специальных предметов, и их просто слишком много, чтобы перечислить их здесь, но семена сидра — одно из них. сначала они будут отображаться серыми, что означает, что вам придется их активировать. он даст вам 2 кнопки, чтобы проверить или отклонить его активацию, и если вы нажмете его, появится сообщение о том, что семена были посажены, и теперь вы можете выращивать сидр или любое другое растение, которое вы принесли сюда. удаление семян из гнезда также удалит плодородие, вы можете добавить только одно семя на остров со знаком вопроса, и только восточные семена подходят для восточных островов и наоборот.
- Как работают сиды?
Прочитайте последний авнсер.
- Я могу построить церковь, где мне ее поставить?
Есть много зданий, которые понадобятся вашим людям, например, церкви и таверны. вам нужно иметь как можно больше людей в пределах диапазона влияния зданий, чтобы угодить им (есть некоторые предметы, которые увеличивают этот диапазон). наличие нескольких перекрывающихся церквей не увеличивает счастье ваших людей на 200%, а наличие многих из них обанкротит вас, поэтому размещайте их как можно ближе к своим людям и как можно дальше от других церквей.
- Мои люди жалуются на дефицит, а я построил рыбацкую хижину?
С ростом населения растут и его потребности. вам придется наладить производство того, чего они хотят, например рыбы, однако это также самый простой способ обанкротиться в будущем; путем создания большого количества продукции, в то время как потребляется недостаточно, что приводит к постоянно заполненным рыбацким хижинам и истощению средств. Другими словами: вы хотите удовлетворить свое население, тратя при этом как можно меньше денег, и ключом к этому является терпение. Рыбацкая хижина может быть уже переполнена, вскоре может подъехать рыночная тележка, чтобы опустошить ее, ваши крестьяне могут жаловаться на отсутствие рыбы, а рыбацкая хижина еще не успела ее поймать. если вы точно не знаете, сколько производственных зданий нужно вашему городу, и вам надоело узнавать о банкротстве, то этот калькулятор производства может сказать вам, что вам нужно в зависимости от вашего населения.

- Могу ли я назвать свою новую деревню?
Да, вам нужно будет выбрать торговый пост, который является вашей гаванью, и вы увидите название вашего города в правом верхнем углу, вам нужно будет щелкнуть по нему левой кнопкой мыши, удалить старое название с помощью Backspace, а затем написать свое собственное и нажать введите.
- Мои крестьяне становятся гражданами, что это дает?
Поздравляем! теперь вы находитесь на пути к разблокировке большего количества игр, новые здания, квесты и события скоро украсят ваш город! однако, если вы хотите, чтобы ваши люди не развивались, вы можете запретить им, выбрав своего рыночного оруженосца и щелкнув левой кнопкой мыши по кнопке вверху в виде пергамента. это запрещает вашим людям использовать права восхождения. права на восхождение зарабатываются за счет увеличения населения (а также некоторых редких предметов). это гарантирует, что ваши крестьяне превратятся в горожан, партизан и дворян и потребуют строительных материалов для каждой фазы, от дерева до даже стекла позже. это будет истощено из ваших собственных запасов, поэтому есть причина остановить их эволюцию.
- Помогите, все в порядке!
- Я построил конопляные фермы, но не получаю одежду!
- Почему мои граждане жалуются на недостаток еды? мой склад ПОЛНЫЙ рыбы!
- I нашел великого визиря и остров для поселения, но это совсем не то, что острова на севере!
- Как построить восточное поселение?
- Почему кочевники не едят мою рыбу?!
- Я построил фермы по производству специй, но они ничего не производят!
- Мне надоело торговать вручную, как мне это автоматизировать?
- У меня есть продукция для всего, но мои люди не станут партиканами!
- Я зашел довольно далеко, как мне разблокировать больше зданий?
- Стоит ли что-то построить/сделать/получить/попробовать?
- Как бой?
- Когда я наконец смогу с чем-нибудь сразиться?
- Что делают все эти кнопки?
- Двигаться — которая позволяет вам восстановить свой лагерь расположить лагерь где-то в другом месте.
- Атака – позволяет отправить своих людей для атаки вражеского отряда.
- Подкрепление – позволяет помочь одному из ваших отрядов, подвергшихся нападению.< /li>
- Отмена — останавливает марширующую армию и заставляет ее построить лагерь на месте (удаляет лагерь, если он уже построен).
- Почему мои армии не атакуют здания?
- Что это за зеленые и красные зоны?
- Я видел этих наемников, как они работают?
- Как отправить армию на другой остров?
- Как получить больше боевых кораблей?
- Как разблокировать восточные юниты?
- Есть ли кампания или руководство?
- Как мне найти то, что я ищу в квесте?
- Я в гавани, гонка не начинается?
- Какие награды приносят квесты?
- Как узнать, кого я должен нажать?
- Я не могу найти главного строителя?
- Как я могу передать свой подарок великому визирь?
- Я уничтожил корабли парней, почему миссия не заканчивается?
- Я не могу победить Люциуса! как защитить остров Эдем?
- Как получить достаточно ресурсов для императорский собор?
- Требуется ли для этой игры учетная запись ubisoft?
- Будет ли когда-нибудь исправлена ошибка, срок действия которой истекает?
- Хороша ли игра?
Не паникуйте! Огонь — это всего лишь первая радость для вашего растущего поселения. их можно потушить с помощью пожарной части, которая откроется при достижении приличного количества горожан, однако ваши люди будут пытаться получить воду из городских колодцев, таких как те, что на вашем рынке, чтобы потушить близлежащие пожары. вы можете уменьшить вероятность распространения огня, уничтожив близлежащие здания, но не близлежащие, так как огонь не позволит вам тоже. многие вещи в anno 1404 могут привести и приведут к пожарам, таким как восстания, саботаж, бомбардировки, грозы и многое другое! поэтому разумно иметь пожарную часть рядом со всеми вашими домами, хотя производственные и торговые здания не имеют склонности к самопроизвольному возгоранию, поэтому они, вероятно, не нужны в сельской местности. если вас тошнит от огня, вы можете отключить эту опцию, изменив настройки при создании новой игры.
Многим производственным зданиям потребуются мастерские для обработки своих товаров, ткацкая фабрика — одна из них. мастерские могут нуждаться в большем или меньшем количестве производственных зданий для снабжения. Вы можете увидеть их продуктивность, выбрав их и посмотрев на количество %, которое они генерируют (максимум 100%).
По мере развития вашего населения им потребуются дополнительные товары, одним из таких являются специи. позже вам потребуются еще хлеб и мясо, а пока вам придется начать искать это горячее новое добро на юге, на востоке!
Это верно! В Anno 1404 есть 2 типа цивилизаций: Восток и Оксидент. эти двое становятся все более зависимыми друг от друга по мере прохождения игры, и чтобы получить восточные товары, такие как специи, которые нужны вашему народу, вам придется построить восточное поселение.
Во-первых, вам придется получить знания о восточной архитектуре, и великий визирь готов поделиться ими в подарок. Вы можете купить эти дары в виде пергамента в оксидентальной гавани лорда Ричарда. затем вы должны отправить его обратно к великому визирю, который попросит вас отдать его и ему. это должно разблокировать первые несколько восточных зданий на вкладке строительства, которые работают так же, как и их северные аналоги.
Кочевники не заботятся о рыбе и не потребляют никаких окислительных продуктов. однако они приходят со своим типом еды: финиками. Вы можете построить финиковую ферму на плодородной почве, которую редко можно найти на Востоке. но не отчаивайтесь! у мудрых кочевников Востока есть козырь в рукаве; нории! эти полезные водопои удобряют бесплодные пустыни на юге, позволяя финиковым фермам, пастухам коз и шелковым плантациям укореняться в этой засушливой земле. Однако, как и любому производственному зданию, нории требуется время, чтобы полностью удобрить ее в пределах своего радиуса, и ее придется пополнять, как только в ней закончится вода. в правом верхнем углу меню норий есть небольшая кнопка, изображающая здание с зеленой стрелкой, указывающей вверх. это позволит вам пополнить его по цене, это также работает с шахтами!
Помните, что было сказано о сидре?
К юго-востоку от экрана есть кнопка в форме звезды, это меню торговых путей. вы можете создать новый, нажав кнопку к северо-востоку от меню. вам нужно будет выбрать 2 или более гаваней, определить, какие товары вы хотели бы добавить и убрать с вашего корабля в гавань и из нее, а затем, наконец, назначить корабль с достаточным количеством свободных слотов для вашего нового маршрута!
чтобы ваши дома могли перейти на следующий уровень, все его требования должны оставаться зелеными хотя бы некоторое время. если какая-либо из его потребностей в еде, питье или других требованиях желтая или не заполнена, они откажутся развиваться. не каждый дом будет развиваться несмотря ни на что! всегда останется один-два крестьянских дома. хотя количество можно уменьшить, получив больше прав восхождения.
< /ol>
Хотя рост населения является основным способом разблокировки зданий, есть и другие здания, которые можно разблокировать, используя драгоценные камни (вы получаете их за игровые достижения), давая больше и лучше подарки великому визирю и даже используя специальные чертежи, которые мгновенно создают что-то бесплатно!
Да, если вы можете сэкономить средства.
Военные
Не очень.
После того, как вы построили крепость, вы можете начать набирать в ней армии. для этого потребуется оружие, такое как оружие, пушки, боевые машины и многое другое. если у вас достаточно товаров и золота, вы можете щелкнуть левой кнопкой мыши на нужном отряде и построить его лагерь на свободном открытом пространстве.
После того, как ваши армии построят свой лагерь, вы можете отдать им 4 команды, а именно:
Только осадные орудия, такие как требушеты, пушки и позиции шахтеров, могут атаковать здания и стены.
Это зоны влияния военных юнитов, таких как башни, армии и даже корабли. внешнее кольцо — это диапазон для кораблей и башен, а внутреннее кольцо — это диапазон, с которого армии могут захватывать торговые здания. если внутреннее кольцо воинских частей соединится, они смогут воевать друг с другом.
<р>Их двое: бароны-разбойники и ассасины. Бароны-разбойники имеют много здоровья и быстро захватывают, но наносят мало урона. ассасины наносят большой урон и быстро передвигаются, но имеют мало здоровья. ни одно из них требует найма оружия.
Вам потребуется либо торговый пост, либо замок на побережье обоих островов. Затем вы можете использовать кнопку перемещения армии и отправить ее в море, чтобы стать кораблем с одного из этих плацдармов. оттуда вы можете переправить их на другой остров и снова построить их с помощью кнопки перемещения. они сойдут на берег через ваш второй плацдарм. обратите внимание, что замки можно строить, отправляя военный лагерь в море и отправляя его к берегу, используя кнопку постройки замка, очень похожую на кнопку постройки торгового поста на обычных кораблях.
Вы можете построить их на верфях, купить у пиратов или купить в нейтральных гаванях, используя честь в меню дипломатии. Также можно купить абордажную команду за честь у пиратов. вставьте это в военный корабль, щелкните левой кнопкой мыши по нему, затем щелкните левой кнопкой мыши по вражескому кораблю, который вы хотите взять на абордаж. если ваш корабль сильнее, вражеский корабль будет захвачен.
Открывая восточные здания с помощью подарков, вы в конечном итоге получите право построить восточную крепость, которая во многом похожа на оксидантскую копию.
Задания< /h2>
Да, вы можете увеличить его, запустив игру из своей библиотеки Steam БЕЗ надстройки.
Такие вещи, как пропавшие без вести люди, застрявшие корабли и конкретные гавани, будут отмечены заданием на вашей мини-карте красными кругами, ЕСЛИ вы наведете курсор мыши на задание.< /p>
Ваш корабль должен будет оставаться там, пока не истечет таймер квеста, после чего вы получите предмет из гавани и должны будете мчаться к месту назначения, только не забывайте, что вы его там припарковали!
В основном они рандомизированы и могут варьироваться от бесполезного угля до эпических командиров!
Они будут обведены синим кольцом. кроме саботажа шпионов.
Он должен спать под деревом в имперском городе, над его головой есть несколько букв Z. позже вы столкнетесь с дополнительными квестами, где вы сможете искать среди людей, идущих по вашим улицам, найти такого разыскиваемого человека.
Если вы подобрали его во время квеста и не положили на свой склад, то на вашем корабле должен быть в подарок значок из рулонов пергамента, который вы должны принести в гавань великого визиря.
Вероятно, к югу от карты еще есть корабли или спрятался среди великой гавани. чтобы кампания продолжилась, все вражеские корабли должны быть уничтожены.
какое-то время вам придется сражаться с силами Люциуса, в конце концов Мари поручит вам найти великого визиря и эвакуировать город. Вы можете сделать это, приведя свой корабль к зданию гавани (вероятнее всего, восстановить на севере), перейдя на вкладку предметов и извлекая карту из гнезда предметов вашего корабля. оттуда вы должны щелкнуть левой кнопкой мыши по нему, чтобы активировать его, после чего ваш корабль тоже выйдет за помощью. через некоторое время он вернется с кораблями визирей, чтобы эвакуировать город, нажмите на корабль великих визирей, чтобы присоединиться к ним.
Побочные квесты дадут вам специальные предметы, которые уменьшат стоимость его строительства, у академии мудрости есть один предмет, который можно передать на ваш склад.
Технические
Да, хотя в старых версиях на компакт-дисках это не так.
Вряд ли.
Да.