Contents
- Intro
- Bash — Everyday Ubuntu life
-
Commands
- Creating folders
- Deleting files
- Deleting folders and their sub-folders
- Running commands as root
- Opening GUI applications as root
- Backing up your files
- Backing up your Directories
- Checking system performance
- Check Devices
- Show network Information
- Show wireless information
-
Scripting
- Variables
- If Statements
-
Storing application stdout to a variable:
- Example
- Example 2
-
FUNctions
-
Example
- Debugging
-
Example
-
Other Scripting Languages related to Bash
-
tr
- Example
- Example
-
AWK
- pidof clone
-
SED
- Basic Substitution
-
tr
Bash scripting is one of the easiest types of scripting to learn, and is best compared to Windows Batch scripting. Bash is very flexible, and has many advanced features that you won’t see in batch scripts.
However if you are a ‘non-computer-savvy’ person that won’t mean a thing to you. Bash is the language that you will learn to love as much of everyday Ubuntu life is done/can be done using the Terminal. You will soon learn that most things can be done through both GUI (Graphical User Interface) and CLI (Command Line Interface), however some things are more easily achieved from one or the other. For example, changing file permissions of a folder and all its sub folders is more easily achieved using cli instead gui.
NOTE: Text that is inside the box are to be entered into a terminal as follows:
If it's inside a box like this... enter it into a terminal unless instructed to do otherwise. Except this box. Of course. Silly.
You can also just copy and paste if needed.
Intro
In this document we will discuss useful everyday commands, as well as going a bit more in depth into scripting and semi-advanced features of Bash. Bash is not only used to run programs and applications, but it can also be used to write programs or scripts.
Bash — Everyday Ubuntu life
During your time as an Ubuntu user you will use the terminal to perform tasks such as
- Creating folders
- Deleting files
- Deleting folders and their sub-folders
- Opening applications as root
- Backing up your files
- Backing up your folders
- Checking system performance
- Check Devices
- Checking wireless connection
Along with many other things, the list above will be the commands we will discuss.
Commands
Creating folders
Creating folders can be done simply in the file manager nautilus by right clicking and selecting ‘Create Folder’, but if you want to do this from a cli environment you would type the following in the terminal:
mkdir /home/joe/Desktop/new_folder
the mkdir (make directory) command creates the folder then the file path tells it where to create the folder.
Deleting files
Deleting files are done with the rm command as follows:
rm /home/joe/file_to_be_deleted
the rm (remove) command is used to remove anything through a cli environment.
Deleting folders and their sub-folders
The command you are about to read can potentially (if used incorrectly) destroy your system!
rm -r /home/joe/useless_Parent_folder
To force (note most of the time you will not need to use -f)
rm -rf /home/joe/useless_Parent_folder
This command is slightly different to the one before, it uses two options ‘-r’ which means recursive (will delete the folder and all sub-folders) and ‘-f’ means force (will not ask for your permission). This command is perfectly fine for deleting a dir and all its sub-dirs. The next commands should !!**!!NEVER!!**!! be run. Unless you want to say goodbye to your system.
rm -rf /*
rm -rf /
This will delete everything from your root folder downwards, which if you did a standard install would be everything.
Running commands as root
When working on the command line, you usually want to work with the default permissions. This way you insure that you won’t accidentally break anything belonging to the system or other users, so long as the system and other users haven’t altered their file permissions. Yet there will be times when you wish to copy a file to a system folder (like /usr/local/bin) to make it available to all users of the system. Only the system administrator (i.e. the user ‘root’) should have permission to alter the contents of system directories like /usr/local/bin. Therefore trying to copy a file (like a program downloaded from the Internet) into that folder is forbidden by default.
cp Downloads/some_downloaded_program /usr/local/bin
cp: cannot create regular file `/usr/local/bin/some_downloaded_program': Permission denied
Since it would be very tedious to always login as root to do administrative work (in fact you should avoid logging in as root with a graphical desktop) you can use the sudo program to execute a single command as root.
sudo cp Downloads/some_downloaded_program /usr/local/bin
The default Ubuntu installation is configured so that the user who was created during system installation is allowed to use this command. It will prompt for the password and execute the command as the root user.
Opening GUI applications as root
Sometimes you will want to edit a config file in your root folder, in order to save changes to this file you need root privileges so we need to open our text editor as root. All you will need is just sudo or pkexec to show a gui password popup.
sudo gedit
Note a lot of kde apps will not work like kate or dolphin.
Backing up your files
To create a backup of a file, we’re going to use the cp (copy) command. The basic syntax for cp is as follows:
cp source_file dest_file
This will copy the ‘source_file’ to the ‘dest_file’. Now, using the previous example, we want to backup ‘/path/to/conf_file.txt’. To accomplish this, we type the following:
sudo cp /path/to/conf_file.txt /path/to/conf_file.txt.old
That’s fine and dandy, but what if I want to copy my file to another directory? Well that’s just as easy. Let’s say instead of copying /path/to/conf_file.txt to the /path/to/ directory, you want to copy it to a directory where you store all of your backup files, say /my/backup/folder/. In order to accomplish this you would type:
cp /path/to/conf_file.txt /my/backup/folder/    #saves conf_file.txt to /my/backup/folder/
#OR
cp /path/to/conf_file.txt /my/backup/folder/conf_file_new_name.txt
***This is a typical safety measure that has saved many users in the past from a complete disaster.***
Okay, so we know how to copy a file: a) to a different filename and b) to a different folder. But how do we copy entire directories?
Backing up your Directories
To backup one directory to another, we introduce cp -r (recursive) option. The basic syntax is as follow:
cp -r /directory/to/be/copied/ /where/to/copy/to/
So if we wanted to copy all of the contents of our /path/to/ folder to our /my/backup/folder, we would type the following:
cp -r /path/to/ /my/backup/folder/foldername #foldername can be whatever you want the foldername to be
Checking system performance
If your computer starts to lag, you can see which applications are using the most CPU power with this command:
top
This is generally the same information given as the GUI application ‘System Monitor’.
Check Devices
USB Devices:
If a USB device stops working, you may want to see if it is still connected/detected. To check if a device is connected/detected, type the following:
lsusb
PCI Devices:
As PCI devices are checked with:
lspci
Show network Information
To see the status of your network connection, use the command:
ip addr
This command will show you your ip, what type of connection you are using, etc.
Show wireless information
Like the command ip stated above, you can use iwconfig to check the settings of your wireless connection without editing anything. In a terminal enter:
iwconfig
This also shows packets sent/received.
Scripting
NOTE: The commands given in the scripting section are to be put into the text editor and not in the terminal unless instructed otherwise.
Bash is primarily a scripting language, so it would be a crime not to talk about scripting. Let’s dive straight in with a bash script. More precisely the infamous «Hello World» script. You can create a bash script by opening your favorite text editor to edit your script and then saving it (typically the .sh file extension is used for your reference, but is not necessary. In our examples, we will be using the .sh extension but instead Linux uses #!/path/to/runtime or in this case #!/bin/bash).
 #!/bin/bash

echo "Hello, World"
The first line of the script just defines which interpreter to use. NOTE: There is no leading whitespace before #!/bin/bash. That’s it, simple as that. To run a bash script you first have to have the correct file permissions. We do this with chmod command in terminal (change mode) as follows:
chmod a+x /where/i/saved/it/hello_world.sh   #Gives everyone execute permissions
# OR
chmod 700 /where/i/saved/it/hello_world.sh   #Gives read,write,execute permissions to the Owner
This will give the file the appropriate permissions so that it can be executed. Now open a terminal and run the script like this:
/where/i/saved/it/hello_world.sh
Hopefully you should have seen it print Hello, World onto your screen. If so well done! That is your first Bash script.
TIP If you type:
pwd
You will see the directory that you are currently working in (pwd stands for ‘print working directory’). If your current working directory is /where/i/saved/it/, then you can shorten the above command to:
prompt$ pwd
/where/i/saved/it
prompt$ ./hello_world.sh
Now, lets get to more interesting aspects of Bash programming, Variables!
Variables
Variables basically store information. You set variables like this using text editor:
var="FOO"
‘var’ can be anything you want as long as it doesn’t begin with a number. «FOO» can be anything you want.
To access the information from the variable you need to put a ‘$’ in front of it like this:
var="FOO"
echo $var
Try entering those lines into a terminal one at a time; you will see that the first one just gives you another prompt and the second one prints FOO.
But that’s all a bit boring. So let’s make a script to ask the user for some information and then echo that information.
 #!/bin/bash
clear
echo "Please enter your name"
read name
echo "Please enter your age"
read age
echo "Please enter your sex. Male/Female"
read sex
echo "So you're a $age year old $sex called $name"
read allows the user to input information where it is then stored in the variable defined after the read. read variable would take whatever input the user entered and store it in $variable. We then access this with echo and set up a neat sentence. This script is reasonably messy though; read has another function that could halve the size of this script.
clear
read -p "Please enter your name  : " name
read -p "Please enter your age  : " age
read -p "Please enter your sex. Male/Female  : " sex
echo "So you're a $age year old $sex called $name"
That is more efficient code. However it’s still a bit messy when run. A solution? Good old white spaces!
clear
read -p "Please enter your name  : " name
echo ""
read -p "Please enter your age  : " age
echo ""
read -p "Please enter your sex. Male/Female  : " sex
echo ""
echo "So you're a $age year old $sex called $name"
Now we have an efficient and clean Bash script.
If Statements
An if statement can be used to check for something and do something else depending on the outcome of the check. For example, if I had an ‘apple’, I would want to make sure it’s still an ‘apple’ and not an ‘orange’ because I don’t like Oranges!
The syntax for an if statement is
if [something]
        then
        elif
        then
        elif
        then
        ....etc....
        else
fi
The else if statement or (elif) is not necessary, but it can be used if needed.
An if statement to check if our $fruit variable is an ‘apple’ would look like this
echo "Please enter type of fruit"
read fruit

if [ $fruit = apple ]
        then echo "Good, I like Apples"
        else echo "Oh no, I hate Oranges!"
fi
Just to explain this statement,
if [ the contents of $fruit is 'apple' ]
        then say "Good, I like Apples"
        if it's not, then say "Oh no, I hate Oranges!"
finish
If statements are an easy concept to grasp as they are similar to the «if» used in spoken English. But say you wanted to have 4 or 5 checks, the answer may be to write 4 or 5 statements but that’s not the most practical way. This is where elif comes in handy.
if [ $fruit = apple ]
        then echo "Good, I like Apples"
elif [ $fruit = pear ]
        then echo "Good, I like Pears"
elif [ $fruit = banana ]
        then echo "Good, I like Bananas"
        else echo "Oh no, I hate Oranges!"
fi
This saves us from from repetitive scripting. There are better ways to check what the fruit is, but we won’t go into that now.
Storing application stdout to a variable:
Application stdout ( what you see on the terminal screen, with an un-piped application ) can be saved and used in Bash. The simplest and most elegant way is to use command substitution, by wrapping the code in $(…)
Example
fooVar=$(who)
echo $fooVar
This code should output the current users, their respective ttys, and date of login. Note that this strips newlines. Be sure to do any parsing in line ( | grep, etc ) and then pass it to a variable. We will try this again, but grep for tty7, the GUI’s tty.
Example 2
fooVar=$(who | grep tty7)
echo $fooVar
This should output the single user that is currently logged into the WM. Let’s move on to more advanced data manipulation within command substitution.
FUNctions
Bash lets you create a function on the fly, really handy if you plan on using a code block more then once. Functions reduce the amounts of editing you have to do in a script, if and when you have to update your script. Let’s get to it!
Example
Here is an example script:
echo "echo is Called"
echo "Functions are FUN!"
echo "echo is Called"
Although this example is simple, you can see that if you want to change «echo is Called» to say «foo is Called» you would have to edit twice.
Below is the same app using functions.
echoFunction() {
  echo "echo is Called"
}
fooBar() {
  echo "Functions are FUN!"
}

echoFunction;
fooBar;
echoFunction;
# You call functions without (), just the function name then a semicolon.
This example, as you can see may be longer now, but you can imagine how, adding features, this will eliminate code and reduce complexity. Also, you can see if you want to change the echo call, you have to edit one line, not two.
Debugging
I always find it useful to trace a script to find out why something does not work as expected. To trace, start it through bash explicitly and use the -x option, like so:
bash -x ./script.sh
This will write each command to standard error (preceded by a ‘+ ’) before it is executed.
tr
tr is one of the most basic applications to pipe data through that uses a basic scripting syntax. In this case, it accepts Regular Expressions. Let’s do a normally complicated task, transforming a string to all uppercase.
Example
read foo
var=$(echo $foo | tr "{a-z}" "{A-Z}")
 # {a-z} Matches a through z
 # {A-Z} matches A through Z
echo $var
The output should look something like this:
this is a test
THIS IS A TEST
tr also can TRanslate strings, so let’s translate all «tar» in $foo to «bar».
Example
echo "Type in: I love tars"
read foo
var=$(echo $foo | tr "t" "b")
echo $var
the output should look something like this:
I love tars
I love bars
AWK
AWK ( Short for Aho, Weinberger & Kernighan )
awk has its own custom scripting language, suitable for a tutorial by itself, so I will cover only the basics to help assist when you are bash scripting. This is not meant to be complete or comprehensive in any way.
pidof clone
Let’s make a quick pidof clone that prompts for a process identifier, then echoes the process ID.
read pname
ps -ef | grep -v grep | grep $pname | awk '{print $2}'
Let’s take some pipes out and use only awk for the filtering
read pname
ps -ef | awk -v p=${pname} '$8 ~ p { print $2 }'
Single quotes are used to pass the awk command(s). The curly braces are to use the awk language (for stuff like prints, ifs, etc.). Print prints the column passed given by the $ markup, space delimited.
The awk -v option allow passing a shell value into an awk variable, the $8 is a field variable (column 8 of the ps -ef command’s output) and the operator ~ is a regular expression match.
There are a lot more commands than the print command, including if statements, etc., and is worth looking into if you are interested in what you see here!
SED
sed is one of the most complicated scripting languages on the GNU / Linux system. I am only going to cover the s/ command here.
Basic Substitution
Try this out to show that sed can not only replace inline, but unlike tr, replace with a longer or shorter string than before.
read foo
echo $foo | sed "s/foo/bars/"
When this command is run, it should substitute the first appearance of «foo» with «bars».
This is an example of the output.
I love to go to foo
I love to go to bars
CategoryCommandLine
Shell scripting is an important part of process automation in Linux. Scripting helps you write a sequence of commands in a file and then execute them.
This saves you time because you don’t have to write certain commands again and again. You can perform daily tasks efficiently and even schedule them for automatic execution.
You can also set certain scripts to execute on startup such as showing a particular message on launching a new session or setting certain environment variables.
The applications and uses of scripting are numerous, so let’s dive in.
In this article, you will learn:
- What is a bash shell?
- What is a bash script and how do you identify it?
- How to create your first bash script and execute it.
- The basic syntax of shell scripting.
- How to see a system’s scheduled scripts.
- How to automate scripts by scheduling via cron jobs.
The best way to learn is by practicing. I highly encourage you to follow along using Replit. You can access a running Linux shell within minutes.
Introduction to the Bash Shell
The Linux command line is provided by a program called the shell. Over the years, the shell program has evolved to cater to various options.
Different users can be configured to use different shells. But most users prefer to stick with the current default shell. The default shell for many Linux distros is the GNU Bourne-Again Shell (bash). Bash is succeeded by Bourne shell (sh).
When you first launch the shell, it uses a startup script located in the .bashrc or .bash_profile file which allows you to customize the behavior of the shell.
When a shell is used interactively, it displays a $ when it is waiting for a command from the user. This is called the shell prompt.
[username@host ~]$
If shell is running as root, the prompt is changed to #. The superuser shell prompt looks like this:
[root@host ~]#
Bash is very powerful as it can simplify certain operations that are hard to accomplish efficiently with a GUI. Remember that most servers do not have a GUI, and it is best to learn to use the powers of a command line interface (CLI).
What is a Bash Script?
A bash script is a series of commands written in a file. These are read and executed by the bash program. The program executes line by line.
For example, you can navigate to a certain path, create a folder and spawn a process inside it using the command line.
You can do the same sequence of steps by saving the commands in a bash script and running it. You can run the script any number of times.
How Do You Identify a Bash Script?
File extension of .sh.
By naming conventions, bash scripts end with a .sh. However, bash scripts can run perfectly fine without the sh extension.
Scripts start with a bash bang.
Scripts are also identified with a shebang. Shebang is a combination of bash # and bang ! followed the the bash shell path. This is the first line of the script. Shebang tells the shell to execute it via bash shell. Shebang is simply an absolute path to the bash interpreter.
Below is an example of the shebang statement.
#! /bin/bashThe path of the bash program can vary. We will see later how to identify it.
Execution rights
Scripts have execution rights for the user executing them.
An execution right is represented by x. In the example below, my user has the rwx (read, write, execute) rights for the file test_script.sh
File colour
Executable scripts appear in a different colour from rest of the files and folders.
In my case, the scripts with execution rights appear as green.
How to Create Your First Bash Script
Let’s create a simple script in bash that outputs Hello World.
Create a file named hello_world.sh
touch hello_world.shFind the path to your bash shell.
which bashIn my case, the path is /usr/bin/bash and I will include this in the shebang.
Write the command.
We will echo «hello world» to the console.
Our script will look something like this:
#! usr/bin/bash
echo "Hello World"
Edit the file hello_world.sh using a text editor of your choice and add the above lines in it.
Provide execution rights to your user.
Modify the file permissions and allow execution of the script by using the command below:
chmod u+x hello_world.shchmod modifies the existing rights of a file for a particular user. We are adding +x to user u.
Run the script.
You can run the script in the following ways:
./hello_world.sh
bash hello_world.sh.
Here’s the output:
The Basic Syntax of Bash Scripting
Just like any other programming language, bash scripting follows a set of rules to create programs understandable by the computer. In this section, we will study the syntax of bash scripting.
How to define variables
We can define a variable by using the syntax variable_name=value. To get the value of the variable, add $ before the variable.
#!/bin/bash
# A simple variable example
greeting=Hello
name=Tux
echo $greeting $name
Tux is also the name of the Linux mascot, the penguin.
Arithmetic Expressions
Below are the operators supported by bash for mathematical calculations:
| Operator | Usage |
|---|---|
| + | addition |
| — | subtraction |
| * | multiplication |
| / | division |
| ** | exponentiation |
| % | modulus |
Let’s run a few examples.
Numerical expressions can also be calculated and stored in a variable using the syntax below:
var=$((expression))
Let’s try an example.
#!/bin/bash

var=$((3+9))
echo $var
Fractions are not correctly calculated using the above methods and truncated.
For decimal calculations, we can use bc command to get the output to a particular number of decimal places. bc (Bash Calculator) is a command line calculator that supports calculation up to a certain number of decimal points.
echo "scale=2;22/7" | bc
Where scale defines the number of decimal places required in the output.
How to read user input
Sometimes you’ll need to gather user input and perform relevant operations.
In bash, we can take user input using the read command.
read variable_nameTo prompt the user with a custom message, use the -p flag.
read -p "Enter your age" variable_name
Example:
#!/bin/bash

echo "Enter a numner"
read a

echo "Enter a numner"
read b

var=$((a+b))
echo $var
Numeric Comparison logical operators
Comparison is used to check if statements evaluate to true or false. We can use the below shown operators to compare two statements:
| Operation | Syntax | Explanation |
|---|---|---|
| Equality | num1 -eq num2 | is num1 equal to num2 |
| Greater than equal to | num1 -ge num2 | is num1 greater than equal to num2 |
| Greater than | num1 -gt num2 | is num1 greater than num2 |
| Less than equal to | num1 -le num2 | is num1 less than equal to num2 |
| Less than | num1 -lt num2 | is num1 less than num2 |
| Not Equal to | num1 -ne num2 | is num1 not equal to num2 |
Syntax:
if [ conditions ]
    then
         commands
fiExample:
Let’s compare two numbers and find their relationship:
read x
read y

if [ $x -gt $y ]
then
echo X is greater than Y
elif [ $x -lt $y ]
then
echo X is less than Y
elif [ $x -eq $y ]
then
echo X is equal to Y
fi
Output:
Conditional Statements (Decision Making)
Conditions are expressions that evaluate to a boolean expression (true or false). To check conditions, we can use if, if-else, if-elif-else and nested conditionals.
The structure of conditional statements is as follows:
if...then...fistatementsif...then...else...fistatementsif..elif..else..fiif..then..else..if..then..fi..fi..(Nested Conditionals)
Syntax:
if [[ condition ]]
then
	statement
elif [[ condition ]]; then
	statement
else
	do this by default
fi
To create meaningful comparisons, we can use AND -a and OR -o as well.
The below statement translates to: If a is greater than 40 and b is less than 6.
if [ $a -gt 40 -a $b -lt 6 ]
Example: Let’s find the triangle type by reading the lengths of its sides.
read a
read b
read c

if [ $a == $b -a $b == $c -a $a == $c ]
then
echo EQUILATERAL

elif [ $a == $b -o $b == $c -o $a == $c ]
then
echo ISOSCELES
else
echo SCALENE

fiOutput:
Test case #1
Test case #2
Test case #3
Looping and skipping
For loops allow you to execute statements a specific number of times.
Looping with numbers:
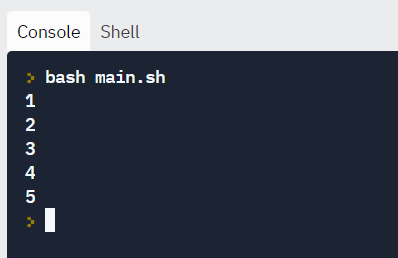
In the example below, the loop will iterate 5 times.
#!/bin/bash

for i in {1..5}
do
    echo $i
done
Looping with strings:
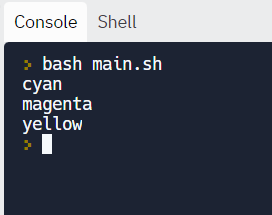
We can loop through strings as well.
#!/bin/bash

for X in cyan magenta yellow
do
	echo $X
done
While loop
While loops check for a condition and loop until the condition remains true. We need to provide a counter statement that increments the counter to control loop execution.
In the example below, (( i += 1 )) is the counter statement that increments the value of i.
Example:
#!/bin/bash
i=1
while [[ $i -le 10 ]] ; do
   echo "$i"
  (( i += 1 ))
done
Reading files
Suppose we have a file sample_file.txt as shown below:
We can read the file line by line and print the output on the screen.
#!/bin/bash

LINE=1

while read -r CURRENT_LINE
	do
		echo "$LINE: $CURRENT_LINE"
    ((LINE++))
done < "sample_file.txt"
Output:
How to execute commands with back ticks
If you need to include the output of a complex command in your script, you can write the statement inside back ticks.
Syntax:
var= ` commands `
Example: Suppose we want to get the output of a list of mountpoints with tmpfs in their name. We can craft a statement like this: df -h | grep tmpfs.
To include it in the bash script, we can enclose it in back ticks.
#!/bin/bash

var=`df -h | grep tmpfs`
echo $var
Output:
How to get arguments for scripts from the command line
It is possible to give arguments to the script on execution.
$@ represents the position of the parameters, starting from one.
#!/bin/bash

for x in $@
do
    echo "Entered arg is $x"
done
Run it like this:
./script arg1 arg2
How to Automate Scripts by Scheduling via cron Jobs
Cron is a job scheduling utility present in Unix like systems. You can schedule jobs to execute daily, weekly, monthly or in a specific time of the day. Automation in Linux heavily relies on cron jobs.
Below is the syntax to schedule crons:
# Cron job example
* * * * * sh /path/to/script.sh
Here, * represent represents minute(s) hour(s) day(s) month(s) weekday(s), respectively.
Below are some examples of scheduling cron jobs.
| SCHEDULE | SCHEDULED VALUE |
|---|---|
| 5 0 * 8 * | At 00:05 in August. |
| 5 4 * * 6 | At 04:05 on Sunday. |
| 0 22 * * 1-5 | At 22:00 on every day-of-week from Monday through Friday. |
You can learn about cron in detail in this blog post.
How to Check Existing Scripts in a System
Using crontab
crontab -l lists the already scheduled scripts for a particular user.
Using the find command
The find command helps to locate files based on certain patterns. As most of the scripts end with .sh, we can use the find script like this:
find . -type f -name "*.sh"Where,
.represents the current directory. You can change the path accordingly.-type findicates that the file type we are looking for is a text based file.*.shtells to match all files ending with.sh.
If you are interested to read about the find command in detail, check my other post.
Wrapping up
In this tutorial we learned the basics of shell scripting. We looked into examples and syntax which can help us write meaningful programs.
What’s your favorite thing you learned from this tutorial? Let me know on Twitter!
You can read my other posts here.
Work vector created by macrovector — www.freepik.com
Learn to code for free. freeCodeCamp’s open source curriculum has helped more than 40,000 people get jobs as developers. Get started
Каким бы простым ни был графический интерфейс в Linux и сколько бы там ни было функций, все равно есть задачи, которые удобнее решать через терминал. Во-первых, потому что это быстрее, во-вторых — не на всех машинах есть графический интерфейс, например, на серверах все действия выполняются через терминал, в целях экономии вычислительных ресурсов.
Если вы уже более опытный пользователь, то, наверное, часто выполняете различные задачи через терминал. Часто встречаются задачи, для которых нужно выполнять несколько команд по очереди, например, для обновления системы необходимо сначала выполнить обновление репозиториев, а уже затем скачать новые версии пакетов. Это только пример и таких действий очень много, даже взять резервное копирование и загрузку скопированных файлов на удаленный сервер. Поэтому, чтобы не набирать одни и те же команды несколько раз можно использовать скрипты. В этой статье мы рассмотрим написание скриптов на Bash, рассмотрим основные операторы, а также то как они работают, так сказать, bash скрипты с нуля.
Основы скриптов
Скрипт или как его еще называют — сценарий, это последовательность команд, которые по очереди считывает и выполняет программа-интерпретатор, в нашем случае это программа командной строки — bash.
Скрипт — это обычный текстовый файл, в котором перечислены обычные команды, которые мы привыкли вводить вручную, а также указанна программа, которая будет их выполнять. Загрузчик, который будет выполнять скрипт не умеет работать с переменными окружения, поэтому ему нужно передать точный путь к программе, которую нужно запустить. А дальше он уже передаст ваш скрипт этой программе и начнется выполнение.
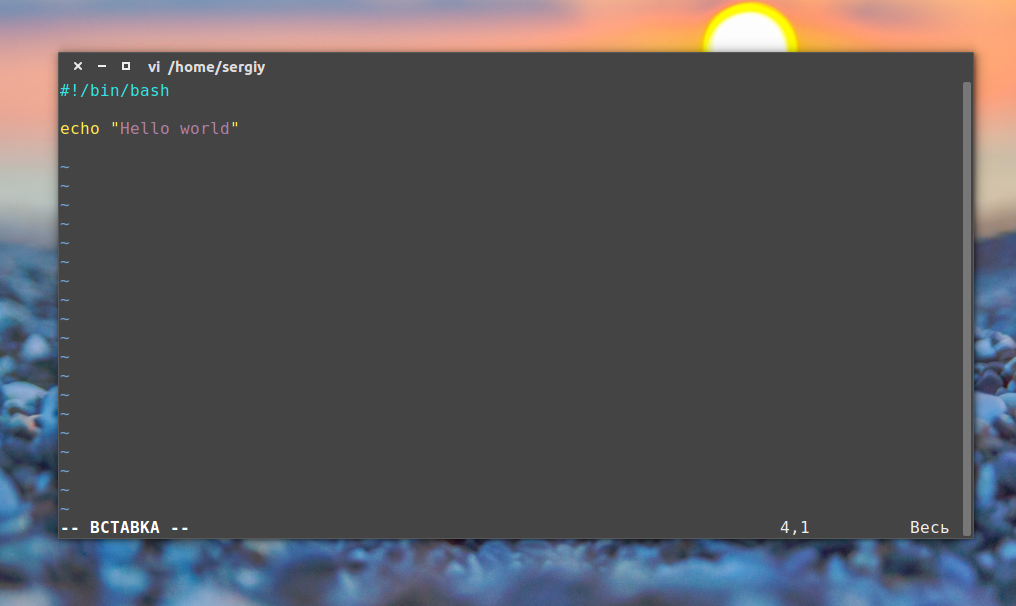
Простейший пример скрипта для командной оболочки Bash:
#!/bin/bash

echo "Hello world"
Утилита echo выводит строку, переданную ей в параметре на экран. Первая строка особая, она задает программу, которая будет выполнять команды. Вообще говоря, мы можем создать скрипт на любом другом языке программирования и указать нужный интерпретатор, например, на python:
#!/usr/bin/env python

print("Hello world")
Или на PHP:
#!/usr/bin/env php

echo "Hello world";
В первом случае мы прямо указали на программу, которая будет выполнять команды, в двух следующих мы не знаем точный адрес программы, поэтому просим утилиту env найти ее по имени и запустить. Такой подход используется во многих скриптах. Но это еще не все. В системе Linux, чтобы система могла выполнить скрипт, нужно установить на файл с ним флаг исполняемый.
Этот флаг ничего не меняет в самом файле, только говорит системе, что это не просто текстовый файл, а программа и ее нужно выполнять, открыть файл, узнать интерпретатор и выполнить. Если интерпретатор не указан, будет по умолчанию использоваться интерпретатор пользователя. Но поскольку не все используют bash, нужно указывать это явно.
Чтобы сделать файл исполняемым в linux выполните:
chmod ugo+x файл_скрипта
Теперь выполняем нашу небольшую первую программу:
./файл_скрипта
Все работает. Вы уже знаете как написать маленький скрипт, скажем для обновления. Как видите, скрипты содержат те же команды, что и выполняются в терминале, их писать очень просто. Но теперь мы немного усложним задачу. Поскольку скрипт, это программа, ему нужно самому принимать некоторые решения, хранить результаты выполнения команд и выполнять циклы. Все это позволяет делать оболочка Bash. Правда, тут все намного сложнее. Начнем с простого.
Переменные в скриптах
Написание скриптов на Bash редко обходится без сохранения временных данных, а значит создания переменных. Без переменных не обходится ни один язык программирования и наш примитивный язык командной оболочки тоже.
Возможно, вы уже раньше встречались с переменными окружения. Так вот, это те же самые переменные и работают они аналогично.
Например, объявим переменную string:
string="Hello world"
Значение нашей строки в кавычках. Но на самом деле кавычки не всегда нужны. Здесь сохраняется главный принцип bash — пробел — это специальный символ, разделитель, поэтому если не использовать кавычки world уже будет считаться отдельной командой, по той же причине мы не ставим пробелов перед и после знака равно.
Чтобы вывести значение переменной используется символ $. Например:
echo $string
Модифицируем наш скрипт:
#!/bin/bash

string1="hello "

string2=world

string=$string1$string2

echo $string
И проверяем:
./script
Hello world
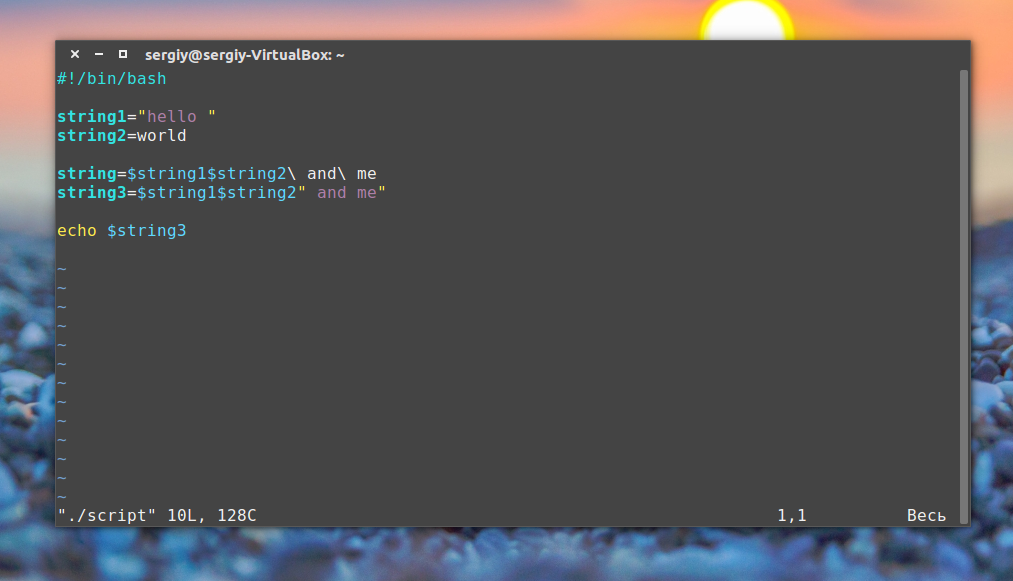
Bash не различает типов переменных так, как языки высокого уровня, например, С++, вы можете присвоить переменной как число, так и строку. Одинаково все это будет считаться строкой. Оболочка поддерживает только слияние строк, для этого просто запишите имена переменных подряд:
#!/bin/bash

string1="hello "

string2=world

string=$string1$string2 and me

string3=$string1$string2" and me"

echo $string3
Проверяем:
./script
Обратите внимание, что как я и говорил, кавычки необязательны если в строке нет спецсимволов. Присмотритесь к обоим способам слияния строк, здесь тоже демонстрируется роль кавычек. Если же вам нужны более сложные способы обработки строк или арифметические операции, это не входит в возможности оболочки, для этого используются обычные утилиты.
Переменные и вывод команд
Переменные не были бы настолько полезны, если бы в них невозможно было записать результат выполнения утилит. Для этого используется такой синтаксис:
$(команда)
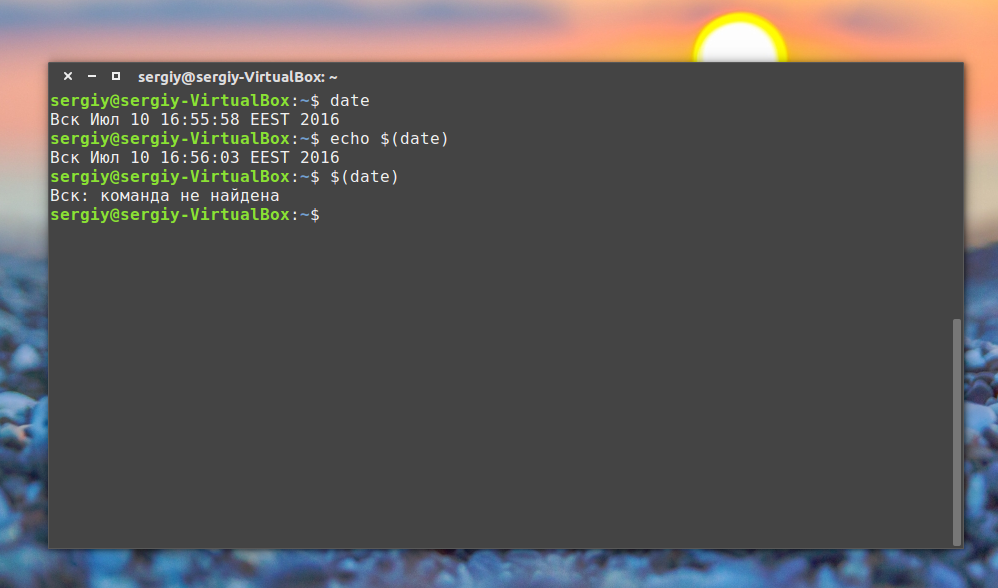
С помощью этой конструкции вывод команды будет перенаправлен прямо туда, откуда она была вызвана, а не на экран. Например, утилита date возвращает текущую дату. Эти команды эквивалентны:
date
echo $(date)
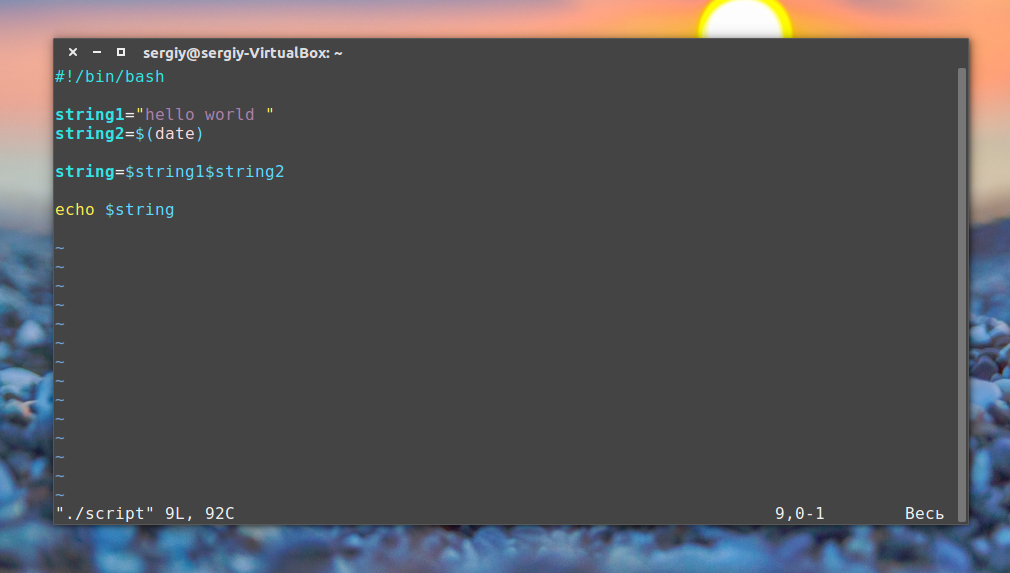
Понимаете? Напишем скрипт, где будет выводиться hello world и дата:
#!/bin/bash

string1="hello world "

string2=$(date)

string=$string1$string2

echo $string
Теперь вы знаете достаточно о переменных, и готовы создать bash скрипт, но это еще далеко не все. Дальше мы рассмотрим параметры и управляющие конструкции. Напомню, что это все обычные команды bash, и вам необязательно сохранять их в файле, можно выполнять сразу же на ходу.
Параметры скрипта
Не всегда можно создать bash скрипт, который не зависит от ввода пользователя. В большинстве случаев нужно спросить у пользователя какое действие предпринять или какой файл использовать. При вызове скрипта мы можем передавать ему параметры. Все эти параметры доступны в виде переменных с именами в виде номеров.
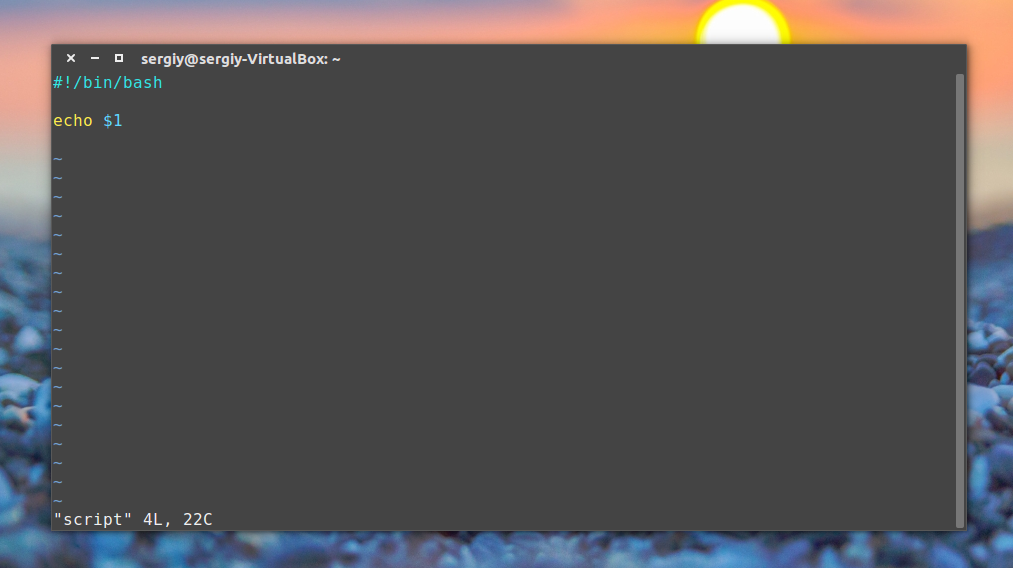
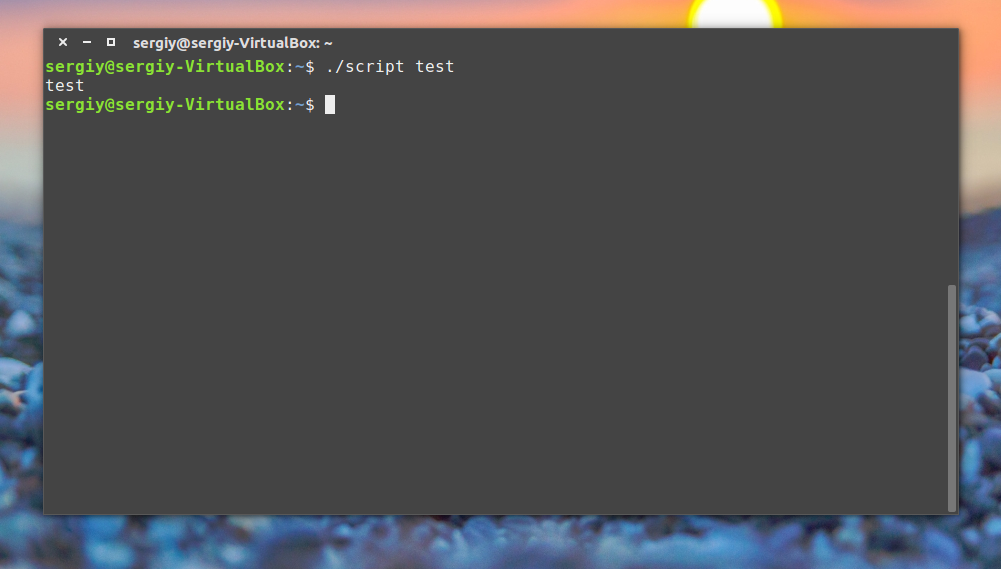
Переменная с именем 1 содержит значение первого параметра, переменная 2, второго и так далее. Этот bash скрипт выведет значение первого параметра:
#!/bin/bash

echo $1
Управляющие конструкции в скриптах
Создание bash скрипта было бы не настолько полезным без возможности анализировать определенные факторы, и выполнять в ответ на них нужные действия. Это довольно-таки сложная тема, но она очень важна для того, чтобы создать bash скрипт.
В Bash для проверки условий есть команда Синтаксис ее такой:
if команда_условие
then
команда
else
команда
fi
Эта команда проверяет код завершения команды условия, и если 0 (успех) то выполняет команду или несколько команд после слова then, если код завершения 1 выполняется блок else, fi означает завершение блока команд.
Но поскольку нам чаще всего нас интересует не код возврата команды, а сравнение строк и чисел, то была введена команда [[, которая позволяет выполнять различные сравнения и выдавать код возврата зависящий от результата сравнения. Ее синтаксис:
[[ параметр1 оператор параметр2 ]]
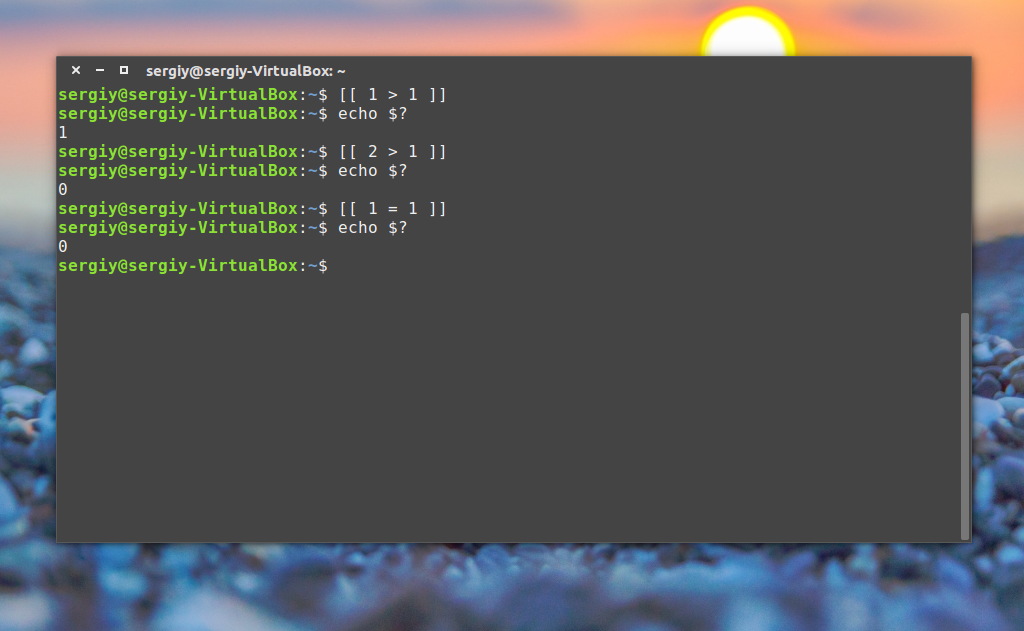
Для сравнения используются уже привычные нам операторы <,>,=,!= и т д. Если выражение верно, команда вернет 0, если нет — 1. Вы можете немного протестировать ее поведение в терминале. Код возврата последней команды хранится в переменной $?:
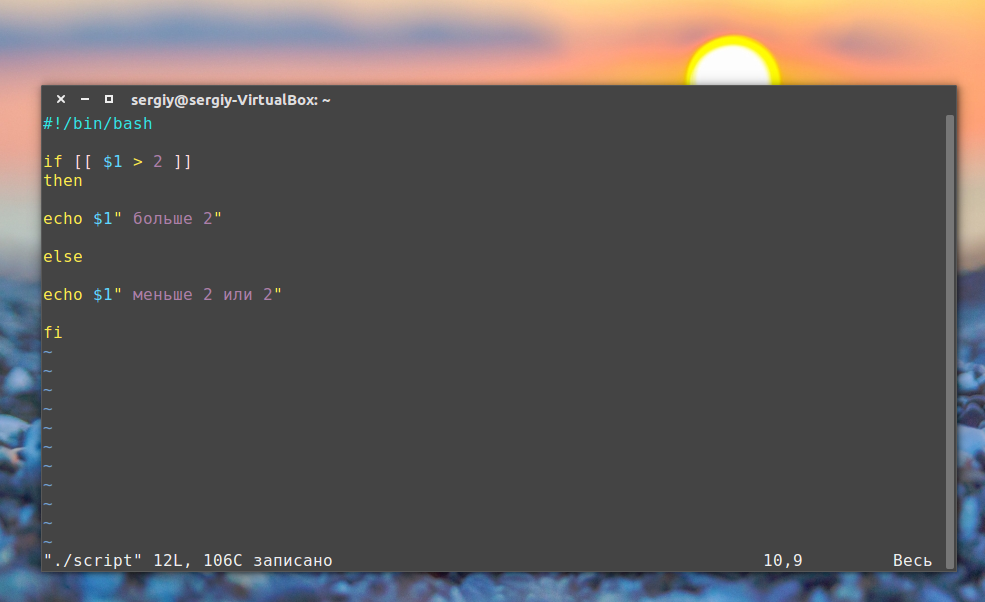
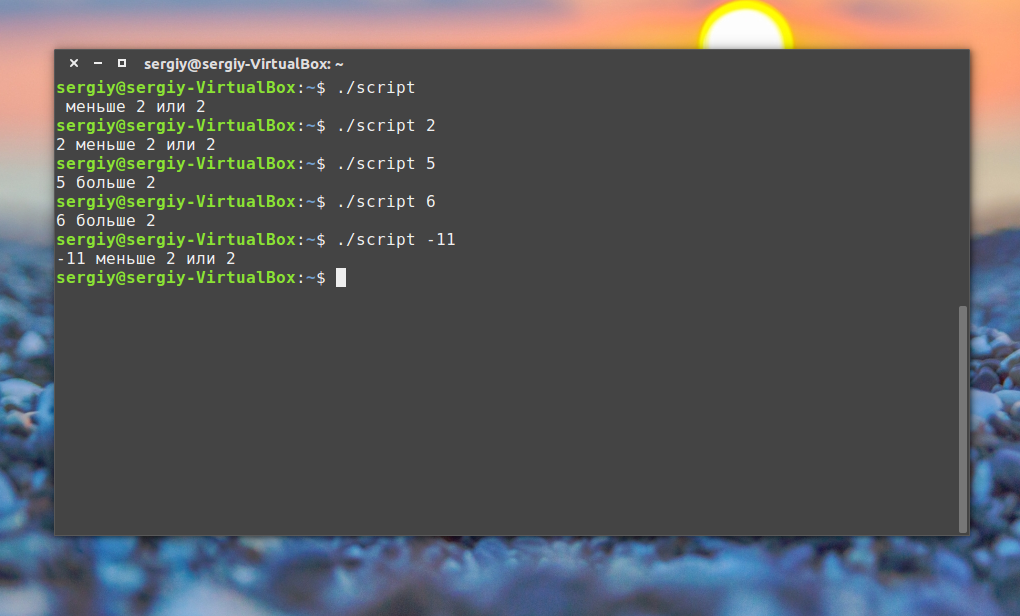
Теперь объединением все это и получим скрипт с условным выражением:
#!/bin/bash

if [[ $1 > 2 ]]

then

echo $1" больше 2"

else

echo $1" меньше 2 или 2"

fi
Конечно, у этой конструкции более мощные возможности, но это слишком сложно чтобы рассматривать их в этой статье. Возможно, я напишу об этом потом. А пока перейдем к циклам.
Циклы в скриптах
Преимущество программ в том, что мы можем в несколько строчек указать какие действия нужно выполнить несколько раз. Например, возможно написание скриптов на bash, которые состоят всего из нескольких строчек, а выполняются часами, анализируя параметры и выполняя нужные действия.
Первым рассмотрим цикл for. Вот его синтаксис:
for переменная in список
do
команда
done
Перебирает весь список, и присваивает по очереди переменной значение из списка, после каждого присваивания выполняет команды, расположенные между do и done.
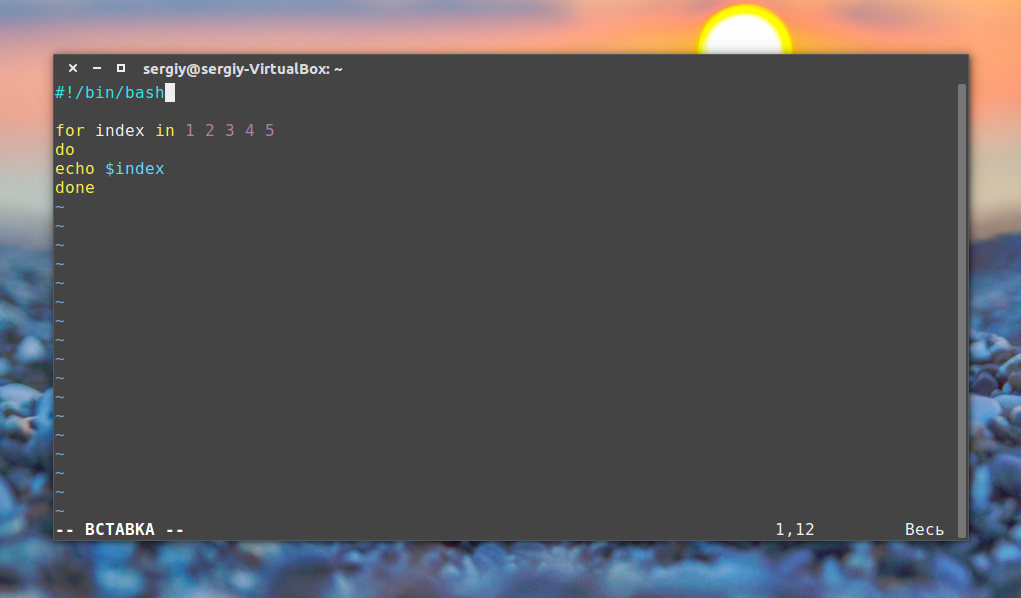
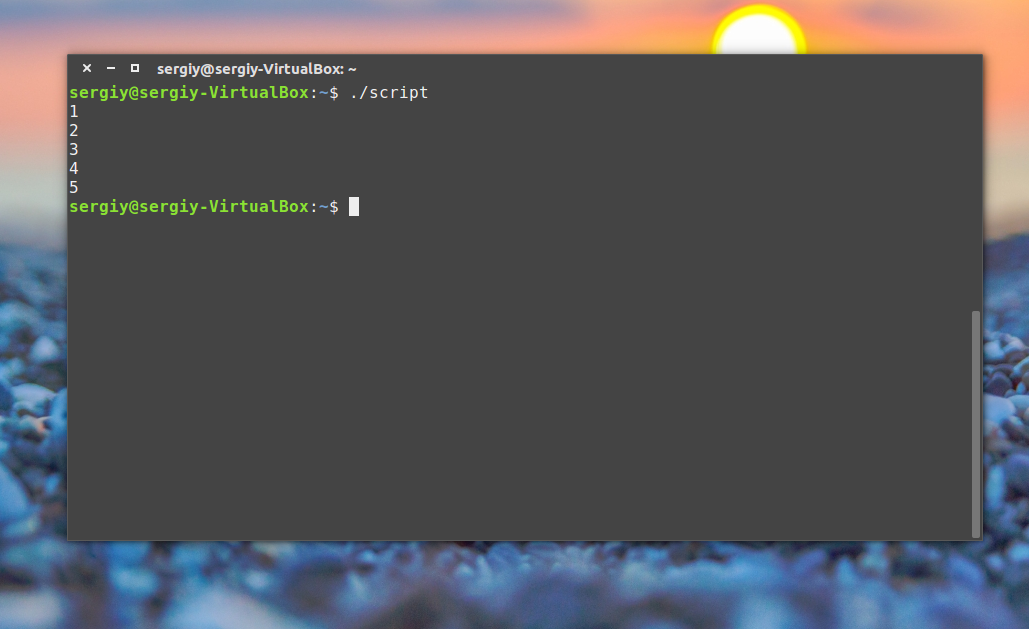
Например, переберем пять цифр:
#!/bin/bash

for index in 1 2 3 4 5

do

echo $index

done
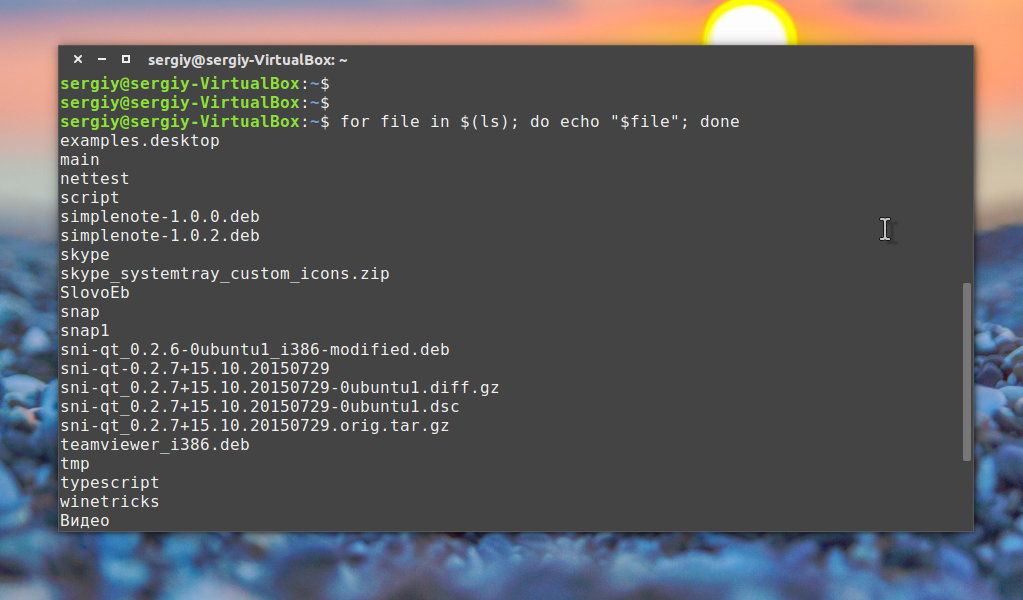
Или вы можете перечислить все файлы из текущей директории:
for file in $(ls -l); do echo "$file"; done
Как вы понимаете, можно не только выводить имена, но и выполнять нужные действия, это очень полезно когда выполняется создание bash скрипта.
Второй цикл, который мы рассмотрим — это цикл while, он выполняется пока команда условия возвращает код 0, успех. Рассмотрим синтаксис:
while команда условие
do
команда
done
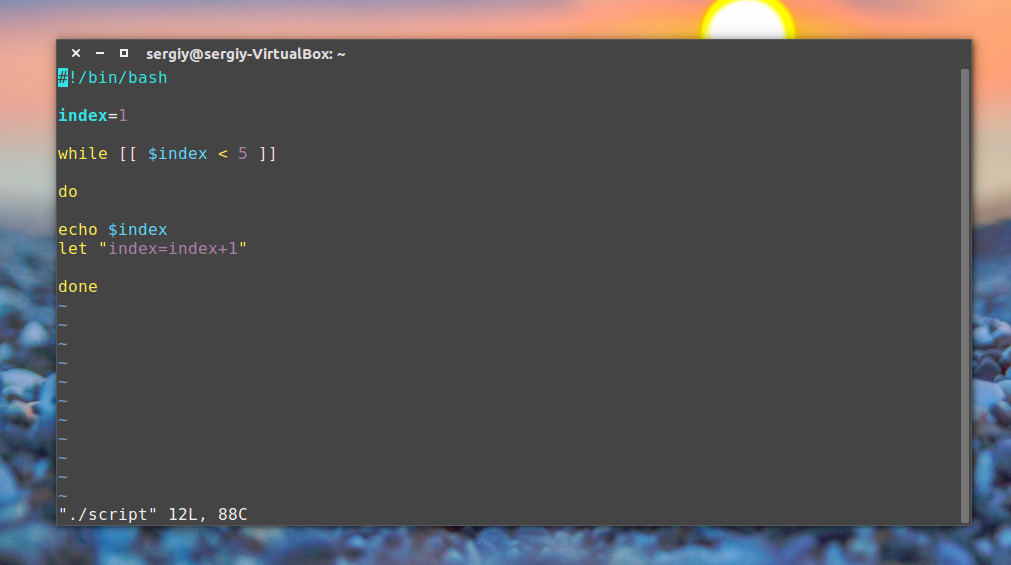
Рассмотрим пример:
#!/bin/bash

index=1

while [[ $index < 5 ]]

do

echo $index

let "index=index+1"

done
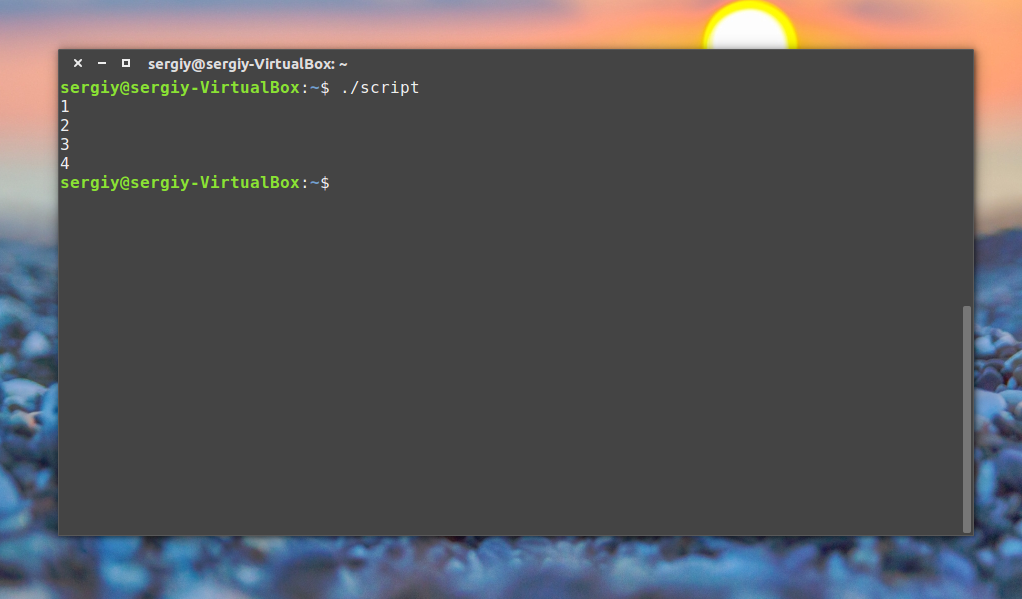
Как видите, все выполняется, команда let просто выполняет указанную математическую операцию, в нашем случае увеличивает значение переменной на единицу.
Хотелось бы отметить еще кое-что. Такие конструкции, как while, for, if рассчитаны на запись в несколько строк, и если вы попытаетесь их записать в одну строку, то получите ошибку. Но тем не менее это возможно, для этого там, где должен быть перевод строки ставьте точку с запятой «;». Например, предыдущий цикл можно было выполнить в виде одной строки:
index=1; while [[ $index < 5 ]]; do echo $index; let "index=index+1"; done;
Все очень просто я пытался не усложнять статью дополнительными терминами и возможностями bash, только самое основное. В некоторых случаях, возможно, вам понадобиться сделать gui для bash скрипта, тогда вы можете использовать такие программы как zenity или kdialog, с помощью них очень удобно выводить сообщения пользователю и даже запрашивать у него информацию.
Выводы
Теперь вы понимаете основы создания скрипта в linux и можете написать нужный вам скрипт, например, для резервного копирования. Я пытался рассматривать bash скрипты с нуля. Поэтому далеко не все аспекты были рассмотрены. Возможно, мы еще вернемся к этой теме в одной из следующих статей.
Статья распространяется под лицензией Creative Commons ShareAlike 4.0 при копировании материала ссылка на источник обязательна .
Определение Bash-сценария
Сценарий (скрипт) оболочки Bash представляет собой текстовый файл с набором команд, которые необходимо выполнить в определенном порядке и/или условиями. Bash-скрипт призван избавить пользователей Linux от ввода множества различных команд для решения частых задач.
Где хранить Bash-сценарии?
Перед началом написания сценария нужно определиться с местом его хранения. Системные сценарии обычно находятся в директориях /bin и /sbin, а также в /usr/bin и /usr/sbin. Для собственных сценариев рекомендую использовать каталоги /usr/local/sbin и /usr/local/bin, однако ничто вам не мешает (кроме ограничения прав записи) хранить свои сценарии в любых других не системных каталогах.
Если вы решили использовать, какой-либо нестандартный каталог, то не забудьте добавить его в переменную среды $PATH, чтобы вы могли запускать свои сценарии по имени, без указания полного пути.
Изменять переменную $PATH следует в файле ~/.bash_profile, если его нет то в ~/.profile.
Например, если я хочу хранить сценарии в каталоге ~/oleg/bash_scripts, то мне необходимо написать следующую строку.
PATH="$PATH:~/oleg/bash_scripts"
Так при инициализации работы оболочки ваш каталог уже будет добавлен в переменную $PATH.
Как создать и выполнить Bash-сценарий?
Для примера, в каталоге /usr/local/sbin, создадим скрипт say_hi.sh, который будет выводить в консоли текстовую строку «Hello Universe!».
touch /usr/local/sbin/say_hi.sh
Далее откроем этот файл любым текстовым редактором, например Vim.
vim /usr/local/sbin/say_hi.sh
И укажем в нем следующие строки.
|
#!/bin/bash echo «Hellow Universe!» |
Здесь первая строка является комментарием где указывается путь до интерпретатора, который будет выполнять скрипт.
Если не указать интерпретатор вручную, то будет использоваться интерпретатор по умолчанию, чаще всего это оболочка /bin/sh.
Во второй строке указана команда вывода echo и ее аргумент «Hello Universe!».
Чтобы скрипт мог быть выполнен к нему необходимо добавить бит исполнения файла.
chmod +x /usr/local/sbin/say_hi.sh
Теперь можно просто указать имя скрипта и запустить его.
say_hi.sh
В результате увидим следующее.
meliorem@ubuntu:~$ say_hi.sh

Hello Universe!
Скрипт можно также передать самой оболочке в качестве аргумента . В этом случае делать скрипт исполняемым не обязательно.
bash say_hi.sh
Ввод и вывод данных в Bash
Вывод текстовой информации можно осуществлять с помощью команд echo и printf.
Разница между ними лишь в том, что echo не позволяет форматировать текст (без добавления ключа -e) и делает автоматический перенос строки в отличии от printf.
Различия команд представлены ниже.
|
#!/bin/bash echo «tHello there! u263bn» printf «tHello there! u263bn» |
meliorem@ubuntu:~$ say_hi.sh

tHello there! u263bn

Hello there! ☻

meliorem@ubuntu:~$
Ввод данных осуществляется с помощью команды — read. Результат ввода необходимо сохранять в переменную.
|
#!/bin/bash echo —n «Введите ваше имя: « read user_name echo «Добрый день, $user_name!» |
meliorem@ubuntu:~$ Введите ваше имя: Oleg

Добрый день, Oleg!

meliorem@ubuntu:~$
Комментарии в Bash
Комментарии предназначены для описания того, что происходит в скрипте на отдельных его участках, чтобы сам создатель скрипта и другие пользователи могли быстрее разобраться в тонкостях его работы.
Комментарии полностью игнорируются интерпретатором (кроме первой строки).
Однострочным комментарием будет считаться одна или несколько строк в начале которых стоит символ — #.
|
#!/bin/bash echo —n «Введите ваше имя: « # Просим пользователя ввести своё имя. read user_name echo «Добрый день, $user_name!» |
В Bash также доступны многострочные комментарии, которые начинаются с символа — : и находятся внутри двойных или одинарных кавычек.
Не забудьте оставить пробел между : и первой кавычкой.
|
#!/bin/bash : « Данный скрипт принимает два числа в качестве аргументов и выводит результат их суммы. « ((sum=$1+$2)) echo $sum exit |
Еще один вариант составления многострочного комментария.
|
#!/bin/bash echo —n «Введите ваше имя: « <<bigcomment Просим пользователя ввести своё имя. bigcomment read user_name echo «Добрый день, $user_name!» |
Отладка Bash-скриптов
В Bash поддерживается отладка скриптов и проверка синтаксиса.
Используйте команду bash c ключом -x для запуска скрипта в режиме отладки.
bash -x script.sh
Также есть возможность передать ключ в самом скрипте.
|
#!/bin/bash -x echo “Ждать 5 секунд” sleep 5 echo “Выполнено!” |
Отладку также можно производить выборочно для отдельных участков кода. В этом поможет настройка параметров оболочки с помощью команды set.
Чтобы начать отладку определенного участка кода, вставьте строку с set -x в начало участка и set +x в его конец.
С помощью команды set можно включать и выключать определенные параметры оболочки. Ознакомится со списком параметров можно после ввода команды set -o.
set -x/set +x— начать/закончить отладку.set -v— выводить строки ввода по мере их чтения.set -n— проверка синтаксиса, без выполнения самого кода.set -o [параметр]/set +o [параметр]— включение/выключение параметра.
В следующем примере команда создания каталога не будет выполнена, также в консоли появится сообщение об ошибке синтаксиса.
|
#!/bin/bash # Включаем параметр проверки синтаксиса set —o noexec if [someerror] mkdir project echo «Создан новый каталог.» # Выключаем параметр проверки синтаксиса set +o noexec # Другой код далее… |
Особенности написания Bash-скриптов
- В первой строке всегда указывается интерпретатор, который будет выполнять скрипт.
Помимо Bash вы также можете использовать другие интерпретаторы, например#!/bin/sh,#!/usr/bin/perl,#!/usr/bin/pythonи другие.
Чтобы узнать путь к интерпретатору используйте командуwhich, напримерwhich python. - Так как расширение файла не играет в Linux особой роли то приписывать
.shсовсем не обязательно.
Это делается для удобства самого пользователя. - Слишком длинные команды вы можете разбить на несколько строк с помощью символа —
. - Вне зависимости того в какой оболочке вы находитесь, будь это
zsh,cshили любая другая, скрипт будет выполнять та оболочка, путь к которой указан в первой строке.
Перевели статью, которая поможет лучше понять, как работает bash, а значит, сэкономить время и уменьшить количество ошибок. Далее текст от лица автора.
Недавно я проводила рефакторинг установки для разнообразного набора приложений. Это была большая куча образов Docker, которые должны быть гибкими, но стабильными. Некоторые веб-приложения также необходимо перезапускать удобным для пользователя способом, который отображает полезные сообщения об ошибках для разработчиков различной квалификации.
Эта задача потребовала большой работы, но я уверена, что стала лучше разбираться в сценариях bash. Мне легко писать эту статью, потому что я записывала все странные мелочи, которые требовали времени на отладку.
Bash настолько странный, что не все из этих мелочей можно подробно разобрать в одной статье, поэтому в каждом разделе я даю ссылки на статьи или учебные пособия, где все эти моменты подробно расписаны.
Язык программирования, на котором писала ваша бабушка
Bash создан Брайаном Фоксом (легендарный и недооцененный парень) и выпущен в 1989 году как open source замена для Bourne Shell, вышедшей в 1976 году. Его название является аббревиатурой от Bourne Again SHell.
Если вы привыкли писать на любом другом языке программирования, bash (и сценарии оболочки в целом) не будут для вас интуитивно понятными. Синтаксис не запоминающийся, переменные странные, область видимости — полная дичь, и поток управления никогда не делает то, что вы думаете.
Как и в случае с CSS, я перестала бояться писать сценарии bash, когда узнала о нем несколько ключевых моментов: как он работает, в чем действительно хорош и как заставить его делать то, что мне нужно. Я также столкнулась с множеством глупых маленьких ошибок, которые мне просто пришлось заучить.
Написание скриптов командной оболочки — это очень весело, если вы овладеете основами! Ничто не заставит вас почувствовать себя более опытным хакером, чем написание дикого однострочника, который запускается с первой попытки.
Примечание: я предполагаю, что вы обладаете некоторыми предварительными знаниями в программировании и сценариях командной оболочки. Если вы только начинаете изучение — вот хороший ресурс для начала. Я предполагаю, что вы, по крайней мере, знаете, как использовать терминал и следующие команды: ls, cd, pwd, cat, grep и написали (или попытались написать) один или два сценария.
Кстати, поскольку эта статья относится к миру Linux и операционных систем, у меня есть примечание для тех, кто занимается этими вопросами дольше меня: нормально (даже рекомендуется!) исправлять меня, если я ошибаюсь, просто будьте вежливы.
Версии
Язык сценариев оболочки, c которым большинство из нас работает в настоящее время, — это версия bash для Mac и Linux, используемая для эмуляции терминала в /bin/bash.
Debian (и, соответственно, Ubuntu и Linux Mint) теперь использует другой, но в основном совместимый язык сценариев оболочки (dash) для системных задач. Прим. переводчика: так утверждает автор статьи, но я везде вижу использование bash.
Вы также можете установить zsh в качестве основной оболочки, который в целом похож на bash, но имеет и отличия.
Из-за всех этих небольших вариаций хорошей идеей будет поместить #!/bin/bash (или какой-либо другой язык сценариев оболочки, который вы хотите использовать) вверху файлов, чтобы указать, что сценарий оболочки должен использовать конкретно этот язык, а не какой-либо еще из установленных на сервере.
Указание языка оболочки в заголовке файла сделает его поведение более предсказуемым. Например, ответы на Stack Overflow обычно предполагают, что вы используете именно bash.
Основы
Давайте сначала рассмотрим несколько фундаментальных вещей.
Сценарии оболочки, по сути, представляют собой текстовые потоки, которые передают данные между собой. Они используют философию Unix, заключающуюся в том, чтобы хорошо выполнять одну задачу и объединять крошечные инструменты в более крупные программы по принципу работы конвейера в промышленности. Результат выполнения каждый инструмента передается на вход следующему по порядку.
Синтаксис
Bash использует нестрогий синтаксис; вы можете использовать точку с запятой в конце строки, если хотите, и отступы не влияют на выполнение кода. В нестрогости синтаксиса кроется ловушка. Синтаксис bash важен и очень специфичен. Вдобавок, по сравнению с другими языками, ошибки в синтаксисе трудно диагностировать.
Очень важно правильно использовать пробелы и точки с запятой.
Например, можно получить ошибку “[grep isn’t a valid command”, если забыть поставить пробел внутри квадратных скобок [] или “Unexpected end of file”, когда вы забыли точку с запятой после {}.
При определении переменной пробел между переменной и знаком = и между знаком = и значением приводит к разным результатам. Существует важное различие между одинарными кавычками и двойными.
Синтаксические ошибки всегда выглядят как логические ошибки, что затрудняет выявление опечаток.
Структура
Сценарии оболочки понимают операторы управления выполнением: операторы if, циклы while, циклы for, операторы case и так далее.
Отличие bash от других языков — это условия и области видимости. Однако, поскольку bash в большей степени ориентирован на однострочные и одноразовые сценарии, условия используются не так часто, как в других языках.
Вот пример однострочника, который использует управление выполнением без каких-либо операторов if:
tac ~/error.log
| grep -m1 -E "Error|Running restart"
| grep -q "Error"
&& echo "Found error since last restart"
Примечание: обозначают перенос строки, tac похож на cat, но выводит файл в обратном порядке.
Это выглядит уродливо, но эффективно, и иллюстрирует сильные и слабые стороны сценариев оболочки.
Сценарий bash может быть очень кратким и трудным для чтения. Вы можете многое сделать в несколько строк, но когда что-то сломается, может быть трудно понять, почему. Это благословение и проклятие. С большой силой появляется огромный потенциал, чтобы все испортить.
Что такое поток? Что такое команда?
Каждая команда — это программа, которая делает одну вещь. Grep, например, ищет вещи и возвращает строки. Запросы и файлы подаются на вход, найденные строки идут с выхода.
Вы можете подумать: «Да ладно, именно так работает все программирование», но в данном случае все немного сложнее, и это особенно важно понять.
Входы и выходы передаются от команды к команде в виде текстовых потоков. Есть три места, куда эти потоки идут и откуда берутся:
- stdin: Стандартный ввод.
- stdout: Стандартный вывод.
- stderr: Стандартный вывод ошибок.
Это называется «поток», потому что строки выводятся в разных точках выполнения команды/функции, а не в конце, как вы могли бы подумать.
Вы отправляете текст на стандартный вывод с помощью таких команд, как printf и echo. Неопытный программист может думать, что это просто команды для вывода сообщений отладки, как в Python или JavaScript. Это не так.
Потоки позволяют объединять команды и функции. Хороший способ проиллюстрировать это — объяснить, как работают функции.
Функции
Определим функцию:
function hello () {
    printf "Hello World! n"
    local variable="Something n"
    printf "$variable"
    echo some more stuff to print $variable
}
Если запустить в терминале $ hello.sh, вы получите:
Hello World!
Something
some more stuff to print Something
Команды echo и printf отправляют текстовые потоки на стандартный вывод. Если вы запустите нашу функцию приветствия из терминала, stdout будет выведен на вашу консоль.
Мы можем перенаправить вывод и отправить его в файл или в качестве ввода для другой команды.
Это немного похоже на возвращаемые значения в обычных функциях языков программирования, за исключением того, что вы можете возвращать столько значений, сколько хотите, и они не завершают функцию.
Если вы хотите завершить функцию, для этого есть пара команд: return и exit. Команды выхода и возврата принимают числовой код: 0 означает успех, все остальное означает сбой. Команда return завершит работу функции, а команда exit завершит работу самой оболочки.
Коды выхода представляют собой целое число от 0 до 255 без знака. Если по какой-то причине вашему сценарию нужно более 255 различных способов потерпеть неудачу, то вам не повезло.
Перенаправление потоков
Вот основные моменты:
-
| называется каналом, и вы используете его для отправки вывода другим командам. Например, мы можем попробовать hello | grep ‘Hello’. Эта конструкция отправит весь вывод команды hello в grep, который вернет строки, содержащие «Hello». Мое любимое повседневное использование каналов — history | grep «команда», когда я забыла точную команду, которую я набрала ранее, но я знаю, что в ней есть определенное слово.
-
> с именем файла справа перенаправит вывод и запишет его в файл, а не на консоль. Файл будет полностью перезаписан. Например, logging_function> tmp_error.log. Если вам нравится Python, вы можете попробовать pip freeze> needs.txt.
-
>> похоже на >, но дописывает в файл, а не перезаписывает его. Например, logging_function >> error.log.
-
< обратно к > . Это перенаправление отправляет содержимое файла справа команде слева. Попробуйте grep foo <foo.txt. < is the reverse of. >
Каналы работают параллельно. Например, следующее будет работать только в течение одной секунды:
sleep 1 | sleep 1 | sleep 1 | sleep 1 | sleep 1Участники канала не заставляют следующую команду в очереди ждать, пока они не будут полностью выполнены. Они обрабатывают и отправляют вывод по мере поступления.
Условия if
Ничто не иллюстрирует «маленькие инструменты» лучше, чем условие if в bash, которое на самом деле состоит из пяти ключевых слов:
if [ <expression> ]; then
<commands>
fi
Заметили, что условие заканчивается ключевым словом fi?
Так же и с оператором case … esac. Когда я узнала об этом, я понадеялась, что while будет завершено с помощью elihw, а until — с litnu. Но это, к сожалению, не так — эти операторы завершаются ключевым словом done.
[ это команда, а ] — это аргумент, который говорит прекратить принимать другие аргументы. If, else, elif и fi являются ключевыми словами.
Вот, например, ошибка:
/bin/sh: 1: [: true: unexpected operatorВы можете подумать, что скрипт столкнулся с ошибочным [ и выдал синтаксическую ошибку. Это не так!
На самом деле происходит то, что команда [ получила неожиданный аргумент: true. Ошибка была на самом деле, потому что я использовала == вместо =, что было вычислено как true и неправильно при использовании оператора [.
Контроль выполнения
Я предпочитаю использовать if только там, где это действительно необходимо. Обычно я предпочитаю операторы bash: && и ||.
&& или || ставится после команды/функции. Если команда возвращает код 0, то команда справа от && будет выполнена, а команда справа от || нет:
$ will_return_0 && echo "I will print"
$ will_return_0 || echo "I will not print"
$ will_return_1 || echo "I will print"
$ will_return_1 && echo "I will not print"
Команды можно объединять в цепочки. Запустите следующие команды:
$ /bin/true && echo "I will print" || echo "I will not print"
$ /bin/false && echo "won't print" || echo "will print"
Но будьте внимательны! Порядок применения важен, нужно использовать вначале &&, а потом ||, но не наоборот. Если выполнить приведенную ниже команду:
/bin/false || echo "will print" && echo "won't print"То в результате будет выведено обе строки, а не одна, как ожидалось.
Эти конструкции чуть сложнее читать, если вы не привыкли к языку командных сценариев. Условия if удобнее, если вам нужно сгруппировать несколько команд и нет смысла выносить эти команды в отдельную функцию.
Я также использую команду: test. Это то же самое, что и [ без вводящего в заблуждение синтаксиса. Менее знакомый синтаксис, мне кажется, лучше, потому что он сигнализирует читателю, что тот может не понимать, что именно происходит.
Переменные
Переменные в bash «дикие». Они работают так, как будто вы поместили их значение в скрипт и запустили его.
Переменные не имеют типа (число, строка, массив и так далее) и действуют, как нужно в данный момент: как строка, команда, число, несколько чисел и так далее. Они могут даже интерпретироваться как несколько ключевых слов, если в вашей «строке» есть пробелы.
Такое поведение переменных может привести к некоторым ошибкам, поэтому вам никогда не следует принимать рискованный ввод данных от пользователя в сценарий оболочки (например из интернета). Если вы веб-разработчик и знаете, насколько опасен eval, то каждый сценарий оболочки — это гигантский оператор eval. Удаленное выполнение кода в любом количестве!
Для примера введите в терминале:
$ MY_VAR="echo stuff"
$ $MY_VAR
Вы должны увидеть выполнение команды, и вывод «stuff» на консоль. Такое поведение может сделать длинные скрипты глючными и непредсказуемыми. Например, попробуйте такой код:
$ HELLO="hello world"
$ test $HELLO = "hello world" && echo yes
Выполнение вызовет ошибку, потому что bash читает код как test hello world = “hello world”.
Именно поэтому одной из лучших практик считается всегда помещать переменные в двойные кавычки:
test "$HELLO" = "hello world" [ "$HELLO" = "hello world" ]Двойные кавычки в bash это не ограничители строк. Bash не обрабатывает строки так, как другие языки. Кавычки немного больше похожи на круглые скобки в других языках (но не на скобки bash — это подоболочки).
Одиночные и двойные кавычки различаются в bash. В большинстве случаев используются двойные кавычки. В чем разница? Двойные кавычки расширяют переменные, одинарные кавычки понимают их буквально. Например:
var=stuff
echo $var
echo "$var"
echo '$var'
Другой раздражающей или полезной (в зависимости от точки зрения) особенностью переменных в bash является то, что в bash не предусмотрена ошибка о том, что переменная не объявлена. Вы можете проверить, была ли переменная установлена следующим образом:
test -z "$empty" && echo "variable is empty"Также можно добавить параметр в сценарий, который покажет неустановленные переменные:
Переменные доступны для всей оболочки по умолчанию, но это можно изменить.
Область видимости
Понимание области видимости крайне важно, чтобы избежать ошибок.
Возможности которыми недостаточно пользуются, — это использование переменных local и readonly. local ограничивает переменную функцией, в которой она определена, а readonly вызовет ошибку, если вы попытаетесь переопределить переменную. Вы даже можете использовать эти опции вместе и сделать локальную переменную только для чтения.
Имя глобальной переменной должно быть ЗАГЛАВНЫМИ буквами. Чтобы сделать переменную доступной для всего терминала, используйте export VAR=»value».
Верхний регистр говорит о том, что это глобальная переменная, а не о том, что это константа/неизменяемая переменная, как в других языках.
Команды
Моя самая нелюбимая вещь в bash — это запоминание маленьких загадочных команд; sed? cat? Что это значит? Имя, конечно, не скажет мне. Man зачастую трудны для понимания, и я, конечно, не вспомню, в каком порядке все должно идти.
Эта ситуация пришла из старых времен, когда каждый символ значил больше, а идея о том, что код должен быть удобочитаемым, не была так распространена.
Иногда поиск точной информации о том, что именно должна делать команда, напоминает поиск в пыльных архивах огромной библиотеки. К счастью, попадаются иногда супер-волшебники в Stack Overflow, которые не против поделиться своими с трудом заработанными знаниями.
Специальные переменные
Иногда вы сталкиваетесь со странными бессмысленными переменными, такими как $@ и $!. Вот их полный список.
Полезные переменные для написания скриптов и однострочников: $— и $*.
Они обе дают вам аргументы, с которыми работает команда/функция: $- — дает флаги, а $1-9 — ввод. Например:
Флаг — это -s, а example.com — это ввод.
Получая входные ключевые слова с $, важно использовать его так: ${2}, ${25} и так далее. Bash не поймет что-то вроде $42, если есть две цифры. Можно также сделать что-то вроде этого:
iterator=4
echo ${$iterator}
Подпроцессы и скобки
Если вы видите такую конструкцию:
То эти параметры вовсе не то, что вы думаете.
Скобки в bash на самом деле порождают вложенные процессы. Это означает, что они являются подпроцессами одного и того же сценария. По сути, это дочерние оболочки, которые получают весь родительский контекст (переменные, функции и так далее), но не могут ничего изменить в родительском процессе.
Подпроцессы — это вторая важная вещь после переменных, которую нужно понимать в сценариях оболочки, чтобы сохранить здравый ум. Они могут появляться там, где вы их не ожидаете, и делать ваши программы менее предсказуемыми.
Во-первых, что они делают?
Давайте рассмотрим примеры:
!#/bin/bash
myVar="foo"
echo $myVar
(
    echo "Inside the sub-shell"
    echo $myVar
    myVar="bar"
    echo $myVar
)
echo "Back in the main shell now"
echo $myVar
foo
Inside the sub-shell
foo
bar
Back in the main shell now
foo
Обратите внимание, как переменная была изменена для контекста подпроцесса, но не за его пределами. Вот еще одна вещь, которая удобна для подпроцессов:
!#/bin/bash
echo "We start out in home"
pwd
(
   echo "In the subshell"
   cd /tmp
   pwd
)
echo "Back in the main shell now"
pwd
We start out at root
/home/username
In the subshell
/tmp
Back in the main shell now
/home/username
Использование exit в подпроцессе приведет к выходу только из этого подпроцесса, а не из родительского сценария.
Круглые скобки — не единственный способ создания подпроцесса. Если вы поместите процесс в фоновый режим с помощью & или nohup, он также перейдет в подпроцесс.
Скрипты, которые вы запускаете с помощью ./, запускаются в своем собственном процессе, а не в подпроцессе вашего терминала, тогда как скрипты, которые вы запускаете с помощью команды source, запускаются так, как если бы вы вводили команды напрямую.
Вы можете ожидать, что функции будут выполняться в подпроцессах, но на самом деле это просто группировка команд.
Чтобы ваша функция запускалась в подпроцессе каждый раз, когда вы ее используете, вам нужно обернуть ее в скобки. Чтобы ваша функция возвращала определенный код завершения без запуска в подпроцессе и не вызывала выход из всего сценария, используйте return вместо exit.
Разделение на части
Иногда вам может потребоваться разбить ваш скрипт на файлы. Команда source поможет вам:
parent.sh:
!#/bin/bash
source /path/to/script.sh
В целом, это работает так, как будто вы добавили весь контент скрипта script.sh в скрипт parent.sh. Это значит, что если вы установите переменную в родительском скрипте, все скрипты, подключенные как source, будут иметь доступ к этой переменной.
Намного лучше использовать этот метод, как подключаемую библиотеку: импортировать вспомогательные функции, которые можно использовать в родительском скрипте.
Остерегайтесь кодов выхода и передачи значений в основной сценарий! Это не работает так, как вы думаете. Если в подключенном скрипте выполнение производится в основном процессе, то команда exit в подключенном скрипте завершит работу основного скрипта!
Рассказываем об IT-бизнесе, технологиях и цифровой трансформации
Подпишитесь в соцсетях или по email
Обработка ошибок
Я стараюсь группировать команды в функцию и обрабатывать ошибки, если функция не выполнилась:
my_function || handle_error


